Simple Trick To Increase Your Blog Subscribers

man-up-arrow
It's been quite some time since I made a post on my blog. This post basically illustrates on increasing the Feedburner subscriber's count to your blog with the help of a simple script - Alert box. You might have seen few websites like sitesketch101.com or famousbloggers.net that loads a popup box from PopUp Domination 2.0 displaying a form to subscribe to their newsletter/blog.

More About PopUp Domination 2.0
PopUp Domination 2.0 is a plugin that lets you build your email list to a whooping level that you never imagined to happen in a week. It's easy to build attractive forms using PopUp Domination 2.0. As far as I know, both the WP plugin and the standalone versions supports all the major email list services as shown below.
Email-Lists
 You get 8 variety of themes with flexible color combinations. If you wish to improve your list in a quick time, then I strongly suggest you to try PopUp Domination 2.0. You have a 60 day money back guarantee offer. It is currently priced at $47.00 which may go up in a week's time. But, wait there's a small trick that lets you save $10.00. 
Popup-Domination-2.0
1. Hit the following link - PopUp Domination 2.0.
2. Once the page is opened in a new tab. Try closing the tab. 
3. You will see a Popup that offers a $10.00 discount. Hit the cancel tab and purchase the plugin now for $37.00.

So, no half measures, just hit the link and try it yourself - PopUp Domination 2.0.

PopUp Domination Alternative - WP Users
So, what do I do if am not able to afford the price that is quoted there. Well, we have a solution for you my WP readers. Just hit this link - FasterIM Opt-In and try the alternative to PopUp Domination. Note: I said only WP users. What if I'm a blogspot user unable to afford the price? Bad luck, we have no other option but to use the alert box that I mentioned at the start of my post (or) pay the price for the standalone version of PopUp Domination 2.0 and get the code.

Alternative to Blogspot Users
I would like to highlight the disadvantages in using this alert box before I start the tutorial. The first one being the inability to modify the box that pops up. Secondly, the alert box might disturb the user who visits your blog because of its ugly look. If you can bear the above two disadvantages, then proceed with the tutorial below to achieve the ultimate aim - navigate the readers to your blog's subscription page. One big advantage in using this alert box is that it loads much faster than any of the above mentioned plugins because it does not involve any external JavaScript - uses only one script defined internally. So, lets get started with this tutorial on alert box.


1. Navigate to "Design>>Edit HTML" and make a backup of your template by clicking on the "Download full template" link at the top of the page. Once the backup is over, search for the following piece of code.
</body>
2. Place the following piece of code with just above the code mentioned in step 1.
<b:if cond='data:blog.url == data:blog.homepageUrl'>
<script type='text/javascript'>
var t=setTimeout("alertMsg()",5000);
function alertMsg()
{
var stay=confirm("Can we navigate you to our blog subscription page?")
if (stay)
window.location="http://feeds.feedburner.com/EverythingAboutBlogging"
}
</script>
</b:if>
3. The timer which I have set on the coding is highlighted in green. This parameter depicts the time after which the alert box should load. For example, if you set the parameter to 6000 instead of 5000, then the box will appear after 6 seconds. Note: 1000 milliseconds make one second. 
4. The text which I used in my coding is highlighted in blue. You may change it as per your wish. Moreover, the code I mentioned will load the alert box only on homepage. If you wish to have it on all pages, then remove the first and last line in the coding mentioned at step 2.
5. Replace the link highlighted in orange with your feed link - obtained from Feedburner.
6. That's it. Save your template.

I am currently working on the coding to load an alert box/popup box similar to PopUp Domination 2.0. In fact, we achieved 75% success in our coding. There are little more bugs/issues that need to be solved before we launch the coding for you. So, keep your fingers crossed and wait for the launch. Hope we come up with the coding for you. I would like to hear your thoughts and views about this post. So, share it with us via comments!!! 

Utilizing Media Options On Your Blog

I occasionally get in a rut when I blog. I write my article. I upload a photo. I move on. Recently though, I found myself remembering how when I first began blogging I loved doing slideshows, polls, and uploading videos. In an effort to bring back some of the magic, I have even considered doing podcasts, but never got around to it. I would still like to get back in the habit of utilizing multiple types of media on my blog. So being curious about the various ways I could make my blog content more interesting, I started keeping my eyes open.

Recently I stumbled upon an infographic that was kind of cool. I was actually exploring shipping companies for a Mother's Day package that required a speedy delivery. Light bulb moment! I thought, hey, there's another way I can use media to enhance my blog. Infographics. Below is the graphic I ran across while searching for shipping information.

[Via: Fedex Shipping]
And sure, displaying a link to an infographic in a passing post on your personal blog is a great way to stir up some traffic and add some interest. There are however some other benefits to consider as well. I began looking to see who had hosted the infographic on their site, when it struck me. 

Infographics not only add interest to the blog post’s that reference them, but they also raise awareness for the sites that host them. Had the infographic not visually grabbed my attention, I would have never had any reason to visit the site it was hosted on. Bloggers and business owners alike should take notice. Getting others to blog about an infographic you host would certainly attract people that may not find your business, or your blog, naturally.

Blogging For Fun Vs Blogging For Money

Blogging-For-Money-Vs-FunThis is a guest article written by Saksham. If you wish to write for EAB, check out this page - Write For Us. If you ask a blogger if he or she blogs for fun or money, it’s likely you won’t get a proper answer. This is because, other than the professional bloggers who are out promoting products or services, most people blog for fun hoping to earn money in the process. Why do you blog? For fun or money?

BLOGGING FOR FUN

Before you blog, decide if you want to blog just for fun and not to make money. In this case, you don’t have to care for anyone’s opinion; just write what feels right to you and post your random thoughts. Keep it humorous and people will read your blogs. You can even write on controversial topics if you like; just know that you might get hate comments along with your fan mail.

If you have the rare talent of being able to make people laugh, start a funny blog and gain a good fan following. You can then use your blog to place Ads and make money. There are many ways that you can apply to convert your fun blog into a profitable blog.

Note that if you manage your blog well, you can always earn money off of it. So even if your initial intent is to start a fun blog, stay away from controversial topics. Earn a steady fan following by posting good and healthy content.

Unless you are a professional blogger who uses all the latest blogging tricks to generate revenue, try blogging just for fun. If your blog helps you earn money, it’s great. If not, just enjoy your blogging experience.

PROFESSIONAL BLOGGING

If you are blogging for money and not just for fun, your strategy and agenda must be totally different. You need to put in a great deal of thought into the reason behind your blog, and what you plan on achieving from it. Determine how much you want to earn in a year and manipulate your blog to earn this revenue for you.

Use all possible basic and advanced methods to attract traffic to your blog. You can do this by posting intelligent articles on different topics and asking for people’s opinion. You can also allow space for promotions for product and service websites on your blog.

You can upload blog posts in other similar blog sites and get your back links that way. You can use keyword optimization, and upload keyword-rich content on profitable niches and get paid by advertisers. One such profitable niche is medifast discounts and nutrisystem coupons; people are constantly scouring the web for articles and information on medifast discounts and nutrisystem coupons. As a professional blogger, did you know you could help promote other people’s businesses for money as well?

Why To Hire A Professional Photographer For Your Blog?

This is a Guest Post written by Sally. If you wish to write for EAB, check out this page - Write For Us. It seems like everyone fashions themselves a photographer these days. The ubiquity of digital cameras and home photo editing software makes it possible for just about anyone to dabble in photography. Moreover, everyone always has a camera, even if it is just the camera on their smartphone.

With this plethora of cameras out and about in the world, it may seem silly to ever hire a real professional photographer to serve the photographic needs of your blog. However, what many individuals seem to forget these days, with ever increasing rapidity, is that photography is a true art form and requires a real artist to be done right. While an amateur home photographer may be able to fulfill the basic photography needs that he or she may have, retaining the services of a professional photographer can give your blog that extra edge that it needs to stand out from the crowd.

First and foremost a professional will have the right tools for the job. Even the most devoted amateur’s collection will pale in comparison when stacked up against the arsenal of equipment that a pro will own. Lenses, filters, you name it, they will have it and by having those various tools in their employ they will better be able to serve you and your needs. Imagine how much your blog will benefit from photographs taken by a competent, trained professional.

Second, a pro will possess an artistic eye that many of us sadly just do not have. There is a reason why this individual makes a living taking pictures. They have a different view of the world; they understand lighting and angles in ways that the home photographer likely does not. If you can, and if you are seriously considering hiring someone to take pictures for you, you definitely should, take a look at their portfolio. Compare their work with some of your own or with some of those taken by your friend who styles himself to be the next Alfred Stieglitz. Certainly you can see a marked difference between them. Be it a natural artist’s intuition or the result of their artistic education, the pros know what they are doing.

Finally, a professional has experience and that can go a long way when deciding what kind of photos you want taken. Take advantage of their knowledge and expertise by asking them some questions. Perhaps that can provide you with some advice or insight into what they think would help your particular photographic needs.

So don’t let your blog flounder when you can make it shine by employing the services of a professional photographer.

How To Get Google Sitelinks For Your Blog?

sitelinks
Hi friends!!! It's been few weeks since we got sitelinks from Google. I did not post about this stuff because no one exactly knows what should be done to get sitelinks for a particular site or blog. However, I would like to share my knowledge about sitelinks. Also, I 'm  going to share few practices which may  fetch you sitelinks. Interested to know what they are???

So, what are Sitelinks? This is what Google defines about Sitelinks - "The links shown below some sites in our search results, called sitelinks, are meant to help users navigate your site." So, basically these links are aimed at improving a site's navigation. Still confused??? Then, have a look at the image below for better understanding.
newbloggingtipz-sitelink
METHODS TO GET SITELINKS
Although we do not know the exact algorithm that Google uses to create sitelinks, we can approximate and deduce few methods to yield these sitelinks. At least, if not for the sitelinks, I'm sure your website will rank better in the major search engines like Google, Yahoo, Bing, etc...

1. PROPER HIERARCHY AND TEXT LINKS: Make sure your site has a clear hierarchy and text links. That is, create a site with proper CSS which utilizes the <ul> and <li> tags primarily. Add background images and other styles using the the same. This is one main reason why Thesis Theme has been outstanding when it comes to SEO.

2. SIMPLE AND CLEAN NAVIGATION BAR: Have a simple and clear navigation bar. Do not provide too many options for the readers. Get to know what the readers visit most frequently on your blog and put those labels/categories on the navigation bar. If your blog covers a variety of topics, then provide the reader with a second level menu.

3. UNIQUE TITLE: Get an unique title for your blog. If you have a unique name, the click through rate for your blog will increase. If you have it common, then no matter what you do, the click through rates will not high. So, make sure your blog has gotta unique title.

4. USEFUL CONTENT: Provide content that interests the reader. Content is King. So, it's very important that you keep providing content that interests your reader and I suggest you to choose titles that are comment provoking. This will fetch you more comments and improve your blog's reputation, as well.

5. PROPER META TAGS: Make sure you have proper META tags and titles that best fits the post. Although blogger does not support individual meta tags for each post, we can partially achieve it with a little bit of coding. Check out this article - Add META Tags To Each Blogger Posts. It is very important that the META tag on the home page is perfect. I recommend you to read this article - Create An Effective META Title For Your Blog.

I just wanted to share my knowledge about sitelinks. May be if you have an idea about getting sitelinks in a much easier way, then let us know via comments. Your thoughts are always welcome. See you soon in another interesting article.

Designing A Perfect Sidebar On Blogger

blog-sidebar
I just wanted to share some information about sidebar which I think would benefit both the newbies, as well as the webmasters, who are striving hard to make money via blogging - to design a perfect sidebar for your blog. To start off, sidebar is basically a section on your blog that comes either to the left or to the right of the main section & includes information related to the blog posts.

It is very important to design this element, that is, put the right content on the right area to attract both the readers and advertisers. As far as I know, a well organized sidebar should include some of the most important widgets like subscription box, advertisements, recent or popular posts, search bar or any information related to the blog they are browsing. Many blogs like TechieMania, Shoutmeloud and my very own blog - EAB, includes optional widgets like Facebook Fan Page/ Twitter Updates or Google Friend Connect.
sidebar-elements
IMAGE CREDIT - www.woorkup.com
So, it's important to know what should come first and what should go at the last. The importance of each widget based on their function has been ordered as shown in the list below. The percentage for each widget in the picture depicts both the importance and the area it should occupy on a particular blog. So, just have a keen look at it!!!

SUBSCRIPTION OPTIONS:
This is a very common widget that could be found on most of the blogs. On an average, it should occupy 5% of the space provided for sidebar and I suggest you to include links to your RSS feed, Facebook and Twitter profile page. You can have a short and catchy description about your blog, as well.

ADVERTISEMENTS:
This is the most important element which every blog should possess. It's the ideal place for advertisements and should occupy, at the most 40% of the total space. It's very important that you don't place too many advertisements on your blog and make it look very ugly for the reader. Also, I suggest you have the width set to something more than 260px because you can have two advertisement blocks on the same row - just like the one on my blog. It's up to the individual to decide whether he wants to display ads related to the topic he is blogging about or just sell the ad space he has to run to meet his hosting/domain costs. 

RECENT OR MOST POPULAR POSTS:
This is another important widget that every blogger should place on the sidebar or at least, at the footer section because the maximum traffic your blog receives would be due to the posts you wrote earlier, that is people land on post pages and not on the home page of your blog. So, when you have a recent or most popular posts widget on the sidebar, there is a very high probability that the readers goes to check out another article on your blog. 

EXTERNAL WIDGETS:
This includes widget such as the Google Friend Connect, FaceBook Fan Page and so many other social bookmarking widgets. It's basically used to build better interaction with the readers. So, I suggest you can have these widgets though they are are not necessary. Make sure they don't occupy too much of your space. Limit the space allotment to not more than 10%.

OTHER ELEMENTS :
This additional space is basically for people to add miscellaneous widgets like job boards, tag cloud, etc... Limit the spacing for these elements to not more than 10%.

Basically, this post provides a quick summary about what should be present on your sidebar to make it more professional. So, I suggest you follow the same list especially if you are newbie. This schematic will definitely earn a better reputation rather than dumping a hell lot of widgets for no use. If you gotta share something, then just leave a comment. We love to hear from you!!!

To Do's - Before And After Publishing A Post On Blogger

to-do-list
Hi friends, I would like to share my to do list with you which I feel, will drive more traffic as well as improve the SEO of your blog. I'm not sure whether my techniques are right but, I guarantee that you will see a change in the rankings on the major search engines like Google, Yahoo, etc... If you are aiming to make money by blogging, then I highly recommend you have a to do list for every article you write.

Apart from writing unique content and providing the best about a topic, I suggest you to have a simple to do list as mentioned in this post. I would like to make myself clear with the idea behind this post. It's not any where related to content (say an article with a to do list that tells how to write your article more effectively) - rather, it deals with few simple practices related to coding and spreading your article to make the best of out of your content.

1. EQUIP YOURSELF (OPTIONAL)

The first and foremost thing you need to ensure before you publish a post on your blog is to ask yourself this question - Do I have the right tool for the right job? This includes the images or videos on your post and the tools to optimize them as well - say, for example, Adobe Photoshop. I highly recommend you  to attach at least one image per post because apart from attracting people to read the post, images convey better meaning than the words do.

I'm sure few might contradict with my point about a minimum of one image per post.  To those contradict, just read the following comparison. I would compare a post without image to an editorial page on "The Hindu". Though it is rich with content, only few people have the patience to read them where as, a post with image would be like the first page/sport's page - quickly captures our heart and pushes our mind to read the article.

2. OPTIMIZE YOUR IMAGES (RECOMMENDED)

I'm sure many would do the first step that I mentioned above. That's the basic one! Next, optimizing your images for SEO. This is one of the most important step that every newbie should follow. I know that the pro's would already be doing this. I strongly recommend you to read the following article if do not know how to optimize your images for SEO - 3 Tips To Make Your Images SEO Friendly. It will drive traffic from images and improve your blog rankings on search engines. Forgot to mention that I usually smush my images before I upload them on blogger - to improve the speed of your blogger blog (Speed Up Your Blog - Tips And Tools).

3. OPTIMIZE YOUR LINKS (RECOMMENDED)

This is another important that should be done when you publish on blogger. When you include a link on your post, the default coding on blogger is such that the link opens the new page on the existing page. That is, when people click on the link, they move to new page while your blog becomes inaccessible - it does not open on a new tab/window. It is very important that you make the coding right so that, the visitor is taken to the link on a new tab while your blog still is on another tab. 

For example, I recommended the article about optimizing images for SEO on blogger. Did you notice that when you hit the link, it opened up on new tab/window? It did not open on the same tab. If that happens , then it will disturb with  the continuity in reading the post. So, optimize your links for SEO and readability by adding the following codes.

1. Once you link a page on your post, hit the edit HTML tab on your post editor. You will find the coding for your linked page as follows.
<a href="http://www.newbloggingtipz.com">
2. Add the following codes to it.
<a title="YOUR TITLE" target="_blank" href="http://www.newbloggingtipz.com">
Note: The tag to be included is highlighted in green. More over, don't forget to replace YOUR TITLE with a suitable title for the page you link.

4. FINAL TOUCH (OPTIONAL)

Once you finish writing your article, I suggest you add a line welcoming your readers and encouraging them to comment. Apart from that, let them know they have some benefit when they comment say,  you gain back links for every comment you make. I recommend you to read about making your blogger blog dofollow - How to make your blogger blog dofollow? Preview your post before you publish. This is very important for webmasters. Check whether your tutorials are perfect, coding is correct and the text appears the way you want.

5. SPREAD YOUR ARTICLE (RECOMMENDED)

One important thing which every one should do is to spread their article. After you publish a post on your blog, make sure you drive traffic to it. Try entering to discussions and leave a link to your post. Comment on blogs related to your niche. Spread it via the social media. I recommend you tweet your article once after you complete your post. After tweet, a Facebook like. Then, ping your blog - call the search engines.

I have listed the to do list which I follow for every article I publish on my blog. I hope you have one. If not, create one. Please, do share with us if you got some other unique step that you regularly follow on your blog. We would love to hear from you. 

Whois Privacy - Time To Stop Using It!!!

privacy+eraser
Hi friends!!! Today, I have got some pretty new stuff to deal with. It's about whois privacy. I'm sure most the webmasters should know about this term and its usage. To  newbies and those who don't know what is "whois" privacy, it's basically a service that most of the domain registrars (like godaddy, name.com, etc...) provide to protect your information when a "whois", a kind of search , is performed on your domains.

If your still confused with, what exactly "whois" is??? Then, have a look at the two pictures on these two links - Site With Whois Privacy, Site Without Whois Privacy. So, it's pretty clear from the two pictures that the one with the whois privacy does not reveal any information about the registrant whereas the one without the whois privacy displays personal information about the registrant.

Well, few years ago, publishing information on net was a little scary issue. However, I feel that the scenario has changed now. It's time to display information about us to ensure our presence on the web. If you plan to make money from blogging or planning to do a business online, then its mandatory to provide a contact address and email address. By using whois privacy, you just lose your credibility.

I do accept that spammers and scammers can make a hell out of the email address but a dedicated unique email address will do good. More over, you can't do anything with these scammers. So, its up to you to decide whether to publish your information or not. I leave it you domain registrants.

FEBRUARY OFFER:
If you wish to avail the whois privacy on name.com, then you may can do it this month because it's free!!! They usually charge $1.99/year. However, this February 2011, we can avail it for free. Just make sure you type the following text - FREEWHOIS in the promo code area and click the apply button next to it just as shown in the picture below. If you feel that providing information on the web is insecure, then go for this offer.
name.com-freewhois-offer
If you have any problems with in applying the promo code or any other issues, you can always contact me via email or leave your comments below. So, I hope you enjoyed this post. See you soon in another interesting article!!!

Why Are Most Bloggers Not Making Any Money?

man+worried
This is a Guest Post written by Sharron Field. If you would like to write for EAB, then check out this page - Write For Us. We bloggers are a pretty dedicated bunch on the whole. We work hard at making our blogs look nice, read well, feature as high as we can get in the search-engine listings. We impart valuable information to do with our specialized subject in our chosen niche, much of the time without charge to any readers.

All in all we put a heck of a load of work into producing what is often some pretty good quality material, and to some extent our efforts are a reward in themselves. But it’s nice to get a little financial reward too, don’t you agree? – so many of us set about commercializing our blogs, not necessarily are we after making a fortune, though that would be very nice indeed thank you, but we’d just to make at least a little something to show that our efforts are appreciated if nothing else. Usually though, try as we might, it seems that no matter what we do, we just don’t seem to be able to make even a pittance.
bloggers-dont-make-money-blogging
So, we step back and take a look at ourselves: Maybe we’re not posting enough? – So, we post more. Maybe we’re not reading enough other blogs to gain sufficient enlightenment to write the quality of material that we’d like to. – So, we read more of other people’s blogs, then we spend ages search-engine-optimizing our blogs in the hope of a higher ranking. Just to make sure that the message about our blog-posts and the topic of our blog is getting out there - we post to social-media more, and we write more and post more…

Ultimate Result: Burnout, and no money. We’ve used up all our spare-time to get a few more readers and stay broke. Really frustrating!!! Isn't it???
 
This is something that a friend and colleague of mine, himself a professional blogger – making an income large-enough to comfortably support himself, his wife, and their two children from being so – calls “The Blogger Hamster Wheel of Doom”: When you’re on the Blogger Hamster Wheel of Doom; no matter how fast you go and no matter how much work you put in, you get nowhere. Even if we light up our blog like Times Square with banner-ads hardly anything changes Why is this? Something somewhere must be wrong – but what?

Imagine if you were in an offline scenario and you just published a new magazine that doesn’t seem to be selling. In parallel to it, we add more content and read other niche publications for inspiration. We mail all retail and social premises, ensuring they’ve heard about the magazine, and we advertise more and we increase the content again, adding many more glossy ads…

Will that make more people buy the magazine? No!!! All that'll do is just increase our workload. Why? Because we have the wrong mindset in both cases. Let me make that a little clear: If you want to write a blog, you need to think like a writer. If you want to sell a product, you need to think like a businessperson, a marketer. If you want to run a blog that sells product and make money from doing so, then you’ve got to think like both a writer and a marketer: You’ve got to become a complete package. Either be complete package or you stay on the Blogger Hamster Wheel of Doom.

To know more about Blogger Hamster Wheel of Doom, just check out the article here : “Most Internet Marketers/Bloggers are Broke”.

3 Tips To Make Images SEO Friendly On Blogger

I sat down last night to find out why Wordpress blogs have better search engine rankings when compared to the Google's Blogger. The answer which I found was that Wordpress blogs are highly SEO optimized (especially those run on Thesis Theme), meaning that the plugins on WP make it flexible for the user to optimize his/her blog more compatible with the search engine algorithms. Whereas, this is not the case with blogger.
This post basically deals with one simple trick that will make our blogger/blogspot blogs more search engine friendly. I have sufficiently talked about title tags and meta tags in my previous posts. So, I have discussed only about optimizing our images in this post. Follow these simple steps every time you post an image on your blog and I'm sure your blog will rank better than it did before. Moreover, you will drive traffic through your images by doing this.

Once you upload an image using the post editor, click on the HTML mode. You will find a code something like the one shown below. Its now time to optimize this code for better SEO. 
<a href="http://3.bp.blogspot.com/_So-xppeH7x0/TNbfFpWlWFI/AAAAAAAAAj4/tzl_ZYIuES4/s1600/CSSEditLogo.png" imageanchor="1" style="clear: right; float: right; margin-bottom: 1em; margin-left: 1em;"><img border="0" height="200" src="http://3.bp.blogspot.com/_So-xppeH7x0/TNbfFpWlWFI/AAAAAAAAAj4/tzl_ZYIuES4/s200/CSSEditLogo.png" width="200" /></a>
1. ADD THE TITLE TAG
CSSEditLogoTitle tags basically display the text when the mouse is hovered over the image. So, how do I add this tag to my image? It is very simple. Just add the following piece of code and insert the text that best describes the post. For example, I want the message "CSS Tutorials" to get displayed when I hover my mouse over the image on the right. To do this, I should modify/add the code as follows.
<a href="http://3.bp.blogspot.com/_So-xppeH7x0/TNbfFpWlWFI/AAAAAAAAAj4/tzl_ZYIuES4/s1600/CSSEditLogo.png" imageanchor="1" style="clear: right; float: right; margin-bottom: 1em; margin-left: 1em;"><img title="CSS Tutorials" border="0" height="200" src="http://3.bp.blogspot.com/_So-xppeH7x0/TNbfFpWlWFI/AAAAAAAAAj4/tzl_ZYIuES4/s200/CSSEditLogo.png" width="200" /></a>
2. ADD THE ALT TAG
The alt (alternate) tags are basically those text which appear instead of the image, that is, when the images do not upload faster either due to a slow connection or host problems, these text will be replaced in place of the image. So, it is very vital that every image on your blog has an alt tag. To add this, add the text highlighted in green. For example, my alternate text for the picture above would "CSSEditLogo" and I have highlighted the same in the code below.
<a href="http://3.bp.blogspot.com/_So-xppeH7x0/TNbfFpWlWFI/AAAAAAAAAj4/tzl_ZYIuES4/s1600/CSSEditLogo.png" imageanchor="1" style="clear: right; float: right; margin-bottom: 1em; margin-left: 1em;"><img title="CSS Tutorials" alt="CSSEditLogo" border="0" height="200" src="http://3.bp.blogspot.com/_So-xppeH7x0/TNbfFpWlWFI/AAAAAAAAAj4/tzl_ZYIuES4/s200/CSSEditLogo.png" width="200" /></a>
3. PROPER IMAGE NAME
The most important factor regarding the SEO would be a proper name to the image. Make sure you include the keywords when you name your image and let it be relevant to the image. It is very important that you avoid spaces because these are generally replaced by %20 and will have no value when it comes to SEO. So, the general idea would be to use '-' or '+' sign for blank spaces.
Example: Instead of CSS Edit Logo, it is better to use CSS+Edit+Logo or CSS-Edit-Logo as your image name. You can completely avoid this confusion by using Yahoo! Smush.it™.
I suggest you to use Yahoo! Smush.it™ before you upload your images to Picasa because it speeds up your blog by decreasing the size of your image. You might read the following article to know more about the various tools to speed up your blog : Speed Up Your Blog - Tips And Tools. It is important to note that even though your image size is reduced, your image quality will still be retained.

I hope these tips would be handy for newbies to optimize their blog SEO. I'm sure if you practice this on a regular basis, your blog will rank much better on Google and various other search engines. So, if you have more tips, please share it with us via comments or you may write a guest post for us. For more details about guest posting, visit the following link -  Write For Us.

On Page And Off Page SEO Factors

on-page-and-off-page-seo-factors
It's been quite sometime since I spoke about SEO (Search Engine Optimization). This post deals with the basics about ON PAGE SEO and OFF PAGE SEO FACTORS. I have already discussed about this issue in my earlier posts, but I never distinguished between these two. So, this post will simply let you know, what are ON PAGE SEO and OFF PAGE SEO FACTORS.

ON PAGE SEO FACTORS
The following will should be optimized when it comes to ON PAGE SEO. I have just enlisted few of them. If you feel there is something more important the ones which I listed, then please share them via comments. We would love to hear from you.

1. META TITLE/DESCRIPTION:
This is the most important factor when it comes to SEO. The title tags in your blog must best describe your content. You might consider reading the following article before re-framing/framing your TITLE TAGS - Create An Effective Meta Title Tag For Your Blog. I have just highlighted some of the important points here.
  • It should be clean and precise
  • It should be include all the primary keywords of your blog.
  • It should be neat and relate to the original content.
  • It should incorporate the most used words in your blog.
  • It should not be very lengthy.
2. META KEYWORDS:
Though most of the major search engines do not require this and do not index this, I still prefer having them on your blog. It's because many popular tools still check for the meta keywords on your blog. There is no harm in having one simple piece of statement on your template. Don't give them too much importance. Just have them is what I say.

3. PROPER TITLE TAGS:
Apart from creative effective titles, it is important that they have been optimized as per the search engines. That is, your post titles must appear first. Later, it should be followed by the blog name. Many newbies forget to do this on their blog. So, refer to this article for adding a proper title tag - How to improve your Google PageRank? In fact, you can refer to this article for adding individual meta tags - Add Meta Tags To Each Blogger Posts.

4. INTERNAL LINKING AND QUALITY CONTENT:
I had always been stressing about quality content in all my posts, be it related to SEO or improving Alexa Rank or Google PageRank. It's very important to have unique and quality content to get indexed by search engines. A good writer/blogger should be able to intelligently link his other posts in his current post. I mentioned intelligently because he should link posts related to the actual content rather than simply linking few of his earlier posts, that is, they must serve some use to the reader.

5. FREE FROM ERRORS:
Another important which most of the websites skip when writing about ON PAGE SEO is that, your HTML should be free from errors. Apart from having quality content, a website with error free coding will perform better on search engines. I personally face this problem and I'm working on it to solve few problems. I will post more about this issue in my upcoming posts. So, it's better you subscribe to my blog.

OFF PAGE SEO FACTORS
Basically, OFF PAGE SEO includes methods that you adopt outside your blog to increase your website ranking or traffic. OFF PAGE SEO primarily attributes to link building and social networking.

1. BUILDING QUALITY LINKS AND COMMENTING:
The first important factor which you must concentrate, when it comes to OFF PAGE OPTIMIZATION, is link building. I suggest you to interact with bloggers related to your niche. The best technique which is followed around the blogosphere to get links from quality websites would be as follows.
  • Prepare a list of blogs where your blog should be listed.
  • Make genuine and relevant comments on the blogs which you have listed.
  • Ensure that your comments are replied by the admin.
  • Interact with the other bloggers - reply to other opinions.
  • Once you feel that your presence has very well been felt by admin, contact him for a link exchange.
This is the best strategy which I feel is followed by many users to get a link from high PR blogs related to thier niche. It is very beautiful to note that even though if the admin has rejected your offer, your comments will still link back to your blog since most of the popular blogs are dofollow blogs. It is very important you search for dofollow blogs before you start the commenting process. You might read the following article to know more about dofollow blogs - How To Make Your Blogger Blog DoFollow?

2. SOCIAL NETWORKS:
I have always stressed about social networks since the start of my website. It's very very important to get yourself (your blog) connected to the world. That's the ultimate aim when it comes to social networking. Some of the good social networking sites to start with include Digg, Reddit, StumbleUpon, Twitter, BlogCatalog, Facebook, etc... Apart from these networking sites, you should consider participating yourself on various forums. This will certainly show a change in the traffic you receive.

I have enlisted only very few when it comes to OFF PAGE SEO factors. If you feel you have some extra content, just email me or share it as a comment. You may write a guest post too - Write For Us

Create An Effective Meta Title For Your Blog

Meta-Tag
Hi friends!!! New Year Greetings from "Everything About Blogging". I wish everyone a very Happy And Prosperous New Year - 2011. Let this year bring success and happiness in all your works. Fine. Now, Let's get into business. We know that Meta Titles/Tags are one of the important factors that contribute to the SEO of a site. This post will basically explain you, how to optimize the Meta Tags so that you make the most out of it.

Meta Tags/Titles are short descriptions about our blog/website. These are the first factors which search engines and visitors look into. So, it is very important you make these tags more effective. To know more about meta tags, you might consider reading the following articles. 

Here are the secrets to create an effective meta tag.
  • Your Meta Title should be clear and precise. Make sure you include all the primary keywords in your tag.
  • Your Meta Title should incorporate the most used words in your blog and relate to the actual content of your blog. Since you use the most used words in your tag, it fetches a better ranking when compared to other blogs in your niche.
  • The length of your Meta Title should not exceed more than 60 characters including blank spaces.
  • Above all, the most effective title tag need not be grammatically correct. It should convey what your blog actually contains and should incorporate the primary keywords of your blog.
Since a meta tag is the first factor that most of the search engine algorithms look into, it is advisable to take great care while creating it. Your suggestions for improving the meta title are welcome. So, post your ideas on improving the meta tags via comments. If you got more ideas, then you might consider writing an article for us too- Write For Us.

Common SEO Mistakes That You Should Avoid

Over the past few months, we see that there are hundreds and thousands of new bloggers evolving on the blogosphere. However, over a prolonged period, only few sustain. Why does this happen? Where do people go wrong? One simple reason could be an improper Search Engine Optimization. Rather than aiding SEO, people with or without their knowledge make the situation worse. I have enlisted few commonly made SEO mistakes that one should avoid.

CHOOSING UNRELATED URL OR TITLE
This is the most commonly made mistake by many newbies. They buy a domain name or choose one from the available blogspot domains keeping in mind to right some content say about "Making Money Online", "About Blogging" or some other stuff. But over a period of time, as they run out of content/topics, they tend to change their track and write a content which is completely not related to their title/URL. This happened to one of my fellow blogger and do you know the final result??? His blog was blacklisted on Google!!!

NEGLECTING ON-SITE SEO
There is a lot of buzz when it comes to ON-SITE SEO and OFF-SITE SEO.  The basic reason being the difficulty in understanding the two SEO's. Later, comes the problem of optimization. Though I myself have a lot of difficulties in finding the difference between the two, I would suggest you to have the following for your blog - proper TITLE TAGS for your post, INDIVIDUAL META TAGS For Your Post apart from the REGULAR META TAGS, proper links within your site - INTERNAL LINKS, ensuring that images have PROPER ALT TAGS and so on. Note: I don't stress too much on META KEYWORDS tag because, I never experienced any improvement having placed that tag on my blog.

FAILING TO RESEARCH YOUR KEYWORDS
One common fault which I encountered personally from my experience and through repeated search for SEO mistakes was to identify the potential keywords for your blog. I know it becomes a hectic process to identify the exact keywords for your blog. You might consider an SEO expert to do the job for you. If you are a blogspot user like me, the forget this point because we can't do much about it.

However, a person planning to host his/her website should consider doing a keyword research before building his/her website to know, what exactly people are searching for. With the automatic suggestions enabled on Google Toolbar or the search box, it has become a little easy to know what people usually search for in their niche. So, I would suggest you to optimize your site for those suggested keywords on Google.

FAILING TO CREATE A SITEMAP
Sitemaps are the most essential structures when comes to SEO. Every blog should posses a structured sitemap so that the search engine robots can easily distinguish those pages which are already indexed and those which need to be indexed. I will soon publish an article for creating a structured sitemap for blogspot users. However, you need to create a sitemap using Google Webmaster Tools. I assume that many would have done this essential step. If not, do it now!!!

I know many people who indexed their pages would have used "atom.xml" when they created a sitemap for their blog. Doing so will index only a maximum of 25 URLs. Use the text "atom.xml?redirect=false&start-index=1&max-results=100" to get 100 posts indexed on your blog. You can vary the number as you want. I don't know how well it works. But, I use both for my blog. You can have a look at the screen shot above to understand this better.
google-webmaster-tools-sitemap
CLICK THE PICTURE TO ENLARGE
Though there are a number of mistakes which we bloggers make, I enlisted only very few of them. However, I will be posting more about this topic in the upcoming weeks. If you know more about this stuff and you wish to share with us, you can consider writing a guest post on our blog - Guest Posting Guidelines, or just leave a comment below. We would love to hear from you!!!

15 Excellent Free Social Bookmarking Icons

Social media has revolutionized the world of blogging. With more than hundreds of thousands of Twitter users and Facebook users, we can truly say that, we are currently in the social media age. It is very important that you connect yourself with the social media to make the best out of your blog. Displaying unique and eye catching icons play a vital role in increasing the number of visitors to connect with you on the social networking sites. So, I have compiled a small list of the attractive icons in this post. Just have a look at them!!!
ICONS SET 15 - CLICK HERE TO DOWNLOAD THE ABOVE SET
I hope you found some interesting icons in the above list. If you did not find one of your kind, then please do wait for few more days. I will publish another set of icons in the upcoming weeks. Subscribe to my blog, so that you don't miss the updates!!!

Why Guest Posting Is So Important?

Before I start with significance of guest posting, let me explain about "What Is Guest Posting?" Basically, guest posting refers to posting articles on other blogs. In other words, it means publishing articles written by you on other blogs rather than your own blog. Guest posting helps to increase the traffic to your blog, improves your writing skills, some blogs encourage Adsense Revenue Sharing - increase your Adsense earnings, increase back links which in turn increases your Google page rank and so on.

Today, I find so many guest bloggers on various blogs but still, there are people who don't encourage guest posting. If you are one among the few people who feel there are no advantages with guest posting, then you definitely need to check out the infographic which I found on "MyBlogGuest". The infographic was designed by Brandon Rhodes for MyBlogGuest, and the infographic will clearly explain the benefits of Guest Posting. Take a look at the infographic given below.

Guest Posting Infographic:
guest-posting-infographic
I feel the best way to develop a community of bloggers related to our niche and to drive more traffic is possible when we encourage guest posting on our blogs. We have already started Guest Posting on our blog. So, if any one wants to write an article for us, they can visit the following page for more details - Write For Us.

Speed Up Your Blog - Tips And Tools

This is my third post about "How To Speed Up Your Blog?". If you had missed the earlier versions, check out the "First Post" and "Second Post" on Speeding Up Blogger Blogs. I suggest you to have a look at the previous versions before you continue with this post because it might sound completely new, if you straight away get to this post. Here, I'm going to deal with some concepts that might sound little complicated when compared to the previous ones. However, I tried my best to keep it as simple as possible. So, webmasters can straight away continue reading this post.

I don't want to make this post too long by writing stories about the benefits which my blog gained after implementing these techniques. But, I would like to know how the following techniques benefited your blog/website. I have just explained few concepts in this post while the other techniques, like CSS Sprites and reducing DNS look ups, may be explained later in the upcoming posts on my blog.

STEP ONE : GET THE RIGHT TOOLS
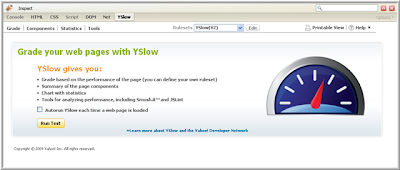
The first and foremost step that one should implement to speed up his/her blog is to get the right tools for analysis. I suggest you to download "YSlow". YSlow is the best firefox add-on as far as I know, when it comes to complete analysis of your website. It will provide grades under each category that contributes to load time of your blog.
Yslow
Another tool that would generate a detailed report about your website - Pingdom. The main benefit of Pingdom is that you don't need Firefox and the results are much easier to parse. How ever, I highly recommend you to download Firefox and get the add-on installed because YSlow is something very special, especially for webmasters.

STEP TWO : IMAGE AND JAVASCRIPT OPTIMIZATION
The most important factor that reduces the speed of your web page would be the images and Java Scripts on your blog. So, what should I do with the images? One simple method reduce the images. But, I feel images speak more than words. So, it becomes very important to add images on your posts and blogs as well. So, let's skip the simple method and get to the next level. Instead of reducing the number of images, it is better to reduce the image size. Let's take an example. Imagine that an image occupies 500kb but after compression it becomes 250kb which simply means my site will load faster. 

Next question : How to compress the images without losing the image quality as well? The answer to this question is very simple - Smush.it!!! This tool does the compression work. Just upload the image to Smush.it and later upload it to your blog. You may apply this technique to the existing images on your blog as well!!!

As far as the Java Scripts are considered, I recommend you reduce them. However, when you can't avoid their use, I recommend you place them at the end of your template. Place them right before the end of body tag. Before placing them at the end, make sure all the Java Scripts are combined into a single file. So, that you avoid the number of HTTP requests and eventually, save time in loading your site. To combine the Java Scripts, use the following tool - JMerge. Jmerge is simple tool that will combine all the Java Scripts on your blog into one single file. 

CSS-Edit-LogoSTEP THREE : CSS OPTIMIZATION
The most important optimization that is required for any blog or website is the placement of CSS and external stylesheets. The CSS and other external stylesheets should be placed above the end of head tag. This allows the browser to load the content first. Thus, the user can read the properly formatted content first while the CSS, Java Scripts and other stylesheets will load in the mean time.

One more optimization that should be made with respect to CSS would be the reduction in the code or in other words, the reduction in size. So, how do I do that? Apart from the CSS compressor explained in the previous posts, you may optimize it as shown in the example here. If you have a code that reads like the one below.
p.notice
{
font-weight: bold;
font-size: 1.33em;
}
p.another-notice 
{
font-weight: bold;
font-size: 1.33em
}
You may replace them with the following code.
p.notice,
p.another-notice
{
font-weight: bold;
font-size: 1.33em;
}
This will considerably save few bytes (though very little) which in turn contributes to a quick load time. More over, you can prove to your friend that your are CSS geek just as I did. Any how, I believe that these tools and tips will increase the speed of your site. Share your views via comments and don't forget that you get back-links (How To Increase Backlinks To My Blog?) for your comments, since my blog is a dofollow blog. (What Is A Dofollow Blog?)

How To Speed Up Your Blogger Blog?

Hi friends!! This is my second post about speeding up a blogger/blogspot blog. If you missed out the first one, then click here to have a look at it - Speed Up Your Blogger/Blogspot Blog. I had been working on this topic myself for the past few weeks and few days before, I found a post about the same topic on Google Buzz. I wanted to share some of the tips mentioned there with my readers. Although, this topic deals with terms that sound weird, I have tried my best to keep them as simple as possible because, I always write things aimed at the newbies.

The prerequisites for improving the page speed of your blog would be, to get a few of the Firefox Add-ons working on your computer - Firebug and YSlow. These Add-ons are basically meant to analyze the speed performance of your site. Only when you analyze things, you will know whether you are on the right track or not. So, let me start off with methods which I felt were effective with my blog. I'm sure, it will be effective for your blog as well.

(Note: I have concentrated only on CSS and images in this post. The other methods of improving your blog speed will follow on the next series under the same topic. Make sure you have subscribed to this blog so that, you don't miss any valuable tip for the betterment of your blog.)

1. Changing The CSS Section: I highly recommend you to opt in for CSS sprites because it reduces the number of HTTP requests for your blog. If I start to explain about this, I'm sure either I will go mad or you will become one. So, let's not harm ourselves. I leave it to the link from where I gained a little info about CSS sprites - Image Slicing. I know it is pretty difficult for the newbies to understand. So, what do they do??? Simple. Just visit this site - W3C CSS Validation Service.
Enter your URL and get the report. It will clearly indicate the warnings and the errors regarding the CSS codes . You may avoid the warnings, but not the errors. Try rectifying the errors as much as possible. Alteast, learn why the error showed up and eventually, you will correct them once you understand why showed up, just as I did:)

2. Image Modifications - For a blog to be quick in loading, it is pretty obvious that the images in the blog load faster because images occupy more space when compared to the text. So, how do I load my images faster? Basically, if you reduce the number of images, or crunch them you will reduce the size which in turn, reduces the time it takes to load them, thereby increases the speed. Apart from crunching and reducing the number of images, the following methods will be more effective in increasing the speed of loading your images.

2.1. Serve Scaled Images: It is very simple to understand though it sounds complex. This method basically uses HTML to compress the size of your image. To explain this very clearly, consider the example of attaching a large size wallpaper of dimension (1024x768) to your blogger post. Once you attach it in your post, you will find a smaller image only and not the actual size of the image. This is because, the image has been scaled to fit in your post.

It is very important factor to note that, you can still find the original picture once you click on the picture; which means the original image is loaded, but it has been reduced by some factor to make it load faster in your posts. One image, multiple sizes using HTML implies scaling. This is the basics about scaling of images. You can read a little more about serving scaled images here - Serve scaled images.

2.2. Specifying Image Dimensions And Using Alt Tags: If you feel the first step is pretty complex to adopt, then you definitely need to adopt this technique. This method basically involves adding two tags in the images of your post or blog namely, the "height" and "width" tag. What happens when I add this piece of code? If you specify the dimensions in your "img" tag, then the browser understand that it has to load something in that space of "AxB" dimensions. If the dimensions aren't mentioned, then the browser will have to wait until the complete image is fetched or in other words, say wait until the end of the script.

Apart from specifying the dimensions in your img tag, I recommend you to add "alt" and "title" tags. The alt tag basically provides a text equivalent for the object/image. That is, incase an image has failed to load then, the alternate text will be displayed. This saves time because it prevents the re-hits to the server for loading the images. More over, the title tags will fetch you more traffic through images and makes your blog more SEO friendly. I will explain about this concept in the upcoming posts. Subscribe to my blog so that, you don't miss anything vital to your blog.

2.3. Minimizing the HTTP requests: In this method, you just need to ensure that all the URLs for your images are placed on the same server. To be more specific, since you blog on blogger and make use of Google Picasa to upload the images in your post, I recommend you to upload all the images related to your blog(including facebook, social bookmarking buttons,etc..) on Picasa. Do not upload on external servers say, Imageshack, Photobucket, etc.. Every image is associated with a HTTP request and every HTTP request consumes time.

So, if your HTTP requests are diverse(each image at different locations), it simply means more time. About 40 to 60% of your daily visitors come with an empty cache, meaning to say that, they load your site for the first time. So, I would say satisfying the first time visitors would be the key to a better user experience. Hope, you enjoyed this post. Share your views via comments!!! Comments are always appreciated!!!
[netinsert=0.0.1.11.14.1]