Free Premium Blogger Templates - ProPress

It has been months since I posted here. So, I did not want that to continue for years. So, here I go with a post on a template which I found would be very appealing and may be to my other fellow bloggers too. The template name is "ProPress Template" and is available for download on "theblogtemplates.com", you may take look at the following link for customizing the blogger template - Customize ProPress Blogger Template. The template was designed by John Smith, but later decided to release it for free through "theblogtemplates.com".
To start off, ProPress is basically a two column blogger template. It has great features which includes a three column footer, a navigation bar and beautiful combinations of colors for the template. It looks very professional. I love this template simply for its professional look. Just take a look at the following three column footer (taken from widgetsforfree), so that you are able to understand what I mean by professional look.

The template provides an unique combination of colors for the background as well as for the widgets. However, I feel the comments section of this template looks a bit unprofessional when compared to the whole blog look. I don't mean to say it is completely odd but lacks a bit of professional touch. So, if you are good in coding HTML or CSS, you can change the way it looks. Any way, I have tried this template with my test blog and it looks pretty perfect. So, why not you give it a try and who knows, you may like it too!!! Hope I make more posts from now on!!!

Display Avatars Besides Comments In Blogger

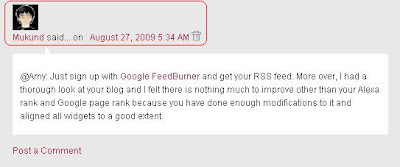
It's been quite long since I made a post in this blog. I had a lot of problems with my net connection(still not fixed) and modem. Still, I found some time today, to post about a new feature introduced by blogger, that is, avatars on blogger comments. Blogger is introducing new features daily on account of its 10th birthday celebration. Every blogger wanted to display avatars like the ones, that showed in word press and this dream has come true now. I have personally tried this feature and you may take a look at the snapshot of the feature installed in my blog below.
avatars-beside-blogger-commentsThis feature displays only users who post comments with Blogger/Google account. But, if you post a comment with "Name /URL" you will not have any image displayed. However, if you post a comment using Wordpress or OpenID or LiveJournal or Typepad or AIM, the favicon of the respective sites will be displayed. I hope the blogger team improves this feature and may be, they can join hands with Gravatar too. Let us get to our work of installing this feature in our blog.

If you are using a default blogger template, then you should navigate to "Settings>>Comments" from the Dashboard and enable the option "Show profile images on comment". It is that simple!! You will find the avatars displayed in your blog. But, what if you have a customized template like mine?? Simply follow the steps below to get the featured installed in your blog.
1. Navigate to "Layout>>Edit HTML" from your dashboard. Make a back up of your template before you do any changes in the template.
2. Expand your template, that is, make sure that you have a tick mark in that "Expand Widget Template". Now, do a search using "CTRL+F" for the following line:
<dl expr:class='data:post.avatarIndentClass' id='comments-block'>
Note: If you could not find the above code, the search for the following line:
<dl id='comments-block'>
3. Now, replace that piece of line with the following code:
<dl expr:class='data:post.avatarIndentClass' id='comments-block'>
4. Next, search for this piece of code:
<a expr:name='data:comment.anchorName'/>
5. Replace all the occurrences of the above code(code in step 4) with the following code:
<b:if cond='data:comment.favicon'>
<img expr:src='data:comment.favicon' height='16px' style='margin-bottom:-2px;' width='16px'/>
</b:if>
<a expr:name='data:comment.anchorName'/>
<b:if cond='data:blog.enabledCommentProfileImages'>
<div expr:class='data:comment.avatarContainerClass'>
<data:comment.authorAvatarImage/>
</div>
</b:if>
You may place a default avatar for those who do not have profile picture. In order to do this, place the following piece of code above the line ]]></b:skin>
.avatar-image-container{background:url(http://alturl.com/xbwk); width:35px;height:35px; }
.avatar-image-container img { border:none;}
Finally, you need to save your template. Now, check out your blog with blogger avatar feature installed in it!! Comments are always welcome!! See you soon in my next post!!

Add A Sliding Featured Content To Your Blogger Blog

I hope every one had a look at the "Magazine" type Word press templates that have a special feature namely, sliding featured content. This feature has been incorporated by default in blogger templates, like the Mahusay blogger template. Many readers personally requested me on "How to install this widget in their blogger templates?". So, this post basically explains how to install the sliding featured content on your blogs. Have a look at the snapshot of the widget installed in my blog.
sliding-featured-content-for-bloggerFollow these simple steps to display this beautiful Sliding Featured Content.
1. Login to your dashboard. Navigate to "Layout>>Edit HTML" from your dashboard. Make a back up of your template before you do any changes in the current template.
2. Search for the following line in your blog. You may use "CTRL+F" to do the search.
</head>
3. Download this: Text Document One. Now, Open the text document and paste the code present in it on top of the line mentioned in step 2.
4. Now, search for the following piece of code in your blog using "CTRL+F".
<div id='main-wrapper'>
5. Download this: Text Document Two. Open the text document. This is the major part of this widget, pretty difficult task too. You need to customize the HTML lines mentioned in that document. Check out the first block of code. You will find "YOUR TITLE". Replace it with the title of your post. Next, replace "SHORT DESCRIPTION OF YOUR POST" with a short description of your post, say 30-40 words. Replace "LINK OF YOUR POST" with the URL of your post.
6. Now, you will find a phrase like this "LINK OF YOUR POST PHOTO". You need to replace that phrase with the URL of your photo. I mean, a photo that is related to that particular post. The most important thing to note is that you should make sure, the photo size is 600x200, that is the width should be 600 and the height should be 200. You can use Adobe Photoshop or any other tool to resize the photos. Once, you are done with the photo. Upload the photo to a hosting website like Imageshack or Photobucket and get the link to your photo. As mentioned earlier, replace "LINK OF YOUR POST PHOTO" with the link you obtained. Huh!! Job done at last.
7. Repeat the same steps (5 and 6) for the other blocks too. I set the number of blocks(imageElement blocks) to four in that document. But, it is your wish. You may include as many blocks as you want. Once, you finish of all the editing business, paste the entire code below the line mentioned in step 4.
NOTE: "If it is very confusing, then download this Sample Text Document to have a look at the code that I installed in my blog to make this widget working. May be, you will have an idea of what I was blabbering. Laughing Out Loud!!!"
8. Now, preview your template. If any error, try to rectify it or else, contact me and I will help you out. No errors??? Then, save your template. Go check out your blog with one of the coolest widgets installed in it.

I made this post as simple as possible so that people feel it easy to install this widget and they will give it a try. It is not that only professional and high quality blogs can facilitate this of a widget. Even small scale blogs can use HTML effectively and make it more appealing. Please leave your comments if you face any difficulty in installing this widget.

Free Premium Blogger Templates - Mahusay

Mahusay template is one of my favorite templates in the recent past. This template has all the features that a professional template needs. Bascially, Mahusay Blogger Template is a two column template that was originally created by PaddSolutions. This was converted to blogger by Free Blogger Template. The color scheme of the template is very impressive. It has got dark and light shades of cream with white as the background for blog posts, text written in black and offers a beautiful Featured content.
The Featured content is a slider that keeps rotating on a regular basis. You may include a short description about the post in it! This widget definitely impressed me and makes the template more stylish. For people, who want to add this sliding "Featured content" widget in your blog, you may contact me personally via Email and I will let you know how to install the widget in your blog. The Read More option, like in Wood Mag Blogger Template, is incorporated by default in this template too.

Main Features:
An Elegant Menu Navigation, Sliding Featured Content with Automatic Post Update, Beautiful space for Author Profile(next to the Featured Content Widget), Default FeedBurner Subscription Form incorporated below the Author profile, 468x60 Banner Ads display at the top, Recent Posts and Recent Comments Widget at the Footer and many more... This template definitely offers a lot more features than the usual ones. It is pretty easy to troubleshoot the errors with respect to HTML coding. The coding is structured properly and there fore, you will not have any difficulties with resolving your problems provided, you know some basic HTML.

Overall, this two column template has got all the features required for a professional blog. I would rate 4 out of 5 for this template because it is pretty difficult to incorporate all the widgets and other craps in two columns. You may use it for personal blogs too!! Definitely will suit both! I hope you enjoyed this template. See you soon in my next post!

Add Tweet This and Retweet To Blogger Posts

Twitter is one of the fastest growing social networks in the recent days. Many feel it drives a lot of traffic to their blog, especially when they have a large number of followers. We should some how use this twitter to improve traffic to our blog. So, how are we going to do that? Simple, just by adding a "Tweet This" link to our blogger posts. There are certain blogs that include Tweet this in the footer of their posts, that is, at the end of the post as a social bookmarking icon. But I recommend you to place it at the top, next to the title of your post.
retweet-button
This post basically explains, how to add tweet this and also a retweet button to blogger posts. Many blogs have links only for "Tweet this" but not for "ReTweet". This post includes both Tweet and ReTweet option, there by, driving more traffic to your blog and making your posts more effective. This service is provided by Tweetmeme. Check the official page by clicking on the link here: Tweetmeme. The final output after installation will generate a button as shown in the picture. Fine. Enough of bla bla bla.. Let us get in to our work. Follow these steps.

1. Login to your dashboard. Navigate to "Layout>>Edit HTML" from your dashboard. Make a back up of your template before you do any changes in the template.
2. Now, expand your template, that is, make sure that you have a tick mark in that "Expand Widget Template". Now, do a search using "CTRL+F" for the following line, if you want to show the button below the title of your post:
<div class='post-header-line-1'>
Else, search for the following piece of code to add the button at the right end of your blog posts.
<div class='post-body entry-content'>
3. Paste the following piece of code just after the above line(either below the title or embedded with your blog posts).
<div style='float:right; margin-left:14px;'>
<script type="text/javascript">
tweetmeme_url = '<data:post.url/>';
</script>
<script type="text/javascript" src="http://tweetmeme.com/i/scripts/button.js"></script>
</div>
4. Save your template. That is it!! Your done with the installation. Very simple I think!!

Add Social Bookmarking Buttons/Icons Below Blogger Posts

I received few comments from my fellow bloggers relating the social bookmarking in blogger posts. Though, I have discussed how to install this in my previous post, there are few more doubts and clarifications regarding this hack. More over, my previous post just displayed links of all the social bookmarking sites and never included any buttons or icons in them. As we know social bookmarks improve traffic to our blog, it is necessary that you make it more attractive and big. Therefore, I thought why not post about this issue in my blog.

Enough of my story and your stories. Let's get our job done now!!! Follow these simple steps to display beautiful social bookmarking sites below every blogger posts.
1. Login to your dashboard. Navigate to "Layout>>Edit HTML" from your dashboard. Make a back up of your template before you do any changes in the template.
2. Now, expand your template, that is, make sure that you have a tick mark in that "Expand Widget Template". Now, do a search using "CTRL+F" for the following line:
<div class="post-footer-line post-footer-line-1">
3. Download any one of the following text documents, that is, download the first text file for installing large icons below your blog posts. If you want small icons below your blog posts, then download the second file.
4. Open the text document. Paste the code that you see in the text document just below the line in step 2.
5. Preview your template to check for errors in HTML code. Thats all folks!!! If you find any error, let me know via comments. Else, Save your template and enjoy those cool icons below every blog post you do.

What Is RSS All About?

I really wondered "What is RSS?", when I started blogging and I never knew what impact, it had on my blog. I just installed in my blog because I found the same in all other blogs. Now, it has been a year since I entered this blogging world and I got to know a little about this RSS which I want to share with my readers. To be very simple, it is another method for the readers to keep track of your blog. RSS stands for "Really Simple Syndication", a technology that websites use to distribute their content.

RSS-Tablet-IconI am sure many of them use bookmarks to keep track of their favorite sites, that is checking those sites everyday or may be on a regular basis for new content. Instead, you can subscribe to each site's RSS feed and you will be informed automatically by your RSS Reader, once there is a new content added on that site. I have used two new terms "RSS feed" and "RSS Reader". What is this crap??? Wait... Relax with a coffee. Let me explain that to you.

Websites that use the technology of RSS create special files, called "feeds". As mentioned earlier, these files are designed in such a way that they are updated periodically to contain the latest information about the site. A RSS reader is simply like a software, in other words, an application to view the RSS feeds. There are two types of RSS readers available, namely, Web Readers and Desktop readers. The former one is the most preferred, because you can store your feeds on the internet rather than on your hard drive. Some of the popular and free RSS readers are: Google Reader, FeedDemon, Bloglines, etc... I prefer Google Reader because, it is simple to use.

Fine. I got my RSS reader. Now, what do I do? Simply, subscribe to the RSS feed of all your favorite websites. Now, how do I do this? Few sites mention "Subscribe Via RSS" or provide an icon, (something like the one, I should on top of this post) some where in the site for their readers to subscribe via RSS. While few browsers, like Fire Fox have got this option in built, that is, you can click on the icon displayed on the right end of the location bar to subscribe to them. Feel free to subscribe to my RSS feed too.

Automatic Read More Hack For Blogger With Thumbnails

I recently wanted to change my blog appearance and while working for the same, I could find this hack. This hack is basically an updated version of the previous "READ MORE HACK" provided by sites like eblogtemplates. The disadvantage with the previous hack was that it did not create a summary of the posts that are already existing, that is, posts that are already published. Moreover, you had to include the code every time in your posts to create a summary of the post.

This post will explain you how to add the automatic read more hack for all posts including a thumbnail, if the post has got a picture in it. If the post has not got any picture, it just shows a small summary of the post. Follow these simple to install this hack in your blog.
1. Navigate to "Layout>>Edit HTML" from your dashboard. Make a back up of your template before you do any changes in the template.
2. Now, expand your template, that is, make sure that you have a tick mark in that "Expand Widget Template". Now, do a search using "CTRL+F" for the following line: </head>
3. Paste the following piece of code above </head>.
<script type='text/javascript'>
var thumbnail_mode = "no-float" ;
summary_noimg = 450;
summary_img = 400;
img_thumb_height = 100;
img_thumb_width = 120;
</script>
4. Now, do a search again for the following piece of code: <data:post.body/>
5. Download this Automatic Read More Hack. Replace the following piece of code with that present in the file. Now, save your template and check out the result.

You may customize the number of letters displayed in post by changing the value in the following line, that is, change the ones highlighted in red.
summary_noimg = 450;
summary_img = 400;
In order to change the height and width of the thumbnail that is displayed in every post, you need to modify the following line, that is, change the ones highlighted in red.
img_thumb_height = 100;
img_thumb_width = 120;

How to add HTML codes in Blogger Posts?

Recently, one my blog readers wanted to know how do I add Java scripts and other HTML codes in my blog posts. To be very frank, even I had this question when I started my blog initially. And when I tried to implement such tricks in my blog, I faced a lot of difficulties with the coding. But nowadays, I find many sites have come up with blogging tips and it has become very simple to customize your blog. Let me straight away tell you, how to implement this trick on your blog posts.

If you just want to show up HTML codes in your blogger post, that is without any customization, then use this site : Simple Code. This method will show the HTML as it is and looks very simple. If you want to customize the way it is displayed, like I do in my blog, then you should follow the next method. In this method, you will have to include some codings and then your job will be done.

Follow these simple steps to include the HTML/Java script codes in your blog post:
1. Navigate to "Layout>>Edit HTML" from your dashboard. Make a back up of your template before you do any changes in the template.
2. Now, do a search using "CTRL+F" for the following line: ]]></b:skin>
(Note: I have used the first method here. Just to show you how it looks)
3. Once you find the code, paste the following piece of code above it:
.codeview {
margin : 15px 35px 15px 15px;
padding : 10px;
clear : both;
list-style-type : none;
background : #f9f9f9 url(http://img17.imageshack.us/img17/5162/codeview.gif) no-repeat right bottom;
border-top : 1px solid #eeeeee;
border-right : 2px solid #cccccc;
border-bottom : 2px solid #cccccc;
border-left : 1px solid #eeeeee;
}
.codeview li {
font-size : 13px;
line-height : 24px;
font-family : "Courier New", "MS Sans Serif", sans-serif, serif;
color : #FFFFFF;
font-weight : normal;
margin : 0;
padding : 0;
}
4. Once you do this step, save your template and return to your blog post where you want to insert the HTML code. Place the HTML content in between the following two tags namely, <div class="codeview"> and </div>
5. You can include the code straight away in the "Compose Mode" of your blog post area. After you complete your post, you can simply click the button "PUBLISH POST" and later, view the result.

If you still find problems with the display of HTML codes, then use Simple Code and get the simplified code from that site. Now, place this simplified code in between the two tags as mentioned in step four. That's all folks. Hope I made it simple and clear. Please post your views below through comments.

Free Premium Blogger Templates - WoodMag

It's quite long, since I posted a new template here. I simply did not want to post a lot of templates because many templates are uploaded day by day, but none of them are customizable nor look good. Finally, after a long time, this template "WoodMag Blogger Templates" deserves a top place among the recently released blogger templates. It is basically a three column template and as the name indicates, it has wood background and appears to look like a magazine style template.
Download WoodMag Blogger Template For Free

MAIN FEATURES:
1. Automatic Read More Facility: There is no need to explicitly add HTML codes and other stuffs to have the read more option enabled in your blog. You get this facility by default in your blog.
2. Lower Three Column Section: Many templates do not have this section while this template includes three sections for bloggers to add their Recent Comments Widget, Recent Posts Widgets, etc..
3. Works Perfectly On All Browsers: It works perfectly fine in IE and Mozilla Firefox because I personally tested the template in my test blog. Bloggers will realise this point only, when they try to customize their widgets and other HTML codes in their blog. A simple "Back to Top" icon will not come along the page in IE whereas in Mozilla, it does. So, there are a lot of similar problems. This template certainly overcomes all those.

Overall, a beautifully designed blog that has got all the features of a professional template. It is very important to note that this template is suitable for both personal and professional blogs.

Increase FeedBurner Subscribers To Your Blog

feedburner-logoOne of the ways to show your blog potential is by displaying the number of FeedBurner Subscribers. The most important thing to be noted regarding the Subscriber's count is that, they are real people with real thoughts and should never be associated with numbers. I had a Google search, for the past one week, related to this topic and I found out that, there is a hack for doing the same using a Netvibes accounts and an OPML file.

It is quite unrealistic to get 2500 subscribers overnight. Moreover, there is no use in doing the same. No real person is reading your blog to generate valuable comments or to increase your traffic. You just show people a couple of thousand readers more than what is in now. So, I advice you not to indulge in any such activities because, one day or the other ,"The Big G"(Google) will find a lock and your key will never fit the lock anymore. Some of the valuable tips that every new blogger can adopt to increase their FeedBurner Subscribers are listed below.

1. Placement Of Your Feed - This is the most important key to increase the subscriber's count. Anything you want to promote in your blog should be placed at the top, that is, above all the widgets. You should have noticed this in my blog provided you followed my blog on a regular basis. Initially, I had the Email subscription option at the bottom of my page(had 14 readers). I shifted it to the top, 2 weeks before and at present, the number of subscribers are 18. I think the results prove why it is so important to place your feeds above all folds.

2. Feeds Below Every Post - It is always intelligent to place a email subscription or your RSS feed below every blog post because, every person who visits your blog is not a blogger . They are just people who landed on your page searching for some information. Thus, it is important to tell in what way, your blog will benefit the user who came from a search engine. You may visit this page for implementation of feeds below every blog post.

3. Post About RSS - This method is self explanatory. Basically, this method tells you to spread "What is RSS" and educate your readers about RSS. Most of the blogs do not have high RSS subscriber's count, simply because many of them don't understand what RSS is all about. So, you may publish post explaining what RSS is and how it will be useful for the reader to stay up-to-date with your blog. Finally, place a RSS link below that post and I am very sure, you will definitely see the difference.

4. Promote Your Blog Feeds - You may promote your RSS feeds by placing them in various forums, email signatures, discussions, etc... You may also place your RSS feeds along with the home page URL when you comment on posts in other sites. This method will serve to be very useful provided you comment on blogs related to your niche. Also, you may solve some problems for your fellow bloggers and later ask them personally to subscribe your blog. Not as a gratitude, but as a token of appreciation in solving their problem.

5. Include A Bonus For Your Subscribers - Last but not the least. A free bonus for Subscribing to your blog. It is very tricky to do this in a blogger or blog spot blog. But, I recommend every one to place some useful Ebook below your subscription form. This will definitely increase the subscriber's count. You have to personally send the Ebook, you mentioned in your blog, through mail to the subscriber, once you know his/her email address via FeedBurner Email Subscription Service.

I have mentioned a few effective methods to improve your subscribers. Am sure there are lots more effective ways in achieving this, so feel free to leave your opinions here via comments. See you in my next post!!!

Jquery Image Maginfier For Blogger Blogs

sm_VistaWallpaperI recently came across a blog that had the effect of image magnification. That is, once you click on the picture in a post, it magnifies. So, I found a hack to implement the same on blogger blogs. The script and the hack original was developed by Dynamic Drive. I modified a little bit of the code and have implemented in my post here.

I feel this trick will be very helpful to those people who post a lot of photos in their blog and for those who post payment proofs in their blog post. Fine, enough of all bla bla's. Let me straight away explain you how to implement this technique in your blog. Follow these simple steps.
1. Navigate to "Layout>>Edit HTML" from your dashboard. Make a back up of your template before you do any changes in the template.
2. Now, expand your template, that is, make sure that you have a tick mark in that "Expand Widget Template". Now, do a search using "CTRL+F" for the following line: </head>
3. Place the following piece of code on top of the above line(</head>).
<script src='http://ajax.googleapis.com/ajax/libs/jquery/1.3.2/jquery.min.js' type='text/javascript'/>
<script src='http://sites.google.com/site/careerfreelife/magnify/Magnifier.js?attredirects=0' type='text/javascript'>
/***********************************************
* jQuery Image Magnify- (c) Dynamic Drive DHTML code library (www.dynamicdrive.com)
* This notice MUST stay intact for legal use
* Visit Dynamic Drive at http://www.dynamicdrive.com/ for this script and 100s more
***********************************************/
</script>
4. Now, when you include any picture in your blog post. Go to the "Edit Html" section and just include class="magnify" and also include this piece of code with the <img src="URL"/>. Just see the syntax of the code here.
<img class="magnify" magnifyby="3" style="width: 200px; height: 150px;" src="YOUR IMAGE URL" alt="YOUR ALTERNATE TEXT" id="BLOGGER_PHOTO_ID_19numbers" border="0" />
5. Also, remove the link pointing to that picture. That is, remove the href code before the image HTML. If it is pretty confusing, just take a look at the following piece of code.
<a onblur="try {parent.deselectBloggerImageGracefully();} catch(e) {}"> <img class="magnify" magnifyby="3" style="width: 200px; height: 150px;" align="left" src="http://alturl.com/53eg" alt="sm_VistaWallpaper" id="BLOGGER_PHOTO_ID_5364892650738529362" border="0"/></a>
This is what, I used for uploading the picture shown above. You can change the width or height of the picture and even change s200 to s400 or s800 in the image URL for bigger images. Note: You cannot find s200 in the above code because I have shorten my URL due to the page width constraints. Any help regarding this trick, you may leave a comment and I will solve your problem.

5 Methods To Increase Your Alexa Rank

Alexa is a website that provides traffic details about various websites. Alexa rank is based on the amount of users who visit a particular website with the Alexa tool bar installed. It might look silly, if you look at the definition provided by Alexa site but how ever, it has become an important factor for advertisers and web masters in evaluating a website. For example, Text Link Ads and Sponsored Reviews are few websites that determine the quality of a blog with Alexa Rank.
alexa-rank-stats1.Quality Content- I feel this is the key to success for your blog. I don't mean to say you should write posts that are very rich in content. I simply want to convey that be genuine in what you write. Don't copy, paste a content from some other site.

2.Alexa Toolbar- Get the Alexa Toolbar, install it on your computer. Later, set your blog or site as the home page. Adopt this method to as many computers as possible. I mean on your office computers, friend's PC and so on.

3.Spread Your Article- Once your write a post about topics that interests your friend, then make sure you spread that post through forums, twitter,digg, and through other social networking sites. Moreover, make sure you submitted your site to all the search engines. If not, click here.

4.Alexa Sparky- This method is quite simple and similar to the method two. Install Alexa sparky (A Firefox add on) on your computer. Every time you visit your own blog, information about your blog is quickly sent to Alexa including the hits to your site which, in turn, will vastly improve your rank with Alexa.

5.Alexa Widgets- Install the Alexa Rank widget(Get this widget) on every web page of your blog. I found through a website that each click on "Alexa Rank" widget installed web page counts as a visit even if the visitor does not use the Alexa tool bar.

I am very sure that the above methods will make your rank better in Alexa simply because they worked well for me and I am not an expertise by any means. There might be several other methods that worked well for your site, please do share them here.

Increase Traffic To Your Blog With Meta Tag and SEO

The response to my previous posts namely, increasing your Alexa rank, increasing traffic to your blog and so on was very good. So, I felt why not, do some more research on the net and get some information about these stuff and help my fellow bloggers improve their site traffic. Basically, this post tells you, how important it is to optimize your site for SEO (Search Engine Optimization) in order to improve your traffic and explains you one simple method out of that namely, proper placement of Meta Tag in your site.

It is very important that you optimize your site to reach very good heights with respect to your Page Rank, Alexa Rank and so on. Will you spend lots of money in driving traffic to your blog when the same is available for free?? I don't think so.

Now, let me tell you one simple method using Meta Tags to generate more traffic to your blog. So, What is a Meta Tag? It is a piece of HTML, that is usually inserted at the top of the template of every site, to provide information about the contents of the web page to the search engines. Few people say it of no use while few recommend it. How ever, there is no harm in adding them. So, It is better we add them. Let me straight away tell you how to include this.

1. Login to your blogger account and navigate to "Layout>>Edit HTML" from your dashboard. Back up your template before making any changes to it by clicking on "Download Full Template".
2. Find the code below. You may use "CTRL + F" to do so.
<title><data:blog.pageTitle/></title>
3. Add the following Meta Tag below it:
<meta content='Your blog description here' name='description'/>
<meta content='Your keywords here' name='keywords'/>
4. You need to change "Your blog description here" to describe your blog. For example, if your blog is related to money making, then you may write a short description say, "Get all the tips you require to make money online" and replace "Your keywords here" with keywords that you feel will drive traffic to your blog.
5. Click Save Template. Congrats!! You have now optimized your site.

Tweetbucks Review

tweetbucksI recently came across this site while surfing through EasyHits4U. The site name is "Tweetbucks". I went through this site and thought this will be useful for my readers to make some money online while they tweet through Twitter.

What should I do to make money with Tweetbucks? Very Simple!! Just shorten any URL that you going to tweet using Tweetbucks and then tweet them. So, when a follower of yours click on that particular link, you make money for that click. It is similar to Pay Per Click but not exactly the same. You also get a commission in every successful purchase made on the advertisements.

Though I have not yet tried Tweetbucks personally, I think this site looks promising and in the future, I will give this one also a try. I think you can earn money with this site provided, you either tweet a lot or have a large followers following you. You can cash out your payments through PayPal once you reach $25 and they clear the payouts the end of the month. It is mentioned on their FAQ's page, that they clear the payments on the last business day of the month.

Moreover, they offer a affiliate program where you earn 10% of the referral earnings from your referrals for 6 months. I think this site is constantly on the path of growth and I expect this site will bring out more methods to make money online. Overall, there is nothing to lose with this site. If you feel you can make money with your blog, then I assure you that your blog will be your gold mine. Try to find out which program suits your blog. Who knows?? Tweetbucks may be the one for you!! So, what you waiting for?? Give it a try!!!

Recent Posts Widget For Blogger With Thumbnails

I received few comments in my blog and one of my readers requested a "Recent Posts" widget. To start off there are 2 methods to include this widget in your blog. One method will use the feed of your blog, just like the "Recent Comments" Widget explained in my previous posts. Since, the first method is very simple and self explanatory. I would like to skip this method and move on to the second method. This method includes a thumbnail of your recent posts and also displays the number of comments for that particular post as shown in the demo - Indian Food Recipes.

This post basically features about adding this type of widget to your blog. Follow these simple steps to install this widget on your blog.
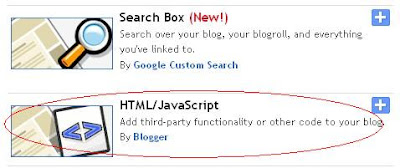
1. Login to your blogger account and navigate to "Layout>>Page Elements". Click on "Add a Gadget" and select "HTML/JavaScript".
2. Copy the following code and paste in the pop up window that appears.
<center>
<script language="JavaScript">
imgr = new Array();
imgr[0] = "http://i43.tinypic.com/orpg0m.jpg";
imgr[1] = "http://i43.tinypic.com/orpg0m.jpg";
imgr[2] = "http://i43.tinypic.com/orpg0m.jpg";
imgr[3] = "http://i43.tinypic.com/orpg0m.jpg";
imgr[4] = "http://i43.tinypic.com/orpg0m.jpg";
showRandomImg = true;
boxwidth = 298;
cellspacing = 8;
borderColor = "#ffffff";
bgTD = "#000000";
thumbwidth = 40;
thumbheight = 40;
fntsize = 12;
acolor = "#666";
aBold = true;
icon = " ";
text = "comments";
showPostDate = false;
summaryPost = 40;
summaryFontsize = 10;
summaryColor = "#666";
icon2 = " ";
numposts = 5;
home_page = "http://YOURBLOGNAME.blogspot.com/";
</script>
<script src="http://xrl.us/bezqwo" type="text/javascript">
</script>
</center>
3. Change the code highlighted in green. That is, replace "YOURBLOGNAME" with the URL name of your blog. After you change the name, simply save the changes. Have a look at your blog with this cool widget installed in it!!!

Make Money with Smowtion

I recently joined a new site namely Smowtion. This is a new blog monetization opportunity for all new bloggers. I recommend every blogger to install this on their site. Not only the newbies, even sites that get very good traffic. Simply because, Smowtion pays every blogger per impression. Basically, it works with CPM, CPC and CPA ad types. All put together will lead to eCPM which is Effective Cost Per Mile.
There is no need to confuse with all the technical terms mentioned above. It just means you get paid for every 1000 impressions. In fact, the main advantage of this site is easy installation and once installed, you will find banner ads running in your site. More over, they offer PayPal as a mode of payment. This is another advantage when compared to Adbrite.

Some of the best features about this site includes revenue per page view. I mean every page view of your site counts. Since, every page view counts even the slightest amount of traffic that your blog gets will earn money for you. Secondly, the customer service is really very good. The service includes live chat, email, etc... Thirdly, they offer a referral plan where you earn 5% of the revenue earned by your referral for the first six months. Lastly, they have got a user friendly panel that will help you navigate easily throughout the site.

The site clearly says that it is compatible with Google and you may run these ads in parallel with your Google Adsense Ads. The only disadvantage with this site is that we cannot personalize the advertisements and this company is fairly in the new stage. Overall, I feel Smowtion seems like a very good opportunity for all new bloggers. Join now and start making money with your blog now.

Recent Comments Widget For Blogger

One method to show off the power of your blog is by displaying the recent comments. I said to show off the power because only when you have some loyal readers, they will comment on your posts genuinely and by that way, you show the power of your blog. This post basically features on how to add recent comments widget for blogger blogs. There are 2 methods to include this widget to your blog. Both the methods are very simple and are explained below.

The first method is using the feed. Follow these simple steps to include this method of recent comments to your blog.
1. Login to your blogger account and navigate to "Layout>>Page Elements". Click on "Add a Gadget" and select "Feed". The picture below will explain you this step more clearly.choose-feed
2. Paste the following code in the window that pops out.
http://YourBlogName.blogspot.com/feeds/posts/default
Note: Replace "YourBlogName" with the URL name of your blog. Example: For my blog, it is "newbloggingtipz"
3. Select the "Save Changes" button and view your blog.

The second method is using the HTML code. Follow these simple steps to include this method of recent comments to your blog.
1. Login to your blogger account and navigate to "Layout>>Page Elements". Click on "Add a Gadget" and select "HTML/JavaScript". Take a preview of what I am saying below.choose-html-javascript2. Download this text document. Open the text file and copy the code in it and paste in the pop up window, that appeared in step one.
3. Scroll to the end of the code in it. Find the following line in that code.
src="http://YourBlogName.blogspot.com/feeds/comments/default?
4. Replace the code highlighted in green with the URL name of your blog as explained in the previous method(Refer Step 2).
5. Select the "Save Changes" button and view your blog.

The first method will allow you to display only the comments and will show dates and other stuff while the second method will show all such details. Moreover, you can customize the way the comments are displayed in the second method if you know HTML to some extent while the first method offers no customization. So, enjoy this recent comments widget. See you later in the next post.

Free Premium Blogger Templates - Zinmag Primus

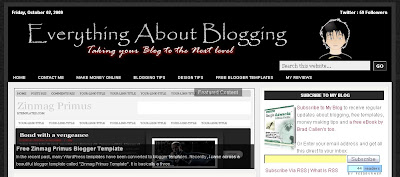
In the recent past, many WordPress templates have been converted to blogger templates. Recently, I came across a beautiful blogger template called "Zinmag Primus Template". It is basically a three column, white professional template. This template has got a special feature of displaying the post summary in short with a description. Moreover, it is designed in such a way that those post summaries are displayed as slide shows rather than standard ones. Thus, it can be said that it shows your recent posts in slide show format to the readers.

The preview of the template is shown above. Even this theme was converted by Falcon Hive from WordPress to Blogger. The special features of this template includes two navigation bars, one features content section or in other words recent post section displayed as slide show and finally the four column footer. Apart from this, all the other features of a three column template are also available.

Also, it is compatible with Internet Explorer. This point is to be noted because many WP converted themes will have Java scripts embedded in them and these scripts will not work in IE while most of them will work in Mozilla. Thus, it is important to make sure that your template is compatible with all the browsers. This one satisfies both, so there is no problem. For further information and customization of this template, you may visit the following website - Blogger Styles.

Add Related Posts To Blogger Blog

I recently came across few comments in my blog that the previous post about related posts was not working in few blogger blogs. Moreover, the previous "Related Posts Widget" displays all the related posts based on category and displayed the labels of each one of them but, the one in this post will only display the specified number of posts and will not show any labels. Take a preview of the final output.related-postsThis post basically features an alternative method to show the related posts in your blog. Follow these simple steps to add this widget to your blog.
1. Navigate to "Layout>>Edit HTML" from your dashboard. Make a back up of your template before you do any changes in the template.
2. Search using "CTRL+F" for the following line:
</head>
3. Download this first text file. Open the text file and insert the following piece of code just before the above line.
4. Now, expand your template, that is, make sure that you have a tick mark in that "Expand Widget Template". Now, do a search using "CTRL+F" for the following line:
<data:post.body/>
5. Download this second text file. Open the text file and insert the following piece of code just after the above line.
6. Now, Save your template. Preview each of your posts separately. If you still have any problem in downloading the file or with the code, then please leave a comment.

UPDATE: Check the latest version here - Stylish Related Posts.

Add Google Talk To Your Blog

I think everyone know, what is Google Talk? Google Talk is service that provides to send instant messages, make voice calls to PC's, transfer files, etc... People who sit for more hours in front of their PC's will like this widget especially blogs related to my niche(blogger tips, who need help in figuring out the correct HTML code). I say more hours with PC because, you include this widget basically to show that your online and any help required by the reader can be solved instantly through chat rather than leaving comments and other stuff.

This post basically features about including this widget to your blog. You just need to follow some simple steps in order to include this widget to your blog. Follow the steps as mentioned below:
1. As always, you need to back up your template before making any changes in the code. Navigate to "Layout>>Edit HTML" from your dashboard and download the template.
2. Now, Navigate to "Layout>>Page Elements" page. Click on "Add a Gadget" and select "HTML/JavaScript". Take a preview of what I am saying below.choose-html-javascript3. Paste the following piece of code in the window that pops out.
<iframe width="234" frameborder="0"
src="http://bit.ly/11fXeU"
height="350">
</iframe><p style="margin:-8px 0"><br /><center>
<a style="text-decoration:none;font-size:70%;" href="http://bit.ly/VYZga">Add to your blog</a></center></p>
4. Now, save your code and take a look at your blog.

Add 125x125 Ad Spots To Your Blog

Presently, the best ad format for a blog is 125x125. You may check out great blogs like ProBlogger, BloggerBuster, etc... These people use 125x125 ad spaces mostly rather than any other ad format. These dimensions are very perfect to display text and banner ads attractively and more over, they remain in the side bar permanently and do not interfere much with the blog's content.

Follow these simple steps to include an Advertise Here banner as shown in my blog.
1. Create a post specifying the importance of advertising in your blog. This should include an approximate amount of page views per month in your blog. You may also include Google page rank, Alexa rank and other stuffs which you feel will convince the advertiser.
2. As always, you need to back up your template before making any changes in the code. Navigate to "Layout>>Edit HTML" from your dashboard and download the template there.
3. Now, Navigate to "Layout>>Page Elements" page. Click on "Add a Gadget" and select "HTML/JavaScript". Take a preview of what I am saying below.4. Paste the following piece of code in the box that appears.
<a href="YOUR BLOG DETAILS URL"><img border="0" width="125" src="http://img60.imageshack.us/img60/2389/advertisehere.gif" height="125"/></a>
5. Replace "YOUR BLOG DETAILS URL" with the post URL that you made in step one. That is it. Now, save your code and take a look at your blog.

You may use these banners too instead of the one used in my blog.
| Banner One | Banner Two | Banner Three |
Click on each of the links and view the banners. Note: To change the banner image, you need to change the URL pointing to the image and not the link pointing to your site. That is, replace following code:
src="http://img60.imageshack.us/img60/2389/advertisehere.gif"
with the following code for the "Banner One" link
src="http://img198.imageshack.us/img198/9649/advert125x125.png"
Look at the URL carefully, it has been changed. So, you just need to change the URL and nothing else is required. Come on bloggers!! Add this widget to your blog too and show the advertisers that your blog is worth advertising!!!

Add Email Subscription Form Below Your Blogger Posts

I recently noted the amount of subscriber's count has increased by a small margin in my blog because of the inclusion of an email subscription form below each of my blogger posts. So, I thought why not help other bloggers also to put a form like mine in their blogs and improve their subscriber's count too. So, this post basically features how to add an email subscription form below every blogger post. Moreover, you can add some interesting text like the one seen in my blog that will attract a lot of readers.

Simply, it is a modified or customized email subscription form that will help your reader's subscribe to your blog easily rather than searching where the subscribe icon is in your blog. I think it is enough of explaining about this stuff because everything is explained clearly in that picture above. That will be the final output after making the changes in our HTML code.

Let me straight away list out the steps in including this widget to your blog.
1. As always, you need to back up your template before making any changes in the code. Navigate to "Layout>>Edit HTML" from your dashboard and download the template there.
2. Now, expand your template, that is, make sure you have a tick mark in that "Expand Widget Template". Now, do a search using "CTRL+F" for the following line:
<div class='post-footer-line post-footer-line-1'/>
3. Download this Text Document. Open the text file and insert the following piece of code in it just after the above line.
4. Change the feed name ("EverythingAboutBlogging" to YOUR BLOG FEED NAME) from my feeds to your feed. You need to find that from FeedBurner's Email Subscription Form which is self explanatory.
5. Preview your template to check for any error in code. If you find errors, then redo the steps again from the first else save your template. If you have any problem in downloading the file or with the code, then please leave a comment.

Improve Traffic To Your Blog With Social Communities

We already know many social networking sites such orkut, facebook,etc.. I recently joined one real time social networking site - Twitter. The best part of this site is that it is a real-time social networking which projects what you do to all the people around the world. It can even be attending the call of nature. Jokes apart, so how will this site improve the traffic to your blog???
Twitter is simply service that connects friends and families around the world and this site is basically built on one motto - "What Are You Doing?" This post basically tells how you can use this concept of "What you are doing" to improve traffic to your blog. You have a feature called TwitterFeed that will automatically update the new posts through the RSS feed of your blog. So, this will improve your site. You can also tweet what you are currently doing, say, updating your blog or changing a template, etc.. and you can leave a link of your blog while tweeting. This will improve the traffic to your blog.

Thus, basically you can tweet what ever you want, related to your blog ,with a link pointing to your site. You can also show off the amount of followers, just like the subscriber's count that will enhance and make other bloggers feel your site is worth reading and who knows, they may even join your site!!! You can show this count by including a small piece of HTML code - TwitterCounter.

One more service that will improve your blog traffic consistently is BlogCatalog. I recommend everyone to join this site to experience the best traffic to your site. Even here your new blog posts are automatically updated. More over, you can create groups and increase your traffic. You may take part in discussions, post broadcasts and lots more there. It will take another post to explain all features about BlogCatalog. This site also provides a lot widgets. The best one among them would be the recent visitors one. You can have a look at it at the right sidebar of my blog.

The best method that you can adopt to increase traffic with BlogCatalog is, create a group saying Visit my blog and I will visit yours or provide free reviews about various sites and ask people to visit your site in return. It is up to the individual to create an idea to drive more traffic. You may visit my group to see how many members have joined - Get Comments For Your Blog. I hope all new bloggers give a try to these 2 sites and improve their traffic.

Display Top Commentators In Blogger

I recently came across this widget from my friend's blog that displays the top commentators in blogger. This is one good technique to show that your blog has got some influential readers. You may frequently see this in WordPress blogs, but not in blog spot, because most of them do not know what the HTML code is to display this widget. By displaying this widget, you encourage your loyal readers to comment more on your posts.

In order to setup this top commentators widget in your blog, you may just place this code in "ADD HTML/Javascript" in the layout's page. You may follow these steps to install the top commentators widget in your blog.
1. Navigate to your "Layout" page from the dashboard.
2. Click "HTML/JavaScript". Take a preview of what I am talking here.
3. Download the following text document - Top Commentators Widget
4. Now, place the code in the new window that appears. After you place the code, slight modification is to be done in the last but 2 lines of the code. You need to replace your nickname and your blog name. Simple!!!
5. Check for the following code in that line. Replace "NICKNAME" with some name of your choice and "YOURBLOG.blogspot.com" with the address of your blog. (Example:newbloggingtipz.blogspot.com)
&filter=NICKNAME&url=http%3A%2F%2FYOURBLOG.blogspot.com&num=10"
6. Once this is done. Just save it and you may preview your blog to see the final output.

Improve Traffic To Your Blog

It is very important as a new blogger that you gain good readership and commentators. It is only possible if you display your blogs to others. As always, one easy method that you can adopt to increase your traffic is to use sites like EasyHits4U(Review about this site), TrafficSwarm, etc.. The most important thing that you need to do in order to increase the traffic to your blog is to submit your blog/site to various Search Engines.

I found the below site that will submit your site to various search engines. However, I suggest you to index your blog individually with Google. You may visit Google WebMaster Tools for indexing your blog with Google. Though, Google automatically recognizes your blog and keywords if your content is unique, it is still better to index your blog separately with Google. I will soon let you know how to index your blog with Google in my later posts.

Submit Your Site To The Web's Top 50 Search Engines for Free!

Similarly, You can submit your site to Yahoo! Search Engine too here. I would prefer you to submit your blog to Google and Yahoo! separately while submission to other search engines can be done with the help of site that is mentioned in the above banner. The reason behind this is that many people use either Google or Yahoo! as to search things around the web.

Also, I recently found a easy method that will increase your Alexa rank within few weeks. You may have noticed that my Alexa rank was 2, 949, 475. (as on April 22nd, 2009) Now, you can check out my Alexa rank and it has got increased to 950,345. (as on May 27th, 2009) This is simply because of using geographic traffic. It simply means persons visiting from a specific region of the world. To improve your Alexa rank, you just need traffic from America as far as I know. Use Easyhits4U and select the region from which place you need traffic. Simple... So why waiting?? Try this trick!!!

Make Money with Adgitize

Many of my blogger friends want to earn money just to display a banner just like the direct income from an advertiser. But the truth is, it is really impossible to get an advertiser for your new blog. Any advertiser will expect a decent amount of traffic to his/her site. This is not possible with a new blog. Thus, if you have ad spaces in your blog waiting for an advertiser to contact you, I am sure it will remain the same through out.

What should I do to fill my Ad spaces? One simple solution. You need to check out Adgitize. Though I have no personal experience of this site, I feel this site will for sure fill your ad spaces with ads. They accept all the blogs except one with jokes and articles. The earnings here is pretty confusing because they say they give you points and that points can be converted into cash. I will be able to get a clear view only after I join this site. How ever, you may visit the FAQ page of their site for better understanding.

There is one good thing about this site that I can guarantee you. I am sure that they will not ban your account saying fraudulent clicks because, that has been the main consideration for them to launch their site. I feel this will be a very good alternative for all bloggers who want to fill their vacant ad spaces and may be it will add some cash if you have some traffic. The only ad slots that the publisher should provide for the advertiser is 468x60 and 125x125.

Other major advantage of this site is it offers a very low payout that is a minimum payout of 10$ through PayPal. So, it is quite easy if you find the technique to earn with this site. I also heard that they pay for blog page views and then even for each article you write in your blog. That's a pretty good news for all the newbies. Though I am not clear about this site at present, I will try to crack a secret way of earning with this site, like the one with LinkWorth through LinkWords. (Let me know the secret to earn with LinkWorth). So, please do check my blog for later post about this site. Hope all new bloggers make money out of this site too!!

Add Stripe Ad in Blogger

What is Stripe Ad?
Some call it Stripe Ad and some say it Stript Ad. Let the people call what ever they want. Our aim is simply to know, what that is and is it useful to our blog? The answer to this question would be yes!!! You can convey some important messages to your visitors through this Stripe Ad. Stripe ad is a strip of highlighted ad-space that appears below or above the browser’s web page. You can take a look at the Stripe Ad below for better understanding:
This Stripe Ad is mostly used to display the number of FeedBurner subscribers and hence, is useful to increase the number of subscribers. How to add this Stripe Ad to your blog? This post features the answer to that question.

Follow these simple steps to add it to your blog:
1. Login to your blogger account. Navigate to "Layout>>Edit HTML" from your dashboard. As always, make a back up of your template before doing any change. For this, click the "Download template" that appears on the top of the page and save your template.
2. Download this text document: Text Document One. Now, copy the code in "Text Document One" and paste it right above this code:
]]><b:skin>
3. Next, Download this text document: Text Document Two. Now, copy the code in " Text Document Two" and paste it right above this code:
</head>
4. Find for the following piece of code in your template:</body> I
t is found at the end of the template. Now, place the following piece of code above it.
<div id='mta_bar'>
<div id='left_bar'><span class='left'><a href='http://feeds.feedburner.com/yourblogfeed' target='_blank'>More than 300 have subcribed in readers, have you?</a></span></div>
<span class='right' onmouseout='self.status=''' onmouseover='self.status='yourblog.blogspot.com';return true;'> <img align='absmiddle' border='0' onClick='closeTopAds();return false;' src='http://img6.imageshack.us/img6/5207/closethumb1.png?imgmax=800' style='cursor:hand;cursor:pointer;'/></span></div>
5. Change the one's that are highlighted in green with your blog feed and names respectively. That's all. Save your template and check out the result.
[netinsert=0.0.1.11.14.1]