
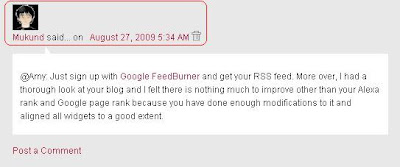
It's been quite long since I made a post in this blog. I had a lot of problems with my net connection(still not fixed) and modem. Still, I found some time today, to post about a new feature introduced by blogger, that is, avatars on blogger comments. Blogger is introducing new features daily on account of its 10th birthday celebration. Every blogger wanted to display avatars like the ones, that showed in word press and this dream has come true now. I have personally tried this feature and you may take a look at the snapshot of the feature installed in my blog below.
 This feature displays only users who post comments with Blogger/Google account. But, if you post a comment with "Name /URL" you will not have any image displayed. However, if you post a comment using Wordpress or OpenID or LiveJournal or Typepad or AIM, the favicon of the respective sites will be displayed. I hope the blogger team improves this feature and may be, they can join hands with Gravatar too. Let us get to our work of installing this feature in our blog.
If you are using a default blogger template, then you should navigate to "Settings>>Comments" from the Dashboard and enable the option "Show profile images on comment". It is that simple!! You will find the avatars displayed in your blog. But, what if you have a customized template like mine?? Simply follow the steps below to get the featured installed in your blog.
1. Navigate to "Layout>>Edit HTML" from your dashboard. Make a back up of your template before you do any changes in the template.
2. Expand your template, that is, make sure that you have a tick mark in that "Expand Widget Template". Now, do a search using "CTRL+F" for the following line:
<dl expr:class='data:post.avatarIndentClass' id='comments-block'>
Note: If you could not find the above code, the search for the following line:<dl id='comments-block'>
3. Now, replace that piece of line with the following code:<dl expr:class='data:post.avatarIndentClass' id='comments-block'>
4. Next, search for this piece of code:<a expr:name='data:comment.anchorName'/>
5. Replace all the occurrences of the above code(code in step 4) with the following code:
<b:if cond='data:comment.favicon'>
<a expr:name='data:comment.anchorName'/>
<b:if cond='data:blog.enabledCommentProfileImages'>
<div expr:class='data:comment.avatarContainerClass'>
<data:comment.authorAvatarImage/>
</div>
</b:if>
You may place a default avatar for those who do not have profile picture. In order to do this, place the following piece of code above the line <img expr:src='data:comment.favicon' height='16px' style='margin-bottom:-2px;' width='16px'/>
</b:if><a expr:name='data:comment.anchorName'/>
<b:if cond='data:blog.enabledCommentProfileImages'>
<div expr:class='data:comment.avatarContainerClass'>
<data:comment.authorAvatarImage/>
</div>
</b:if>
]]></b:skin>.avatar-image-container{background:url(http://alturl.com/xbwk); width:35px;height:35px; }
.avatar-image-container img { border:none;}
Finally, you need to save your template. Now, check out your blog with blogger avatar feature installed in it!! Comments are always welcome!! See you soon in my next post!!.avatar-image-container img { border:none;}

