Why isn't my blog getting any comments?

Few days back, I had a chat with a newbie. He asked me "Why is that, your blog receives comment but, I don't receive any on my blog?" I have tried to answer this question on this post. I personally get excited when I see comments on my blog appreciating for my work. I'm sure it should be the same for many  people around the blogosphere as well. I have listed few points in this post which I feel stands as an obstacle to receive comments.

1. POOR CONTENT
Its a pretty common mistake that every newbie makes when he/she starts a blog. Their aim is to make money and they want to do it overnight. They copy and paste content from other websites. It is important to note that the content which you copied has already been indexed by Google and your new blog will nowhere stand with the blog that's already well established. So, it is very important to generate your own articles because "CONTENT IS KING".

Secondly, it is important to make your content precise. Be clean and clear with what you say. Don't make the post too lengthy unless it is required. Use bulletins or number the points, wherever required. Highlight the keywords on your post. I would suggest every one to add a bit of humor at places in your post and to share your personal experiences. Try it yourself and see the result, because it works well on my blog and probloggers,like Darren Rowse, too suggest the same.

2. LOW TRAFFIC
The second major constraint would be traffic. I have posted enough articles on increasing traffic to our blogs. So, I suggest you to have a glance at the previous entries on my blog - 
Article 1: How To Increase Traffic To My Blog?
Article 2: Improve Traffic To Your Blog.
Article 3: Increase Traffic To Your Blog With Meta Tag and SEO.
Article 4: Improve Traffic To Your Blog With Social Communities.
Having read these articles, you should have an idea where you are weak at. Optimize your site or methodology and start increasing the traffic to your blog. Apart from those, I suggest you to take part in forums/discussions related to your niche and leave your links there. It works very well, especially for blogs related to my niche (blogger tutorials, hacks, blogger widgets).

3. POOR INTERACTION
The most important factor which you leads to loss of comments and readers would be your interaction with your blog readers, fellow bloggers , forum members and other similar stuff. When some one comments on your blog, make sure you reply to their comment. Ask them to be more expressive and show some gratitude towards them. If you definitely want to make an impact, then I suggest you visit their blog and leave a comment there. This will definitely fetch more comments than what your blog is currently receiving. Also, use the social media to the best extent possible. Would stress this on my next post. Make sure you subscribe to my blog so that, you don't miss the next editions.

4. LACK OF COMMENT PROVOKING QUESTIONS/CONTENT
This is something related to the first point - content. Write on topics that would provoke more comments rather than writing some history about the topic on your article. It is advisable to write every post with a related question that would provoke users to comment on them. Secondly, ask for comments. For example, say your blog is dofollow (read more about dofollow blogs here: How To Make Your Blogger Blog DoFollow?), you may add a final tag on your blog saying - "We are a DoFollow blog. So, express your views about this post to generate a back-link for your blog".

5. LACK OF INCENTIVES & COMPLEX COMMENT PROCESS
If your blog is making good traffic and you generate a good revenue. Still, you don't receive comments. Then, you may run a contest which will temporarily increase the comments on your blog. May be, this will fetch more loyal readers to comment on your blog. Finally, make your comment process simple. Don't ask people for a login and stuff. You can enable comment moderation to prevent spam. So, stop asking people to login for commenting. Most important, make the comment section visible (USE COMMENT FORMS), not like my blog. I have a problem with the comment form, so I'm still stuck with this pop up window.

I have just enlisted a few simple ideas that can generate more comments. I'm sure there are better ways too. So, if you have any of them in your mind, please share it with our readers via comments. SEE!!! THIS IS HOW YOU SHOULD GENERATE COMMENTS:)

Add Image Captions On Hover With CSS3

I'm currently trying out few cool effects with CSS3. You might check out my entry which involves making rounded corners with CSS3 rather than the usual flat straight corners. Here, in this post , we deal with another cool effect namely, displaying the image caption only when you hover your mouse over the image. To check this effect, just hover your mouse over the image below.

Just Another Wildlife Photo
I hope you like the hover effect on this photo. This effect is visible only in the latest browsers - Firefox, Chrome, Safari and Opera, not in Internet Explorer.

Are you excited about this trick??? If you are not able to view this effect, it simply means your browser does not support CSS3. I'm pretty sure this trick works on the following browsers - Mozilla Firefox, Chrome, Safari and Opera. Just follow these simple steps to implement this effect on your blog.

1. Login to your dashboard. Navigate to "Layout>>Edit HTML" from your dashboard. Make a back up of your template before you do any changes in the template.
2. Search for the following code in your blog. You may use "CTRL+F" to fasten your search results.
]]></b:skin>
3. Now, paste the following piece of code just above the line you searched in step 2.
#post-image {
}
#figure {
position:relative;
float:left;
margin:10px;
overflow:hidden;
padding: 1px;
}
#figure:hover {
-moz-box-shadow:0 0 20px rgba(0,0,0,0.75);
-webkit-box-shadow:0 0 20px rgba(0,0,0,0.75);
box-shadow:0 0 20px rgba(0,0,0,0.75);
}
#figure .caption {
position:absolute;
bottom:0;
left:0;
opacity: 0.75;
margin-bottom:-115px;
-webkit-transition: margin-bottom;
-webkit-transition-duration: 400ms;
-webkit-transition-timing-function: ease-out;
-moz-transition-property: margin-bottom;
-moz-transition-duration: 400ms;
-moz-transition-timing-function: ease-out;
-o-transition-property: margin-bottom;
-o-transition-duration: 400ms;
transition: margin-bottom;
transition-duration: 400ms;
transition-timing-function: ease-out;
}
#figure:hover .caption {
margin-bottom:0px;
}
#post-image .caption {
width:100%;
height:90px;
padding:10px;
background:#111;
color:#fff;
font-family: Arial, Helvetica, sans-serif;
}
#post-image .caption b {
text-shadow: 0px 2px 0px #000;
}
#post-image .caption {
color: #ddd;
line-height: 24px;
font-size: 14px;
text-shadow: 0px 2px 0px #000;
}
4. Save your template. That's it.

IMPLEMENTATION IN BLOGGER DRAFT/POST:
I suggest you to use Yahoo! Smush.it before you upload any photo to Picasa Web Album because your images will load faster when you smush them.  To get more details about Yahoo Smush.it, check this article - Tips and Tools To Speed Up Your Blog

Once you upload the image to Picasa Web Albums, copy and paste the URL in a temporary text file. Now, paste the following piece of code in the place where you want the image to appear in your post. That is, shift to the HTML mode in the blogger draft and paste the following piece of code.
<div id="post-image">
<div id='figure'>
<img src="URL OF IMAGE FROM PICASA"/>
<span class='caption'>
<b>YOUR IMAGE TITLE/b>
YOUR IMAGE DESCRIPTION GOES HERE
</span>
</div>
</div>
Replace "URL OF IMAGE FROM PICASA" with the actual URL of your image - the one which you temporarily saved in the text file. Also, change the appropriate text for the title and description of the image. That's all folks. Now, publish your post. You should be able to see the cool CSS effect when you hover  the mouse over the image. Share your views via comments. We love to hear from you!!!!

Making Rounded Corners With CSS3 On Blogger

CSS-Logo
Few people kept mailing me regarding the rounded corners in blogger/blogspot blogs. They wanted to show rounded corners rather than the straight edges. Since the number of mails kept increasing regarding this tutorial, I thought to make a post about them. Pretty good example to illustrate this would be consider the following boxes. Just look at the corner sections of each box.

CSS ROUNDED CORNERS EXAMPLE

CSS STRAIGHT CORNERS EXAMPLE
The former looks curved while the latter is flat. That's the trick we are going to learn in this post, that is, to add rounded corners on blogger/blogspot blogs. You may use them in displaying a note(like I do) or may be on the navigation bars or to display HTML codes withing blogger posts and so on. So, you may use them where ever you want. Remember that, this trick will  be visible only in the latest versions of Mozilla Firefox, Chrome, Safari and Opera and not in IE. Check out the browser specific attributes table below.
Enough of the stories!!! Let's implement this trick on our blogs now!!! Just, follow these simple steps.

1. Login to your dashboard. Navigate to "Layout>>Edit HTML" from your dashboard. Make a back up of your template before you do any changes in the template. 
2. Search for the following code in your blog. You may use "CTRL+F" to fasten your search results.
]]></b:skin>
3. Now, paste the corresponding piece of code just above the line you searched in step 2. Paste according to your choice; not all of them.
EXAMPLE 1 - THIS BOX WAS IMPLEMENTED USING THE FOLLOWING CODE.
.example1 {
background-color:#F1F1F1;
border:3px solid #DDD;
text-align:left;
width: 525px;
margin:15px 35px 15px 15px;
padding:5px;
-webkit-border-radius: 10px;
-moz-border-radius: 10px;
border-radius: 10px;
}
EXAMPLE 2 - THIS BOX WAS IMPLEMENTED USING THE FOLLOWING CODE.
.example2 {
background-color:#F1F1F1;
border:3px solid #DDD;
text-align:left;
width: 525px;
margin:15px 35px 15px 15px;
padding:5px;
-webkit-border-radius: 5px;
-moz-border-radius: 5px;
border-radius: 5px;
}
EXAMPLE 3 - THIS BOX WAS IMPLEMENTED USING THE FOLLOWING CODE.
.example3 {
background-color:#F1F1F1;
border:3px solid #DDD;
text-align:left;
width: 525px;
margin:15px 35px 15px 15px;
padding:5px;
-webkit-border-radius: 36px 12px;
-moz-border-radius: 36px 12px;
border-radius: 36px 12px;
}
EXAMPLE 4 - THIS BOX WAS IMPLEMENTED USING THE FOLLOWING CODE.
.example4 {
background-color:#F1F1F1;
border:3px solid #DDD;
text-align:left;
width: 525px;
margin:15px 35px 15px 15px;
padding:5px;
-webkit-border-top-left-radius: 30px;
-webkit-border-top-right-radius: 30px;
-moz-border-radius-topleft: 30px;
-moz-border-radius-topright: 30px;
border-top-left-radius: 30px;
border-top-right-radius: 30px;
}
4. Once you have pasted the code. Save the template. Now, your ready to display them in the place you want. Just use a span or div tag to use the CSS3 of your choice. That is, paste the following code any where in the template area or as a HTML/JavaScript using "Add A Gadget" option on blogger design page or within your posts.
<div class="example1">PLACE YOUR CONTENT HERE</div>
5. Now, save your code. That's it!!!

Instead of adding pictures for rounded corners, if you make use of CSS, the time to load your site will be reduced enourmously. That's the biggest advantage with this trick. You might consider reading the following articles for speeding up your blogger/blogspot blog - Article 1 : Speed Up Your Blogger Blog, Article 2 : Speed Up Your Blogspot Blog, Article 3:  Tips And Tools For Speeding Up Your Blog. Express your views about this post via comments!!!

Floating Subscribe Buttons To Blogger/Blogspot Blogs

Recently, one of my readers asked for a widget that will display the subscribe icons fixed on his blog, that is, he wanted to display the subscribe icons static as the page is scrolled to the top or to the bottom. It's pretty simple to add this widget on your blogger or blogspot blog. Just have a look at the final preview of the widget for better understanding.
I hope you are excited about the widget. Create a back up of your template before you modify your template. To do this, navigate to "Design->Edit HTML" and make a backup of your template by clicking on the "Download full template" link at the top. Once the back up is over, follow these steps carefully.

1. Search for the following of code in your template. Use "CTRL+F" to fasten your search results. 
<div id='main-wrapper'>
2. Paste the following piece of code just below the line you searched in step 1.
<div style='position: fixed; bottom: 1%; left: 1%;'>
<table border="0"><tr><td>
<a href="http://feeds.feedburner.com/YOURFEEDNAME" target="_blank"><img alt="Rss Feed Options" border="0" src="http://lh6.ggpht.com/_So-xppeH7x0/TQry4q9ls8I/AAAAAAAAAoQ/RJufyB1rm3M/s800/RSS%20Tab.gif" /></a>
</td><td>
<a href='http://feedburner.google.com/fb/a/mailverify?uri=YOURFEEDNAME&loc=en_us' target="_blank"><img alt="Subscribe Via Email Rss" border="0" src="http://lh6.ggpht.com/_So-xppeH7x0/TQry4ixB3kI/AAAAAAAAAoI/2KHpF8rasM8/s800/Email%20RSS%20Tab.gif" /></a>
</td></tr><tr><td>
<a href='YOUR FACEBOOK PROFILE URL' target="_blank"><img alt="Find Us On Facebook" border="0" src="http://lh4.ggpht.com/_So-xppeH7x0/TQry4tMjsEI/AAAAAAAAAoM/4qZB_rMPHqA/s800/Facebook%20Fan%20Tab.gif" /></a>
</td><td>
<a href='http://twitter.com/YOUR TWITTER USERNAME' target="_blank"><img alt="Follow Us On Twitter" border="0" src="http://lh6.ggpht.com/_So-xppeH7x0/TQry4gG96VI/AAAAAAAAAoU/Rm2eoCkzieI/s800/Twitter%20Follow%20Tab.gif" /></a>
</td></tr></table>
</div>
Note: You may add the above code as "Page Element" too. Just navigate to "Design->Page Elements->Add A Gadget" from blogger dashboard and choose "HTML/JavaScript" and paste the code in the window that appears and save it.
3. That's it!!! Save your template!!!

CUSTOMIZATION:

Once you add the above code, you need to make the first four changes in the code (those highlighted in green). First, change the text "YOURFEEDNAME" to the feed name of your blog. You can find this when you login to your FeedBurner Account. Next, replace "YOUR FACEBOOK PROFILE URL" with the URL of your Facebook fan page. Last but not the least, replace "YOUR TWITTER USERNAME" with the user name of your twitter profile. Make sure you save these changes!!!

I hope you like this widget. You may express your views about this widget and if you need some widget of your choice, please do post them via comments and I will try to figure out the code for them. We always love to hear from you!!!

Infolinks Review - Make Money With Infolinks

Hi friends, it's been quite long since I made a post about making money online. Though many people would be familiar with Infolinks, I just wanted to share my experience with them. To start off, you first should know what is a text link advertising? Basically, text link advertising means to advertise using the text in our blog, that is, advertiser chooses a keyword for his advertising campaign. When that keyword matches with the content on your blog, they get displayed.
HOW DO I EARN MONEY WITH INFOLINKS???

It's very simple. As I said, when the keywords match, the advertisement gets displayed. When people click on these ads, you earn for every click they make. It's pretty simple to understand. To display the ads on your blog, you need to add a small piece of code on your blog. It's very simple. Once you sign up with them, you will be asked to verify your email address. After you complete the initial setup, login to the dashboard and navigate to "Integration Guide". 

Copy the code present on the "1-minute Integration" page. Now, navigate to your "Blogger Dashboard>> Design>> Edit HTML". Search for the </body> tag in your template. Paste the code "Infolinks code" on just above the </body> tag. Basically, you can paste the code any where in between the body tags but,  I prefer placing them at the bottom because scripts placed at the end will load our site faster. Meaning to say that people will see the content first and later the ads which is the right way to optimize your site. For more details on loading your page faster on blogger, you may refer to the following articles : Article 1 - How To Speed Up Your Blogger/Blogspot Blog?, Article 2 - How To Speed Up Your Blogger/Blogspot Blog?, Article 3 - Speed Up Your Blog - Tips And Tools
 
CUSTOMIZATION:

Infolinks offer the 4 customizations namely, the ability to change the color, style of underline (dotted or double underlined), set the maximum number of links per page, category which best suits your blog. It is pretty easy to customize. Just login to your Infolinks Dashboard and navigate to "Integration Guide>>Advanced Integration Wizard". Once you reach this page, it's going to be self explanatory. 

PROS:

One main advantage with Infolinks is that you can happily run the Infolinks ad with the Google Adsense. I guarantee you that there will be no PR ban nor the cancellation of Adsense account. The other advantage would be the newly introduced related tags. You may place them below every post or below the title of your post or below the navigation bar to increase your earnings by more than 30%.

CONS:

One main drawback with Infolinks is that they don't match exactly with the content of our blog rather they match with the normal words in our blog. To illustrate this, consider the following example. I found the word "matching" that displays a link to "shaadi.com", which is completely not in match with my blog's content. This is the only drawback which I found about Infolinks.

If you know more about Infolinks, please share your view via comments. Comments are always appreciated and we always love to hear from you!!!

Common SEO Mistakes That You Should Avoid

Over the past few months, we see that there are hundreds and thousands of new bloggers evolving on the blogosphere. However, over a prolonged period, only few sustain. Why does this happen? Where do people go wrong? One simple reason could be an improper Search Engine Optimization. Rather than aiding SEO, people with or without their knowledge make the situation worse. I have enlisted few commonly made SEO mistakes that one should avoid.

CHOOSING UNRELATED URL OR TITLE
This is the most commonly made mistake by many newbies. They buy a domain name or choose one from the available blogspot domains keeping in mind to right some content say about "Making Money Online", "About Blogging" or some other stuff. But over a period of time, as they run out of content/topics, they tend to change their track and write a content which is completely not related to their title/URL. This happened to one of my fellow blogger and do you know the final result??? His blog was blacklisted on Google!!!

NEGLECTING ON-SITE SEO
There is a lot of buzz when it comes to ON-SITE SEO and OFF-SITE SEO.  The basic reason being the difficulty in understanding the two SEO's. Later, comes the problem of optimization. Though I myself have a lot of difficulties in finding the difference between the two, I would suggest you to have the following for your blog - proper TITLE TAGS for your post, INDIVIDUAL META TAGS For Your Post apart from the REGULAR META TAGS, proper links within your site - INTERNAL LINKS, ensuring that images have PROPER ALT TAGS and so on. Note: I don't stress too much on META KEYWORDS tag because, I never experienced any improvement having placed that tag on my blog.

FAILING TO RESEARCH YOUR KEYWORDS
One common fault which I encountered personally from my experience and through repeated search for SEO mistakes was to identify the potential keywords for your blog. I know it becomes a hectic process to identify the exact keywords for your blog. You might consider an SEO expert to do the job for you. If you are a blogspot user like me, the forget this point because we can't do much about it.

However, a person planning to host his/her website should consider doing a keyword research before building his/her website to know, what exactly people are searching for. With the automatic suggestions enabled on Google Toolbar or the search box, it has become a little easy to know what people usually search for in their niche. So, I would suggest you to optimize your site for those suggested keywords on Google.

FAILING TO CREATE A SITEMAP
Sitemaps are the most essential structures when comes to SEO. Every blog should posses a structured sitemap so that the search engine robots can easily distinguish those pages which are already indexed and those which need to be indexed. I will soon publish an article for creating a structured sitemap for blogspot users. However, you need to create a sitemap using Google Webmaster Tools. I assume that many would have done this essential step. If not, do it now!!!

I know many people who indexed their pages would have used "atom.xml" when they created a sitemap for their blog. Doing so will index only a maximum of 25 URLs. Use the text "atom.xml?redirect=false&start-index=1&max-results=100" to get 100 posts indexed on your blog. You can vary the number as you want. I don't know how well it works. But, I use both for my blog. You can have a look at the screen shot above to understand this better.
google-webmaster-tools-sitemap
CLICK THE PICTURE TO ENLARGE
Though there are a number of mistakes which we bloggers make, I enlisted only very few of them. However, I will be posting more about this topic in the upcoming weeks. If you know more about this stuff and you wish to share with us, you can consider writing a guest post on our blog - Guest Posting Guidelines, or just leave a comment below. We would love to hear from you!!!

Ultimate Blogging Theme For Blogger - It's Free Now!!!

Hi friends!!! I'm happy to announce that this is the 100th post on my blog "Everything About Blogging". I want to celebrate this little joy by sharing 'The $147 WP Theme - Ultimate Blogging Theme" for blogger with my readers. If you are a WP user, then I'm very sorry to tell you that the theme is not available for free. There's no other go!!! You need to download the theme for $147 from Carl Ocab's website. Anyway, blogspot users can download this template for free!!!
Money-Maker-Blogger-Template
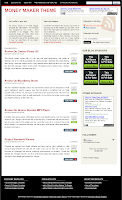
Take a look at the above screen shot to preview the template. Excited about the template? Not convinced??? Then, check out the features of this template by clicking the link below.


Still not satisfied??? May be you are tough-skinned person. Then, check out the LIVE DEMO by clicking the link below.


I hope you are convinced with the template. Apart the features you read about this template here - Features Of Ultimate Blogging Theme For Blogger, I included the basic version of newer post and older posts link below every post page. I plan to include the WordPress style comments for blogger on this template as well. The features will be updated as and when I fix them.

I have a small request to people who use this template - "Please, don't remove the credits section on this template. You may modify them as you want. Please, leave at least one link pointing to my site". Moreover, I'm happy to announce that my previous release namely, "MY WORLD BLOGGER TEMPLATE" has gained a lot of reputation around the blogosphere. I found it accepted on 'BloggerStyles' and 'btheme.info'. It's been used by "Best Blogger Templates" and the list goes on.

I don't want to waste too much of your time. So, click the link  below to download the Ultimate Blogging Theme For Blogger and have a blast!!!!

Note: Step by Step customization for the above template will be posted in the upcoming weeks. It's better you subscribe to my blog, so that you don't miss the updates regarding this template. Any way, I would love to hear your feedback about this template. Let me know what more features you want on this template. I will try to add them as well!!! So, feel free to leave your comments.

15 Excellent Free Social Bookmarking Icons

Social media has revolutionized the world of blogging. With more than hundreds of thousands of Twitter users and Facebook users, we can truly say that, we are currently in the social media age. It is very important that you connect yourself with the social media to make the best out of your blog. Displaying unique and eye catching icons play a vital role in increasing the number of visitors to connect with you on the social networking sites. So, I have compiled a small list of the attractive icons in this post. Just have a look at them!!!
ICONS SET 15 - CLICK HERE TO DOWNLOAD THE ABOVE SET
I hope you found some interesting icons in the above list. If you did not find one of your kind, then please do wait for few more days. I will publish another set of icons in the upcoming weeks. Subscribe to my blog, so that you don't miss the updates!!!

Why Guest Posting Is So Important?

Before I start with significance of guest posting, let me explain about "What Is Guest Posting?" Basically, guest posting refers to posting articles on other blogs. In other words, it means publishing articles written by you on other blogs rather than your own blog. Guest posting helps to increase the traffic to your blog, improves your writing skills, some blogs encourage Adsense Revenue Sharing - increase your Adsense earnings, increase back links which in turn increases your Google page rank and so on.

Today, I find so many guest bloggers on various blogs but still, there are people who don't encourage guest posting. If you are one among the few people who feel there are no advantages with guest posting, then you definitely need to check out the infographic which I found on "MyBlogGuest". The infographic was designed by Brandon Rhodes for MyBlogGuest, and the infographic will clearly explain the benefits of Guest Posting. Take a look at the infographic given below.

Guest Posting Infographic:
guest-posting-infographic
I feel the best way to develop a community of bloggers related to our niche and to drive more traffic is possible when we encourage guest posting on our blogs. We have already started Guest Posting on our blog. So, if any one wants to write an article for us, they can visit the following page for more details - Write For Us.

Adsense With Social Bookmarks On Top Of Every Post

Hi friends! I have been little busy with my exams!! So, it's been quite long since I made a new post but today, I had some time to share an unique widget which one of my friends asked through the comments namely, "Adsense With Social Bookmarking Buttons On Top Of Every Blogger Posts". Just have a look at the screen shot below.
Adsense With Social Bookmarks
Excited about the widget? Want to add this to your blog as well? Then, just follow the following steps. Before I proceed with the steps, I will would like to highlight the advantages of this widget. One main advantage is that you can increase your Adsense impressions along with click rates by adding this widget. Other would be the Social Bookmarking Buttons.

By adding the social bookmarking buttons at the top, you make it very easy for the reader to share your posts via the networking sites. Make sure you added the "Stylish Related Posts" on your blog as well so that the social bookmarking buttons are placed at the end of each blogger post as well. The widget includes buttons for Twitter, Del.icio.us, Digg, StumbleUpon, Technorati and Facebook.

I don't want to take much of your time by making you read too much about the widget. Let me move to the procedure of installing this widget. Create a back up of your template before you modify your template. To do this, navigate to "Design->Edit HTML" and make a backup of your template by clicking on the "Download full template" link at the top. Once the back up is over, follow these steps carefully.

1. Let's first add the CSS for the above widget. Search the for the following piece of code in your blogger template. Use "CTRL+F" to fasten your search results. 

]]></b:skin>
2. Download the following text document - CSS FOR ADSENSE WITH SOCIAL BOOKMARKS. Open the text document. Copy and paste the entire code present in it just above the line mentioned in step 1.
3. CSS customization is over. You may save your template temporarily. Now, expand your template, that is, make sure you have a tick mark in box next to "Expand Widget Template".  Next, search using "CTRL+F" for the following line.

<div class='post-body entry-content'>
4. Download the following text document - WIDGET CODE FOR ADSENSE AND SB ON TOP. Open the text document and paste the entire code present in it just below the line mentioned in step 3.
Note: Replace "YOUR ADSENSE CODE" text in the file with your Account ID. Account ID will be found in the top right corner of the Adsense Dashboard. Take a look at the screen shot below for better understanding.
5. That's it!!! Save your template and check out the post pages on your blog. If you need any other networking sites apart from the ones mentioned above, you can leave your comments below and I will help you add them as well!!! 

I hope you enjoyed this widget. Meet you soon with another interesting post/widget. Don't forget to share your views about this widget/post. We love to hear from you. 

Discount On ProBlogger Ebook For November 2010

31-days-to-better-blog
I wanted to post about the special discount on ProBlogger Ebook last week. But, I did not get enough time because I was working on "Stylish Related Posts" widget. Today, I had some time to post about the discount. I hope every one in the blogging world know about Darren Rowse and his blog "ProBlogger.net". If you don't know about him, I highly recommend you to take a look at his site - ProBlogger.

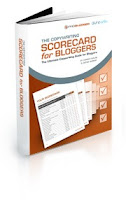
copywriting-scorecard-bloggersRight from the time I started blogging, Darren Rowse had been my first inspiration and he still continues to inspire me. I gained a lot of  useful information from his blog and I'm an active follower of his blog till date. Coming to the ebooks, I highly recommend "31 Days To Build A Better Blog" while the last release "The Copywriting Scorecard For Blogger" is also recommended. To be frank, I have a copy of the former. So, I know how useful it is but, I don't possess a copy of the second release. So, I don't know about it. With respect to the first release, I guarantee that you will find a gradual change in your blog provided you follow the tips mentioned in that book.

If you are excited to get the Ebook, then it's the right time to get one now because Darren is providing a discount for this month. You need to use the following code to avail the discount - november25. I will provide a quick walk-through on "How to avail the discount for the ProBlogger eBooks?"

1. Decide which book you want to buy.
If you are newbie, I highly recommend "31 Days To Build A Better Blog". If you have some experience in blogging, and your searching for ways to improve the quality of your blog posts, then its ideal to get your hands on "The Copywriting Scorecard For Blogger".
2. Click any of the following two links to get the respective eBooks or both, if you need both the eBooks now.
3. You will find a wepage similar to the screen shot shown below. Now, type the code "november25" on the box called discount, the one circled in red in the screen shot. 
BEFORE ENTERING THE DISCOUNT CODE
4. Click "Update Cart" after you enter the text. Now, you will get a discount of $4.99 on the first book while $7.99 on the second. Check the screen shots for better understanding.
AFTER ENTERING THE DISCOUNT CODE
So, what you waiting for??? Grab a copy of the eBooks now!!! If you need more information about the ebooks, then Click here to view more details.

New Stylish Related Posts For Blogger Blogs

Blogger-Icon
Hi friends!! Today, I present to you the "All New Stylish Related Posts Widget For Blogger/Blogspot Blogs". The basic inspiration for designing this widget was "deluxetemplates.net". The main idea behind developing this widget is to increase our Adsense revenue, pageviews (primary reason for related posts widget) and to make our blog look more professional.

If you want to look at the earlier versions of the related posts widget posted on my blog, then visit the following two links - Related Posts Type One, Related Posts Type Two. The latest version of related posts  widget comes with added features like "What's Next?" and  "Google Adsense". Take a look at the screen shot below to preview the widget.
what-next-widget-for-blogger
Are you excited with the widget shown above??? Want to add this  to your blog, then just follow the steps mentioned below. Please create a back up of your template before you install this widget. To do this, navigate to "Design->Edit HTML" and make a backup of your template clicking on the "Download full template" link at the top. Once the back up is over, follow these steps carefully.

1. Expand your template, that is, make sure you have a tick mark in box next to "Expand Widget Template". Now, search using "CTRL+F" for the following line:
<data:post.body/>
<div style='clear: both;'/>
</div>
2. Download the following text document - Code For Stylish Related Posts Widget. Open the text document and copy the entire code present in it. Paste the code just below the line you searched in step1.
Note: Replace "YOUR ADSENSE CODE" text in the file with your Account ID. Account ID will be found in the top right corner of the Adsense Dashboard. Take a look at the screen shot below for better understanding.  
Adsense-account-Id
3. Now, its time to add the CSS part for your widget. Search for the following line in your template.
]]></b:skin>
4. Copy the following code and paste it just above the line mentioned in step3.
.cps {
background:none repeat scroll 0 0 #ddd;
border-top:3px solid #000;
margin-top:5px;
padding:10px;
width:570px;
}
#end {
-moz-background-inline-policy:continuous;
background:none repeat scroll 0 0 #f9f9f9;
border-bottom:3px solid #000;
border-top:3px solid #000;
float:left;
font-family:arial;
font-size:12.2px;
margin:0 0 40px;
padding:14px 0 12px 25px;
width:565px;
}
.actions {
float:left;
margin:0 20px 0 0;
padding-left:0;
padding-top:0;
text-align:left;
width:23%;
}
.tips {
float:left;
margin:0;
padding-left:0px;
padding-top:0;
text-align:left;
width:65%;
}
#end ul.tips li {
-moz-background-inline-policy:continuous;
background:url() no-repeat scroll 0 3px transparent;
margin:0 0 9px;
padding-left:14px;
margin-left:-34px;
}
a.digg {
-moz-background-inline-policy:continuous;
background:url("http://4.bp.blogspot.com/_Zt-MFCckzsc/Sq981K22-FI/AAAAAAAACNA/qP54J_2HcMQ/s400/digg-1.png") no-repeat scroll 0 1px transparent;
padding:2px 0 2px 20px;
}
#end ul.actions li {
-moz-background-inline-policy:continuous;
background:none repeat scroll 0 0 transparent;
margin:0 0 9px;
}
#end ul li {
}
#end ul {
list-style-type:none;
}
a.delicious {
-moz-background-inline-policy:continuous;
background:url("http://3.bp.blogspot.com/_Zt-MFCckzsc/Sq98mokfzuI/AAAAAAAACM4/_L_0wKNZ2TE/s400/delicious-1.png") no-repeat scroll 0 2px transparent;
padding:2px 0 2px 20px;
}
a.subscribemini {
-moz-background-inline-policy:continuous;
background:url("http://2.bp.blogspot.com/_Zt-MFCckzsc/Sq98T8eFqGI/AAAAAAAACMw/1gwnE8qOoIQ/s400/feed.png") no-repeat scroll 0 1px transparent;
padding:2px 0 2px 20px;
}
a.comment {
-moz-background-inline-policy:continuous;
background:url("http://2.bp.blogspot.com/_Zt-MFCckzsc/Sq97-VIfenI/AAAAAAAACMo/3IkSWN0C0OU/s400/comment.gif") no-repeat scroll 0 0 transparent;
padding-left:20px;
}
a.stumble {
-moz-background-inline-policy:continuous;
background:url("http://2.bp.blogspot.com/_Zt-MFCckzsc/Sq97vV2vdYI/AAAAAAAACMg/phL4ZUZgwPA/s400/stumble.png") no-repeat scroll 0 1px transparent;
padding:2px 0 2px 20px;
}
a.twit {
-moz-background-inline-policy:continuous;
background:url("http://1.bp.blogspot.com/_Zt-MFCckzsc/SyPT-xa8c5I/AAAAAAAACtQ/UOzJVxUlFTQ/s400/twitter_16.png") no-repeat scroll 0 0 transparent;
padding-left:20px;
}
#end h3 {
color:#000000;
font-size:13px;
margin-bottom:11px;
margin-top:4px;
font-weight:bold;
}
.hidden {
display:none;
}
Note: If you wish to change the background or the border color, then change the codes highlighted in green. For any other customization regarding this widget, leave your comments below and I will try to customize them as you wish.
UPDATE 
5. Well, the reason why "Posts" did not appear was a result of a small script that we missed out in the hack. So, I'm sorry guys. To add the script, search for the following line on your blogger template.
</head>
Now, paste the following piece of code in the text document - SCRIPT FOR RELATED POSTS just above the line mentioned in step 5.
6. That's it!!! Save your template. View the widget on your post pages. 
Note: You need to view the post pages to view the widget. That is, click on any of the posts in your blog to view the final result. You cannot find them on the home page of your blog.

I hope you enjoyed this post and the widget as well!!! Please share your views about the widget via comments!!! We love to here from you. More over, you gain backlinks for your comments too since my blog is a dofollow blog:)

Speed Up Your Blog - Tips And Tools

This is my third post about "How To Speed Up Your Blog?". If you had missed the earlier versions, check out the "First Post" and "Second Post" on Speeding Up Blogger Blogs. I suggest you to have a look at the previous versions before you continue with this post because it might sound completely new, if you straight away get to this post. Here, I'm going to deal with some concepts that might sound little complicated when compared to the previous ones. However, I tried my best to keep it as simple as possible. So, webmasters can straight away continue reading this post.

I don't want to make this post too long by writing stories about the benefits which my blog gained after implementing these techniques. But, I would like to know how the following techniques benefited your blog/website. I have just explained few concepts in this post while the other techniques, like CSS Sprites and reducing DNS look ups, may be explained later in the upcoming posts on my blog.

STEP ONE : GET THE RIGHT TOOLS
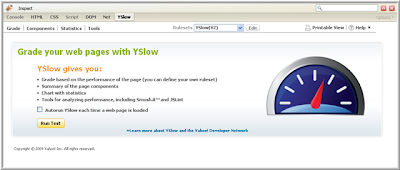
The first and foremost step that one should implement to speed up his/her blog is to get the right tools for analysis. I suggest you to download "YSlow". YSlow is the best firefox add-on as far as I know, when it comes to complete analysis of your website. It will provide grades under each category that contributes to load time of your blog.
Yslow
Another tool that would generate a detailed report about your website - Pingdom. The main benefit of Pingdom is that you don't need Firefox and the results are much easier to parse. How ever, I highly recommend you to download Firefox and get the add-on installed because YSlow is something very special, especially for webmasters.

STEP TWO : IMAGE AND JAVASCRIPT OPTIMIZATION
The most important factor that reduces the speed of your web page would be the images and Java Scripts on your blog. So, what should I do with the images? One simple method reduce the images. But, I feel images speak more than words. So, it becomes very important to add images on your posts and blogs as well. So, let's skip the simple method and get to the next level. Instead of reducing the number of images, it is better to reduce the image size. Let's take an example. Imagine that an image occupies 500kb but after compression it becomes 250kb which simply means my site will load faster. 

Next question : How to compress the images without losing the image quality as well? The answer to this question is very simple - Smush.it!!! This tool does the compression work. Just upload the image to Smush.it and later upload it to your blog. You may apply this technique to the existing images on your blog as well!!!

As far as the Java Scripts are considered, I recommend you reduce them. However, when you can't avoid their use, I recommend you place them at the end of your template. Place them right before the end of body tag. Before placing them at the end, make sure all the Java Scripts are combined into a single file. So, that you avoid the number of HTTP requests and eventually, save time in loading your site. To combine the Java Scripts, use the following tool - JMerge. Jmerge is simple tool that will combine all the Java Scripts on your blog into one single file. 

CSS-Edit-LogoSTEP THREE : CSS OPTIMIZATION
The most important optimization that is required for any blog or website is the placement of CSS and external stylesheets. The CSS and other external stylesheets should be placed above the end of head tag. This allows the browser to load the content first. Thus, the user can read the properly formatted content first while the CSS, Java Scripts and other stylesheets will load in the mean time.

One more optimization that should be made with respect to CSS would be the reduction in the code or in other words, the reduction in size. So, how do I do that? Apart from the CSS compressor explained in the previous posts, you may optimize it as shown in the example here. If you have a code that reads like the one below.
p.notice
{
font-weight: bold;
font-size: 1.33em;
}
p.another-notice 
{
font-weight: bold;
font-size: 1.33em
}
You may replace them with the following code.
p.notice,
p.another-notice
{
font-weight: bold;
font-size: 1.33em;
}
This will considerably save few bytes (though very little) which in turn contributes to a quick load time. More over, you can prove to your friend that your are CSS geek just as I did. Any how, I believe that these tools and tips will increase the speed of your site. Share your views via comments and don't forget that you get back-links (How To Increase Backlinks To My Blog?) for your comments, since my blog is a dofollow blog. (What Is A Dofollow Blog?)

How To Get Approved For BuySellAds?

Hi friends!! I'm very excited to know that my blog "Everything About Blogging | Free Premium Blogger Templates" got approved by BuySellAds. I opened my inbox today and found a mail stating that "Your Site Is Approved On BuySellAds". It's a Diwali surprise for me. To all those who do not know about BuySellAds, it is basically an Ad Agency that supports direct advertising but they accept only quality sites. So, what do I mean by quality sites?
buysellads
MINIMUM REQUIREMENTS (as mentioned on BuySellAds):
  • Greater than 100K impressions per month (for new sites, if you (or your team) have a history of creating really nice websites we will accept you)
  • Your website must be live, finished, and have fresh content.
  • Your website must contain custom domain (eg. www.abc.com), we don't accept sub domains (eg. www.abc.blogspot.com)
  • No porn, anything illegal, or containing even remotely "questionable" content.
  • If you have a ton of untargeted ads on your site already, we're not going to approve you.
  • Getting denied does not mean that we will not approve you at a future date.
The most important points to consider in the criteria listed are the second and the last point. The first one is a keyhole to the newbies and the last one gives you space to submit your site again and again. Do you think I got my site approved on the first attempt? Definitely not!!!  I got it approved at the fifth attempt. So, what do they expect from you, in other words, what should your blog/site possess to get approved by BuySellAds?

As far as I know, you need to maintain a site design that is simple, professional and clean. If you mess up with the widgets and alignment, I'm sure they will not approve you. Make sure that you get your Alexa Rank below 200K, less than 100K would definitely help (Learn more about increasing your Alexa Rank here - 5 Methods To Increase Your Alexa Rank). The next important criteria is that you need to have enough Yahoo! Inbound Links (or) Google PR which is measure of Google backlinks (Learn more about increasing backlinks here - How To Increase Backlinks To My Blog?). 

You should also make sure that your site has got a compete rank(optional). The last but not the least, you should have a minimum of  10,000 pageviews to get the approval. This has become mandatory for new sites because they ask you to add them as a temporary user to access your Google Analytics account and they personally verify whether you satisfy their minimum requirements or not.

I cannot guarantee that your site will be accepted if you satisfy the above mentioned conditions. How ever, I'm pretty sure your blog/site should possess the above criteria. In short, the conditions are necessary but not sufficient. However, if you wish to advertise on my site, then visit the following page for more details - Details About Premium Blogger Templates.

Upcoming Premium Blogger Template - Money Maker

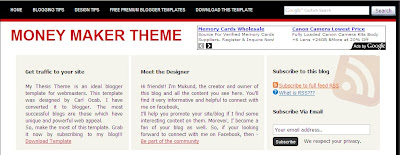
I'm very happy to announce that I'm about to complete an exclusive premium blogger template namely, "Money Maker" blogger template. This premium blogger template is very similar to the "Ultimate Blogging Theme" run on Wordpress. So, we can call it as "Ultimate Blogging Theme For Blogger". We have a little twist in releasing this template. So, read the complete post and don't forget to read the criteria at the end. Take a look at the screen shot below posted to the right.
CLICK TO ENLARGE

I'm pretty sure people running their blogs currently on Wordpress will be jealous of blogs run on blogger if this template comes into existence. I mentioned this statement because the Wordpress version of this template is priced at $147 whereas, it's gonna be absolutely free for blogger blogs. Excited with the news??? Hold on!!! There are few constraints that must be satisfied before I release the blogger version of this template for free. Before I post the criteria for the free release, just have a look at the features of this template.  

FEATURES:
1. MAXIMIZE YOUR ADSENSE EARNINGS:
The name of the template (Money Maker) clearly explains about this feature. The template includes ad units placed at four effective locations just to maximize your Adsense click rates. The various ad locations include but are not limited to HEADER AD (468x60), ADS AT THE END OF THE POSTS (468x60 or 300x250 or 250x250), ADS AT THE END OF THE COMMENTS (468x60 or 300x250 or 250x250), SIDEBAR ADS (125x125).
CLICK ON THE PICTURE TO ENLARGE
2. BEAUTIFUL DESIGNED GREET BOX AND SUBSCRIPTION BOX:
The template comes with a beautifully designed greet box and subscription box which you will not find in most of the premium templates. I guarantee that about 95% of the premium blogger templates do not include this feature. 
CLICK ON THE PICTURE TO ENLARGE
3. UNIQUE DISPLAY OF POST-LABELS:
Most of the blogger templates display the post labels with the name labels to the right under the post title. But, this template is pretty unique. It will show the post-labels to the right of the post title. Take a look at the screen shot below for better understanding.
CLICK ON THE PICTURE TO ENLARGE
4. AUTOMATIC READ MORE HACK WITH READY TWEET BUTTON:
The template comes with an automatic read more hack installed for all the posts. It is very important to note that the text alignment for each post on the homepage is justified. This is not the case with the earlier versions of Automatic Read More Hack for blogs on blogger. The template includes a ready to use tweet/re-tweet button. So, it is pretty easy to add more social bookmarking buttons provided you know where the code for tweet button is located in the template.
CLICK ON THE PICTURE TO ENLARGE
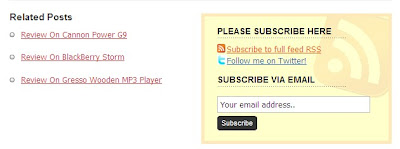
5. UNIQUE RELATED POSTS WITH SUBSCRIPTION BOX AT END OF EACH POST:
The template comes with an unique related post widget similar to the widgets seen on Wordpress blogs. It  includes an email subscription box adjacent to the related posts widget making the overall look of the blog more professional.
CLICK ON THE PICTURE TO ENLARGE
6. FLEXIBLE THREE COLUMN FOOTER:
The template comes with a matching three column footer. It is very flexible such that it can accommodate a leader board ad unit (728x90) at the top apart from the individually allotted columns for various widgets.
CLICK ON THE PICTURE TO ENLARGE
The template includes more features apart from the ones mentioned above. I'm currently working on few of them, which includes "Wordpress Like Comments Section" and "Stylish Newer Post and Older Posts" link, in other words, a stylish page navigation for the template. Moreover, the template is highly Search Engine Optimized (SEO) and it provides a lot of space for further customizations which will be updated after the release of the template.
CRITERIA: I plan to release the blogger version of "Ultimate Blogging Theme" for free provided, I get at least 50 tweets/re-tweets and minimum of 50 comments for this post. Please note that, this criteria (minimum of 50 tweets and 50 comments) is fixed only to know, whether people are really interested with this template or not. So, if you need this template, leave a comment below.
The template will be registered under "MyFreeCopyrights" and will also be registered under Creative Common License in a few days. Once, it is registered, I will release the link (LIVE DEMO) for the blogger  version of this template. Because, people can easily decode the HTML for the templates released on blogger/blogspot domains.

So, you people are gonna be the judges for this template. Should this template become a $147 give away??? Or do you think, this should be released for some price??? If you feel it is worth nothing, you can post even that. Because, I would be happy to use this template for my very own blog:) So, it's up to guys!!! Start commenting!!!

LIVE DEMO RELEASED: MONEY MAKER BLOGGER TEMPLATE

UPDATE : TEMPLATE RELEASED - CLICK HERE
[netinsert=0.0.1.11.14.1]