The New Auto "alt" and "title" Tag Generator For Images - Best Image SEO Solution For Blogger

image-seo-script-blogger
I usually find comments around the web that say blogs run on blogger/blogspot are not optimized for search engines just because we need to manually add alt and title tags for each image you post on your blog. Isn't it kinda of irritating to add stuffs manually every time you post them??? Well, not any more! I found a script that'll automatically add the alt and title tag for the images that you post on your blog.

WHY THIS SCRIPT?
I recommend you to read the following article - 3 Tips To Make Images SEO Friendly On Blogger. I guess you understood the importance of alt and title tags on your blog. I can assure you that this script will rank your blog better, than before, on search engines. What's little more interesting about this script is that, it'll add alt and title tags for all the images - be it the one that your going to post or the ones that already exist in your blog.

HOW IT WORKS?
The script just uses the name of your image to auto generate the "alt" and "title" tags. In other words, the name of your image stands as the text for your alt and title tag. It picks up the next character after the last instance of "/" from the image URL as the starting letter of your alt or title tag. The ending character will be recognized using the last instance of "." from your image URL.

For example, you upload an image "super-script.jpg" using post editor. You'll find the image URL as "http://1.bp.blogspot.com/....../super-script.jpg". When you publish the article and go check out the source code of the same (source code of the image), you'll find the following tags in it - alt="super-script" and title="super-script". Isn't it cool? No more manual addition of tags! Just a proper name for the images and the script will do the rest! 

     Just keep these two things in your mind before you name an image.
     1. Dont' use / or . character when you name your images.
      2. Use a name that best explains the image for better SEO.

INSTALLING THE SCRIPT
1. Navigate to "Design >> Edit HTML" and make a backup of your template by clicking on the "Download full template" link at the top of the page. Once the back up is over, search for the following piece of code.
</body> 
2. Download this text document - IMAGE SEO SCRIPT FOR BLOGGER and paste the code present in it just above the line mentioned in step 1.
3. Save your template. That's it! Very simple! Isn't it?
Note: Usage of above script is subject to copyrights. Do not make any changes to the above code. If you do so, it'll attract a violation of copyrights and you'll be filed under DMCA. For webmasters, you can modify the script provided you give a credit to this article. It's my kind request to you guys!

The above script is found to work on all major browsers - IE, Firefox, Opera, Safari and Chrome. WordPress users can follow the same instructions to get this script working on their blogs as well. I'll soon post another script that makes your external links open on a new tab with an automatic "nofollow" tag attached to it - just to ensure that your link juice isn't spread to other blogs. I suggest you to subscribe to my blog so that, you don't miss it! Share your opinions about the magic script via comments!
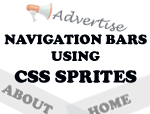
Subscription Box Using Tooltip For Blogger

tooltip-tutorial
In my previous article about HTML Tooltip, I mentioned about "callingallgeeks.org". If you missed the article, then check out - Tooltip For Blogger Using jQuery & CSS. Harsh on his blog "callingallgeeks.org" used this effect to display the Tooltip over the share icons - RSS, Twitter, Facebook. You may experience the Tooltip effect on Yahoo! Cricket too - hover your mouse over the player names.
Subscribe-Tooltip-Demo
In this article, I'll just share the code which will create the Tooltip effect when you hover your mouse over the subscribe icons. If you need the code for the entire subscription box, well install the widget that appears on this article first - Tutorial to add the subscription box. Later, use the code that appears in this post to realize a proper subscription box. So, let's get started.

1. Navigate to "Design >> Edit HTML" and make a backup of your template by clicking on the "Download full template" link at the top of the page. Once the back up is over, search for the following piece of code.
]]></b:skin>
2. Paste the following piece of code just above the line mentioned in step 1.
#dhtmltooltip {
background-color: #484848;
background-image: url("https://lh4.googleusercontent.com/-5SQOgS6ij1A/TiE0rmXU9gI/AAAAAAAABUQ/KwaaLmoeP4c/s800/mouse-hover-bg.png");
background-repeat: repeat-x;
border: 1px solid #AAAAAA;
color: #F2F2F2;
font-size: 12px;
font-weight: bold;
height: 27px;
line-height: 20px;
padding: 10px 20px;
position: absolute;
text-align: center;
z-index: 100;
visibility:hidden;
}
#dhtmlpointer{
position: absolute;
z-index: 101;
visibility:hidden;
}
.social-subscribe ul {
list-style: none outside none;
}
.social-subscribe li {
float: left;
}
.social-subscribe li a.rss {
background: url("https://lh3.googleusercontent.com/-HTQ6s6GmBLg/TiE0rFVVQsI/AAAAAAAABUI/pWdIwOUEuA8/s800/icon-rss.gif") no-repeat scroll 0 0 transparent;
padding: 0 2px 0 0;
}
.social-subscribe li a {
display: inline-block;
height: 52px;
width: 57px;
}
.social-subscribe li a.facebook {
background: url("https://lh6.googleusercontent.com/-tkdaWLGbFQI/TiE0rPLM1QI/AAAAAAAABUE/DG4wcOs1xwY/s800/icon-facebook.gif") no-repeat scroll 0 0 transparent;
padding: 0 2px 0 0;
}
.social-subscribe li a {
display: inline-block;
height: 52px;
width: 57px;
}
.social-subscribe li a.twitter {
background: url("https://lh4.googleusercontent.com/-bIK53VccMss/TiE0ra0pGKI/AAAAAAAABUM/NewFfwHhH7U/s800/icon-twitter.gif") no-repeat scroll 0 0 transparent;
padding: 0 2px 0 0;
}
.social-subscribe li a {
display: inline-block;
height: 52px;
width: 57px;
}
3. Save your template and navigate to "Design >> Page Elements >> Add a Gadget" and choose "HTML/Javascript".
4. Download the following text document - HTML FOR TOOLTIP EFFECT ON SUBSCRIBE ICONS. Just copy the code present in the text document and paste it on the window that pops up. Make the following customizations before you save the widget.
  1. Replace FEEDNAME with the name of your feed obtained from FeedBuner. Your feed name is nothing but your feed title. So, open your FeedBurner account and check out the Feed details. There are two instances where you need to replace FEEDNAME with your feed name.
  2. Replace TWITTER-USERNAME with your twitter user name. There are two instances where you need to replace the same.
  3. Replace FAN-PAGE-URL with your facebook fan page URL. Similar to the previous two customizations, this replacement should also be made at two instances.
5. Once the above customizations are made, just save the widget and your done!

In case you find the customization part a bit difficult to understand, then take a look at the example coding which I used on my demo blog by downloading this text document - SAMPLE CODE. This effect was tested on all major browsers - Firefox, IE, Safari, Chrome, Opera. If you have some unique ideas to illustrate this same effect in a different manner, then share it via comments! Would love to hear from the CSS and Jquery geeks out there!

Cross-Browser Gradient Effect Using CSS

cross-browser-css-gradient
Many themes, be it blogger or WP, make use of gradient effects. About 95% of them, use an image to achieve the gradient effect. However, the same can be realized with CSS. In this tutorial, we'll let you know how to achieve this gradient effect on all major browsers - IE, Firefox 3.6+, Safari, Chrome and Opera. So, let's get started...

If you are a WordPress user, then you need to add the following CSS mentioned in the tutorial to your ".css file" and upload the same to your server. If you are blogspot user, then you need to add the following CSS codes just above the following code in your template - ]]></b:skin>

FOR WEBKIT BROWSERS
To realize the gradient effect on webkit browsers like Safari, Chrome, etc... just include the following line in the CSS part of your theme.
background: -webkit-gradient(linear, left top, left bottom, from(#ccc), to(#000));
FOR FIREFOX 3.6+
To visualize the gradient effect on Firefox, add the following piece of code in the CSS part of your template.
background: -moz-linear-gradient(top, #ccc, #000);
FOR INTERNET EXPLORER
Use the following code to enable the gradient effect on IE.
filter: progid:DXImageTransform.Microsoft.gradient(startColorstr='#cccccc', endColorstr='#000000');
Note: You may change the color codes highlighted in green and blue as per your choice. The codes which are highlighted in green represent the starting color in the gradient effect while the code highlighted in blue represents the ending color. I suggest you to take a look at the following link to easily pick the color code of your choice - HTML Color Codes Generator.

To see the effect on all the browsers, simply combine the above mentioned codes. So, you'll have a browser compatible CSS gradient effect. However, I strongly suggest you to provide a simple color as a background in case the user is using a browser that does not support CSS3. Hence, your final code should be similar to the one shown below.
background: #ccc; /* for non-css3 browsers */
filter: progid:DXImageTransform.Microsoft.gradient(startColorstr='#cccccc', endColorstr='#000000'); /* for IE */
background: -webkit-gradient(linear, left top, left bottom, from(#ccc), to(#000)); /* for webkit browsers */
background: -moz-linear-gradient(top, #ccc, #000); /* for firefox 3.6+ */
If you feel the above the post is too complex to understand, then I suggest you to visit this link -  Ultimate CSS Gradient Generator and choose the gradient effect of your choice for different colors. Once you make a choice at the left, you can preview the same at the right. Moreover, the required CSS to be inserted in your theme will also be generated. So, just copy that & insert it in your template. That's it!

Why gradient effect using CSS? Simple! No external HTTP requests - increases the loading speed of your web page on all browsers... I recommend you to read the following articles to know more about page speed of your blog - Speed Up Your Blog - Tips And Tools, How To Speed Up Your Blogger Blog? and Using CSS Sprites On Blogger - Introduction. Share your opinions about the article via comments!

Tooltip For Blogger Using jQuery & CSS

tooltip-for-blogger
Recently, I came across an interesting tutorial about displaying Tooltip using jQuery. You may refer to "callingallgeeks.org - subscription box" to see an example about the same. In this article, we'll be learning about adding a simple HTML Tooltip to our blogger posts/template. You may check out the live demo by hovering your mouse over the links below.


Cool trick. Isn't it? Well, if your answer to the question is "Yes", then consider reading the rest of the article to get this hack installed on your blog as well. I have used the standard jQuery file that's hosted by Google in my tutorial. If you wish to host it on your blog ( for WordPress Users), then download the latest JavaScript file from jQuery website. Now, let's move to the tutorial.

1. Navigate to "Design >> Edit HTML" and make a backup of your template by clicking on the "Download full template" link at the top of the page. Once the back up is over, search for the following piece of code.
]]></b:skin>
2. Download the following text document (includes the CSS and JavaScript to run the widget) - CODE FOR TOOLTIP WIDGET. Replace the above code with the code present in the text document.
3. Save your template. That's it. 

To make the Tooltip actually work, you need to define an anchor tag and span tag in your post or anywhere in your template (within the body tags) with the following classes ( tip_trigger and tip) present in it. The coding should look similar to the one shown below.
<a href="YOUR LINK HERE" class="tip_trigger">
YOUR LINK TITLE
<span class="tip">
YOUR TEXT HERE
</span></a>
That's it! Replace "YOUR LINK TITLE" with the title of your link, "YOUR LINK HERE" with the URL you wish to point to and "YOUR TEXT  HERE" with the description you want to show the visitor on mouse hover. You need to repeat the same procedure to have multiple Tooltips on your blog. As far as the browser compatibility is concerned, the Tooltip hack is supported by the following major web browsers - Firefox, IE, Safari, Chrome, Opera, etc...

I hope you enjoyed this hack. Well, I'm just learning the basics about jQuery and CSS now. So, if there are any jQuery geeks out there, then I'm open to your suggestions. Share your opinions via comments. I'll soon post the coding for the subscription box using Tooltip similar to the one on "callingallgeeks".

Blogging - The Latest Business Marketing Tool

blog-marketing-tool
Blog happens to be an internet journal. These are employed like brief form of internet logs, meaning a listing of writings over the web. Generally, a blog could be a collection of current information, content pieces, personalized journal pages, photos, video clip, business details, item to be marketed, their promotion, etc... Well, the listing really is limitless.

Blogging, the latest buzzword within the business enterprise, is ultimately given a serious attention because of its use, works out well as an efficient marketing tool and as a publicity instrument. Right from the experts in the field of blogging to SOHOs, "how to blog" is the question asked by all with regard to business marketing.

Among the most famous blogs which happen to be business blogs, use their reach in order to market their goods plus establish a business enterprise. Right from the comfort of building towards the ease of connecting with achievable clients, blogging offers a fresh technique for entrepreneurs to accomplish the best promotional approach with regard to their product, so the company should learn all about "how to blog". So, in this article we'll be targeting the business elements of a blog. Moreover, we'll provide you with  tips that can be effectively utilized to advertise various solutions together along with your business.

1. Low-cost online marketing technique: Starting a blogging account over the Blogger happens to be absolutely free. Nevertheless, you should host your personal blog despite the fact that it utilizes a totally free blogging software program. Enrolling your personal domain name plus getting the blog upon your personal server area provides you with effective exposure within the search engine ratings. This suggestion is applicable to all - not specifically for newbies alone.

2. Develop your item or perhaps company image: It is possible to develop your company image by making use of your own blog. Individuals looking at your blog might be intrigued to be aware of exactly what you do and that is the reason, you should include your business button towards your blog. Publish the item information or perhaps submit an infomercial that will be beneficial, not for newbie individual only but for everyone, to reap benefits.

3. Keep a consumer dialog: Blogs need to be interactive, meaning that the visitors should be able to connect with you for your published remarks, and queries. It should facilitate advanced level queries, in certain cases.

4. Obtaining new clients: Several readers might suggest many others to read your blog providing you with new business opportunities. This will be considered useful, not for newbie individual only but for everyone, and will provide them with new clients.

5. Interaction along with other related businesses: Every business operates on inner and exterior networks. Checking up on related blogs, in addition to their posts can, provide you with a way to discuss their articles or blog posts whilst giving importance to these delivering your understanding about the subject. A viewer considering their blog might click-through towards your blog in order to study more. These types of click-through tend to be totally free and produce increased traffic towards the blog.

6. Excellent publicity outlet: In the event, your business suffers from some undesirable pressure, then your blog could be your probability to display a nice and clean standing. It is possible to take a position or perhaps question a public viewpoint.

7. Immediate Feedback: The additional essential feature of blogging is that it allows you to get immediate feedback plus evaluations upon your goods or provide you with suggestions concerning how to make required modifications. This quick, immediate feedback can help you tweak plus react better towards the sector you are hoping to aim. Yet again, keep in mind your followers tend to be your best lead.

Blogs, nowadays, have grown to be a fundamental element of any business. In case you examine best organizations, they have launched a blog to specifically connect with their potential audience. Furthermore, it is the convenient way of educating clients that attract most companies and entrepreneurs. Thus, do not wait and write a blog today to reap the maximum benefits offered by the web.

Shoutmeloud Thesis Theme Customization - Part 6

Thesis-Theme-Customization
I would like to start the tutorial straight away because it's not going to be a cake walk unless your a webmaster like me (just kidding). I guess this was the most awaited customization "SML Featured Content Slider" that every SML blogger theme user wanted to have! I tried my best to match the one on SML however, it's little different from the ideal one! Check out the live demo below...

SHOUTMELOUD FEATURED CONTENT SLIDER - LIVE DEMO

Before I start off, I would like to tell you that this slider will auto slide until an user clicks on the content (the page navigation in the slider). It works with only one script which implies that it's gonna load faster than other sliders. Well, enough of stories... Let's get started!

1. Navigate to "Design>>Edit HTML" and make a backup of your template by clicking on the "Download full template" link at the top of the page. Once the back up is over, search for the following piece of code.
]]></b:skin>
2. Download the following text document (includes the CSS and JavaScript to run the widget) - CODE FOR SML FEATURED CONTENT SLIDER. Replace the above code with the code present in the text document.
3. Next, search for the following piece of code on your template.
<div id='main-wrapper'>
4. Place the following code just below the line mentioned at step 3.
<div class='sliderwrapper' id='slider1'>

<div class='contentdiv'>
<a href='YOUR POST URL'><h1>YOUR POST TITLE</h1></a>
Content 1 Here.
</div>

<div class='contentdiv'>
<a href='YOUR POST URL'><h1>YOUR POST TITLE</h1></a>
Content 2 Here.
</div>

<div class='contentdiv'>
<a href='YOUR POST URL'><h1>YOUR POST TITLE</h1></a>
Content 3 Here.
</div>

<div class='contentdiv'>
<a href='YOUR POST URL'><h1>YOUR POST TITLE</h1></a>
Content 4 Here.
</div>

<div class='contentdiv'>
<a href='YOUR POST URL'><h1>YOUR POST TITLE</h1></a>
Content 5 Here.
</div>

</div>
<div class='pagination' id='paginate-slider1'>
</div>
<script type='text/javascript'>
featuredcontentslider.init({
id: &quot;slider1&quot;, //id of main slider DIV
contentsource: [&quot;inline&quot;, &quot;&quot;], //Valid values: [&quot;inline&quot;, &quot;&quot;] or [&quot;ajax&quot;, &quot;path_to_file&quot;]
toc: &quot;#increment&quot;, //Valid values: &quot;#increment&quot;, &quot;markup&quot;, [&quot;label1&quot;, &quot;label2&quot;, etc]
nextprev: [&quot;Previous&quot;, &quot;Next&quot;], //labels for &quot;prev&quot; and &quot;next&quot; links. Set to &quot;&quot; to hide.
enablefade: [true, 0.2], //[true/false, fadedegree]
autorotate: [true, 3000], //[true/false, pausetime]
onChange: function(previndex, curindex){ //event handler fired whenever script changes slide
//previndex holds index of last slide viewed b4 current (1=1st slide, 2nd=2nd etc)
//curindex holds index of currently shown slide (1=1st slide, 2nd=2nd etc)
}
})
</script>
5. Save the template and your done!!!

Simple! Isn't it? Well, if you think it is, may be your wrong. The actual tutorial starts here! First, write your post title in between the "H1" tags (those highlighted in green). In other words, replace "YOUR POST TITLE" with your post title and don't forget to link it. Replace "YOUR POST URL" with the link to your post. 

Secondly, you need to replace "Content 1 Here" with the snippet available on your blog. Well, the coding will display anything that's under the heaven in the space that's provided for it. Well, coming back to business, it's better if you could find the coding from your "Blogger Post Editor" for every snippet for the featured content. 

Say, for example (from the demo blog), I wish to add "Review On Cannon Power G9" as a featured content on my slider. The first thing I should do is, navigate to "Posting >> Edit Posts" and select the "Edit" link of the corresponding post. In my case, I should select the "Edit" link for "Review On Cannon Power G9". Now, shift the tab from the "Compose" mode to 'Edit HTML" mode. 

Get the coding for the first paragraph of your article with the styles you chose to display the original post. That's it! Paste it instead of "Content 1 Here" in the coding mentioned at step 4. But, please ensure that your "div" or "span" tags are properly closed before you paste the coding and save them!

You may repeat the above mentioned steps for replacing the other contents in the coding mentioned at step 4. Little confused??? Well, just have a look at the example coding given below. The final coding should look something like the one mentioned in this text document - Example Code For SML Featured Content Slider.

I hope the tutorial was an easy fix! If you have any difficulties in getting the slider work or find any bugs, then please let me know via comments! I'll try to fix them! Your opinions about the widget are also welcome! So, share them too!
[netinsert=0.0.1.11.14.1]