Ultimate Blogging Theme For Blogger - It's Free Now!!!

Hi friends!!! I'm happy to announce that this is the 100th post on my blog "Everything About Blogging". I want to celebrate this little joy by sharing 'The $147 WP Theme - Ultimate Blogging Theme" for blogger with my readers. If you are a WP user, then I'm very sorry to tell you that the theme is not available for free. There's no other go!!! You need to download the theme for $147 from Carl Ocab's website. Anyway, blogspot users can download this template for free!!!
Money-Maker-Blogger-Template
Take a look at the above screen shot to preview the template. Excited about the template? Not convinced??? Then, check out the features of this template by clicking the link below.


Still not satisfied??? May be you are tough-skinned person. Then, check out the LIVE DEMO by clicking the link below.


I hope you are convinced with the template. Apart the features you read about this template here - Features Of Ultimate Blogging Theme For Blogger, I included the basic version of newer post and older posts link below every post page. I plan to include the WordPress style comments for blogger on this template as well. The features will be updated as and when I fix them.

I have a small request to people who use this template - "Please, don't remove the credits section on this template. You may modify them as you want. Please, leave at least one link pointing to my site". Moreover, I'm happy to announce that my previous release namely, "MY WORLD BLOGGER TEMPLATE" has gained a lot of reputation around the blogosphere. I found it accepted on 'BloggerStyles' and 'btheme.info'. It's been used by "Best Blogger Templates" and the list goes on.

I don't want to waste too much of your time. So, click the link  below to download the Ultimate Blogging Theme For Blogger and have a blast!!!!

Note: Step by Step customization for the above template will be posted in the upcoming weeks. It's better you subscribe to my blog, so that you don't miss the updates regarding this template. Any way, I would love to hear your feedback about this template. Let me know what more features you want on this template. I will try to add them as well!!! So, feel free to leave your comments.

15 Excellent Free Social Bookmarking Icons

Social media has revolutionized the world of blogging. With more than hundreds of thousands of Twitter users and Facebook users, we can truly say that, we are currently in the social media age. It is very important that you connect yourself with the social media to make the best out of your blog. Displaying unique and eye catching icons play a vital role in increasing the number of visitors to connect with you on the social networking sites. So, I have compiled a small list of the attractive icons in this post. Just have a look at them!!!
ICONS SET 15 - CLICK HERE TO DOWNLOAD THE ABOVE SET
I hope you found some interesting icons in the above list. If you did not find one of your kind, then please do wait for few more days. I will publish another set of icons in the upcoming weeks. Subscribe to my blog, so that you don't miss the updates!!!

Why Guest Posting Is So Important?

Before I start with significance of guest posting, let me explain about "What Is Guest Posting?" Basically, guest posting refers to posting articles on other blogs. In other words, it means publishing articles written by you on other blogs rather than your own blog. Guest posting helps to increase the traffic to your blog, improves your writing skills, some blogs encourage Adsense Revenue Sharing - increase your Adsense earnings, increase back links which in turn increases your Google page rank and so on.

Today, I find so many guest bloggers on various blogs but still, there are people who don't encourage guest posting. If you are one among the few people who feel there are no advantages with guest posting, then you definitely need to check out the infographic which I found on "MyBlogGuest". The infographic was designed by Brandon Rhodes for MyBlogGuest, and the infographic will clearly explain the benefits of Guest Posting. Take a look at the infographic given below.

Guest Posting Infographic:
guest-posting-infographic
I feel the best way to develop a community of bloggers related to our niche and to drive more traffic is possible when we encourage guest posting on our blogs. We have already started Guest Posting on our blog. So, if any one wants to write an article for us, they can visit the following page for more details - Write For Us.

Adsense With Social Bookmarks On Top Of Every Post

Hi friends! I have been little busy with my exams!! So, it's been quite long since I made a new post but today, I had some time to share an unique widget which one of my friends asked through the comments namely, "Adsense With Social Bookmarking Buttons On Top Of Every Blogger Posts". Just have a look at the screen shot below.
Adsense With Social Bookmarks
Excited about the widget? Want to add this to your blog as well? Then, just follow the following steps. Before I proceed with the steps, I will would like to highlight the advantages of this widget. One main advantage is that you can increase your Adsense impressions along with click rates by adding this widget. Other would be the Social Bookmarking Buttons.

By adding the social bookmarking buttons at the top, you make it very easy for the reader to share your posts via the networking sites. Make sure you added the "Stylish Related Posts" on your blog as well so that the social bookmarking buttons are placed at the end of each blogger post as well. The widget includes buttons for Twitter, Del.icio.us, Digg, StumbleUpon, Technorati and Facebook.

I don't want to take much of your time by making you read too much about the widget. Let me move to the procedure of installing this widget. Create a back up of your template before you modify your template. To do this, navigate to "Design->Edit HTML" and make a backup of your template by clicking on the "Download full template" link at the top. Once the back up is over, follow these steps carefully.

1. Let's first add the CSS for the above widget. Search the for the following piece of code in your blogger template. Use "CTRL+F" to fasten your search results. 

]]></b:skin>
2. Download the following text document - CSS FOR ADSENSE WITH SOCIAL BOOKMARKS. Open the text document. Copy and paste the entire code present in it just above the line mentioned in step 1.
3. CSS customization is over. You may save your template temporarily. Now, expand your template, that is, make sure you have a tick mark in box next to "Expand Widget Template".  Next, search using "CTRL+F" for the following line.

<div class='post-body entry-content'>
4. Download the following text document - WIDGET CODE FOR ADSENSE AND SB ON TOP. Open the text document and paste the entire code present in it just below the line mentioned in step 3.
Note: Replace "YOUR ADSENSE CODE" text in the file with your Account ID. Account ID will be found in the top right corner of the Adsense Dashboard. Take a look at the screen shot below for better understanding.
5. That's it!!! Save your template and check out the post pages on your blog. If you need any other networking sites apart from the ones mentioned above, you can leave your comments below and I will help you add them as well!!! 

I hope you enjoyed this widget. Meet you soon with another interesting post/widget. Don't forget to share your views about this widget/post. We love to hear from you. 

Discount On ProBlogger Ebook For November 2010

31-days-to-better-blog
I wanted to post about the special discount on ProBlogger Ebook last week. But, I did not get enough time because I was working on "Stylish Related Posts" widget. Today, I had some time to post about the discount. I hope every one in the blogging world know about Darren Rowse and his blog "ProBlogger.net". If you don't know about him, I highly recommend you to take a look at his site - ProBlogger.

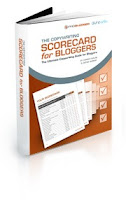
copywriting-scorecard-bloggersRight from the time I started blogging, Darren Rowse had been my first inspiration and he still continues to inspire me. I gained a lot of  useful information from his blog and I'm an active follower of his blog till date. Coming to the ebooks, I highly recommend "31 Days To Build A Better Blog" while the last release "The Copywriting Scorecard For Blogger" is also recommended. To be frank, I have a copy of the former. So, I know how useful it is but, I don't possess a copy of the second release. So, I don't know about it. With respect to the first release, I guarantee that you will find a gradual change in your blog provided you follow the tips mentioned in that book.

If you are excited to get the Ebook, then it's the right time to get one now because Darren is providing a discount for this month. You need to use the following code to avail the discount - november25. I will provide a quick walk-through on "How to avail the discount for the ProBlogger eBooks?"

1. Decide which book you want to buy.
If you are newbie, I highly recommend "31 Days To Build A Better Blog". If you have some experience in blogging, and your searching for ways to improve the quality of your blog posts, then its ideal to get your hands on "The Copywriting Scorecard For Blogger".
2. Click any of the following two links to get the respective eBooks or both, if you need both the eBooks now.
3. You will find a wepage similar to the screen shot shown below. Now, type the code "november25" on the box called discount, the one circled in red in the screen shot. 
BEFORE ENTERING THE DISCOUNT CODE
4. Click "Update Cart" after you enter the text. Now, you will get a discount of $4.99 on the first book while $7.99 on the second. Check the screen shots for better understanding.
AFTER ENTERING THE DISCOUNT CODE
So, what you waiting for??? Grab a copy of the eBooks now!!! If you need more information about the ebooks, then Click here to view more details.

New Stylish Related Posts For Blogger Blogs

Blogger-Icon
Hi friends!! Today, I present to you the "All New Stylish Related Posts Widget For Blogger/Blogspot Blogs". The basic inspiration for designing this widget was "deluxetemplates.net". The main idea behind developing this widget is to increase our Adsense revenue, pageviews (primary reason for related posts widget) and to make our blog look more professional.

If you want to look at the earlier versions of the related posts widget posted on my blog, then visit the following two links - Related Posts Type One, Related Posts Type Two. The latest version of related posts  widget comes with added features like "What's Next?" and  "Google Adsense". Take a look at the screen shot below to preview the widget.
what-next-widget-for-blogger
Are you excited with the widget shown above??? Want to add this  to your blog, then just follow the steps mentioned below. Please create a back up of your template before you install this widget. To do this, navigate to "Design->Edit HTML" and make a backup of your template clicking on the "Download full template" link at the top. Once the back up is over, follow these steps carefully.

1. Expand your template, that is, make sure you have a tick mark in box next to "Expand Widget Template". Now, search using "CTRL+F" for the following line:
<data:post.body/>
<div style='clear: both;'/>
</div>
2. Download the following text document - Code For Stylish Related Posts Widget. Open the text document and copy the entire code present in it. Paste the code just below the line you searched in step1.
Note: Replace "YOUR ADSENSE CODE" text in the file with your Account ID. Account ID will be found in the top right corner of the Adsense Dashboard. Take a look at the screen shot below for better understanding.  
Adsense-account-Id
3. Now, its time to add the CSS part for your widget. Search for the following line in your template.
]]></b:skin>
4. Copy the following code and paste it just above the line mentioned in step3.
.cps {
background:none repeat scroll 0 0 #ddd;
border-top:3px solid #000;
margin-top:5px;
padding:10px;
width:570px;
}
#end {
-moz-background-inline-policy:continuous;
background:none repeat scroll 0 0 #f9f9f9;
border-bottom:3px solid #000;
border-top:3px solid #000;
float:left;
font-family:arial;
font-size:12.2px;
margin:0 0 40px;
padding:14px 0 12px 25px;
width:565px;
}
.actions {
float:left;
margin:0 20px 0 0;
padding-left:0;
padding-top:0;
text-align:left;
width:23%;
}
.tips {
float:left;
margin:0;
padding-left:0px;
padding-top:0;
text-align:left;
width:65%;
}
#end ul.tips li {
-moz-background-inline-policy:continuous;
background:url() no-repeat scroll 0 3px transparent;
margin:0 0 9px;
padding-left:14px;
margin-left:-34px;
}
a.digg {
-moz-background-inline-policy:continuous;
background:url("http://4.bp.blogspot.com/_Zt-MFCckzsc/Sq981K22-FI/AAAAAAAACNA/qP54J_2HcMQ/s400/digg-1.png") no-repeat scroll 0 1px transparent;
padding:2px 0 2px 20px;
}
#end ul.actions li {
-moz-background-inline-policy:continuous;
background:none repeat scroll 0 0 transparent;
margin:0 0 9px;
}
#end ul li {
}
#end ul {
list-style-type:none;
}
a.delicious {
-moz-background-inline-policy:continuous;
background:url("http://3.bp.blogspot.com/_Zt-MFCckzsc/Sq98mokfzuI/AAAAAAAACM4/_L_0wKNZ2TE/s400/delicious-1.png") no-repeat scroll 0 2px transparent;
padding:2px 0 2px 20px;
}
a.subscribemini {
-moz-background-inline-policy:continuous;
background:url("http://2.bp.blogspot.com/_Zt-MFCckzsc/Sq98T8eFqGI/AAAAAAAACMw/1gwnE8qOoIQ/s400/feed.png") no-repeat scroll 0 1px transparent;
padding:2px 0 2px 20px;
}
a.comment {
-moz-background-inline-policy:continuous;
background:url("http://2.bp.blogspot.com/_Zt-MFCckzsc/Sq97-VIfenI/AAAAAAAACMo/3IkSWN0C0OU/s400/comment.gif") no-repeat scroll 0 0 transparent;
padding-left:20px;
}
a.stumble {
-moz-background-inline-policy:continuous;
background:url("http://2.bp.blogspot.com/_Zt-MFCckzsc/Sq97vV2vdYI/AAAAAAAACMg/phL4ZUZgwPA/s400/stumble.png") no-repeat scroll 0 1px transparent;
padding:2px 0 2px 20px;
}
a.twit {
-moz-background-inline-policy:continuous;
background:url("http://1.bp.blogspot.com/_Zt-MFCckzsc/SyPT-xa8c5I/AAAAAAAACtQ/UOzJVxUlFTQ/s400/twitter_16.png") no-repeat scroll 0 0 transparent;
padding-left:20px;
}
#end h3 {
color:#000000;
font-size:13px;
margin-bottom:11px;
margin-top:4px;
font-weight:bold;
}
.hidden {
display:none;
}
Note: If you wish to change the background or the border color, then change the codes highlighted in green. For any other customization regarding this widget, leave your comments below and I will try to customize them as you wish.
UPDATE 
5. Well, the reason why "Posts" did not appear was a result of a small script that we missed out in the hack. So, I'm sorry guys. To add the script, search for the following line on your blogger template.
</head>
Now, paste the following piece of code in the text document - SCRIPT FOR RELATED POSTS just above the line mentioned in step 5.
6. That's it!!! Save your template. View the widget on your post pages. 
Note: You need to view the post pages to view the widget. That is, click on any of the posts in your blog to view the final result. You cannot find them on the home page of your blog.

I hope you enjoyed this post and the widget as well!!! Please share your views about the widget via comments!!! We love to here from you. More over, you gain backlinks for your comments too since my blog is a dofollow blog:)
[netinsert=0.0.1.11.14.1]