Making Rounded Corners With CSS3 On Blogger

CSS-Logo
Few people kept mailing me regarding the rounded corners in blogger/blogspot blogs. They wanted to show rounded corners rather than the straight edges. Since the number of mails kept increasing regarding this tutorial, I thought to make a post about them. Pretty good example to illustrate this would be consider the following boxes. Just look at the corner sections of each box.

CSS ROUNDED CORNERS EXAMPLE

CSS STRAIGHT CORNERS EXAMPLE
The former looks curved while the latter is flat. That's the trick we are going to learn in this post, that is, to add rounded corners on blogger/blogspot blogs. You may use them in displaying a note(like I do) or may be on the navigation bars or to display HTML codes withing blogger posts and so on. So, you may use them where ever you want. Remember that, this trick will  be visible only in the latest versions of Mozilla Firefox, Chrome, Safari and Opera and not in IE. Check out the browser specific attributes table below.
Enough of the stories!!! Let's implement this trick on our blogs now!!! Just, follow these simple steps.

1. Login to your dashboard. Navigate to "Layout>>Edit HTML" from your dashboard. Make a back up of your template before you do any changes in the template. 
2. Search for the following code in your blog. You may use "CTRL+F" to fasten your search results.
]]></b:skin>
3. Now, paste the corresponding piece of code just above the line you searched in step 2. Paste according to your choice; not all of them.
EXAMPLE 1 - THIS BOX WAS IMPLEMENTED USING THE FOLLOWING CODE.
.example1 {
background-color:#F1F1F1;
border:3px solid #DDD;
text-align:left;
width: 525px;
margin:15px 35px 15px 15px;
padding:5px;
-webkit-border-radius: 10px;
-moz-border-radius: 10px;
border-radius: 10px;
}
EXAMPLE 2 - THIS BOX WAS IMPLEMENTED USING THE FOLLOWING CODE.
.example2 {
background-color:#F1F1F1;
border:3px solid #DDD;
text-align:left;
width: 525px;
margin:15px 35px 15px 15px;
padding:5px;
-webkit-border-radius: 5px;
-moz-border-radius: 5px;
border-radius: 5px;
}
EXAMPLE 3 - THIS BOX WAS IMPLEMENTED USING THE FOLLOWING CODE.
.example3 {
background-color:#F1F1F1;
border:3px solid #DDD;
text-align:left;
width: 525px;
margin:15px 35px 15px 15px;
padding:5px;
-webkit-border-radius: 36px 12px;
-moz-border-radius: 36px 12px;
border-radius: 36px 12px;
}
EXAMPLE 4 - THIS BOX WAS IMPLEMENTED USING THE FOLLOWING CODE.
.example4 {
background-color:#F1F1F1;
border:3px solid #DDD;
text-align:left;
width: 525px;
margin:15px 35px 15px 15px;
padding:5px;
-webkit-border-top-left-radius: 30px;
-webkit-border-top-right-radius: 30px;
-moz-border-radius-topleft: 30px;
-moz-border-radius-topright: 30px;
border-top-left-radius: 30px;
border-top-right-radius: 30px;
}
4. Once you have pasted the code. Save the template. Now, your ready to display them in the place you want. Just use a span or div tag to use the CSS3 of your choice. That is, paste the following code any where in the template area or as a HTML/JavaScript using "Add A Gadget" option on blogger design page or within your posts.
<div class="example1">PLACE YOUR CONTENT HERE</div>
5. Now, save your code. That's it!!!

Instead of adding pictures for rounded corners, if you make use of CSS, the time to load your site will be reduced enourmously. That's the biggest advantage with this trick. You might consider reading the following articles for speeding up your blogger/blogspot blog - Article 1 : Speed Up Your Blogger Blog, Article 2 : Speed Up Your Blogspot Blog, Article 3:  Tips And Tools For Speeding Up Your Blog. Express your views about this post via comments!!!

Floating Subscribe Buttons To Blogger/Blogspot Blogs

Recently, one of my readers asked for a widget that will display the subscribe icons fixed on his blog, that is, he wanted to display the subscribe icons static as the page is scrolled to the top or to the bottom. It's pretty simple to add this widget on your blogger or blogspot blog. Just have a look at the final preview of the widget for better understanding.
I hope you are excited about the widget. Create a back up of your template before you modify your template. To do this, navigate to "Design->Edit HTML" and make a backup of your template by clicking on the "Download full template" link at the top. Once the back up is over, follow these steps carefully.

1. Search for the following of code in your template. Use "CTRL+F" to fasten your search results. 
<div id='main-wrapper'>
2. Paste the following piece of code just below the line you searched in step 1.
<div style='position: fixed; bottom: 1%; left: 1%;'>
<table border="0"><tr><td>
<a href="http://feeds.feedburner.com/YOURFEEDNAME" target="_blank"><img alt="Rss Feed Options" border="0" src="http://lh6.ggpht.com/_So-xppeH7x0/TQry4q9ls8I/AAAAAAAAAoQ/RJufyB1rm3M/s800/RSS%20Tab.gif" /></a>
</td><td>
<a href='http://feedburner.google.com/fb/a/mailverify?uri=YOURFEEDNAME&loc=en_us' target="_blank"><img alt="Subscribe Via Email Rss" border="0" src="http://lh6.ggpht.com/_So-xppeH7x0/TQry4ixB3kI/AAAAAAAAAoI/2KHpF8rasM8/s800/Email%20RSS%20Tab.gif" /></a>
</td></tr><tr><td>
<a href='YOUR FACEBOOK PROFILE URL' target="_blank"><img alt="Find Us On Facebook" border="0" src="http://lh4.ggpht.com/_So-xppeH7x0/TQry4tMjsEI/AAAAAAAAAoM/4qZB_rMPHqA/s800/Facebook%20Fan%20Tab.gif" /></a>
</td><td>
<a href='http://twitter.com/YOUR TWITTER USERNAME' target="_blank"><img alt="Follow Us On Twitter" border="0" src="http://lh6.ggpht.com/_So-xppeH7x0/TQry4gG96VI/AAAAAAAAAoU/Rm2eoCkzieI/s800/Twitter%20Follow%20Tab.gif" /></a>
</td></tr></table>
</div>
Note: You may add the above code as "Page Element" too. Just navigate to "Design->Page Elements->Add A Gadget" from blogger dashboard and choose "HTML/JavaScript" and paste the code in the window that appears and save it.
3. That's it!!! Save your template!!!

CUSTOMIZATION:

Once you add the above code, you need to make the first four changes in the code (those highlighted in green). First, change the text "YOURFEEDNAME" to the feed name of your blog. You can find this when you login to your FeedBurner Account. Next, replace "YOUR FACEBOOK PROFILE URL" with the URL of your Facebook fan page. Last but not the least, replace "YOUR TWITTER USERNAME" with the user name of your twitter profile. Make sure you save these changes!!!

I hope you like this widget. You may express your views about this widget and if you need some widget of your choice, please do post them via comments and I will try to figure out the code for them. We always love to hear from you!!!

Wordpress Like Comments For Blogger/Blogspot Blogs

Last week, one of my blog readers sent me a mail stating that he wanted to add a comments section on blogger like the one displayed in my blog right now. I started receiving few mails from different readers regarding the same hack for the past few days. So, I wanted to share this hack on "How To Add A Wordpress Like Comments Section For Blogger/Blogspot Blogs?" with my readers. If you wish to take a look at the final output, then scroll down and view the comments section on my blog or else, just check out the screen shot below.


wordpress-like-comment-sections-for-blogger

To add this "Stylish Wordpress Type Comments Section" on your blogger blog, just follow the following steps. Please, make a back up of your template before you make any modifications. To create a back up, navigate to "Design->Edit HTML" and click on the "Download full template" link at the top. Once the back up is over, follow these steps carefully.

1. Click on the expand template icon. Now, search for the following piece of code in it. You may use "CTRL+F" to fasten your search results.

<div expr:id='data:widget.instanceId + &quot;_comments-block-wrapper&quot;'>
2. Replace the following block of code with the code mentioned in step 3.
<div expr:id='data:widget.instanceId + &quot;_comments-block-wrapper&quot;'>
<dl expr:class='data:post.avatarIndentClass' id='comments-block'>
<b:loop values='data:post.comments' var='comment'>
<dt expr:class='&quot;comment-author &quot; + data:comment.authorClass' expr:id='data:comment.anchorName'>
<b:if cond='data:comment.favicon'>
<img expr:src='data:comment.favicon' height='16px' style='margin-bottom:-2px;' width='16px'/>
</b:if>
<a expr:name='data:comment.anchorName'/>
<b:if cond='data:blog.enabledCommentProfileImages'>
<data:comment.authorAvatarImage/>
</b:if>
<b:if cond='data:comment.authorUrl'>
<a expr:href='data:comment.authorUrl' rel='nofollow'><data:comment.author/></a>
<b:else/>
<data:comment.author/>
</b:if>
<data:commentPostedByMsg/>
</dt>
<dd class='comment-body' expr:id='data:widget.instanceId + data:comment.cmtBodyIdPostfix'>
<b:if cond='data:comment.isDeleted'>
<span class='deleted-comment'><data:comment.body/></span>
<b:else/>
<p>
<data:comment.body/>
</p>
</b:if>
</dd>
<dd class='comment-footer'>
<span class='comment-timestamp'>
<a expr:href='data:comment.url' title='comment permalink'>
<data:comment.timestamp/>
</a>
<b:include data='comment' name='commentDeleteIcon'/>
</span>
</dd>
</b:loop>
</dl>
</div>
3. The following code should be replaced with block of code mentioned in step2.

<div class='comments'>
<b:loop values='data:post.comments' var='comment'>
<div id='comments-outer'>
<div class='comment-author'>
<dt expr:class='&quot;comment-author &quot; + data:comment.authorClass' expr:id='data:comment.anchorName'>
<b:if cond='data:comment.favicon'>
<img class='avatar' expr:src='data:comment.favicon' height='35px' rel='dofollow' width='35px'/>
</b:if>
<a expr:name='data:comment.anchorName'/>
<b:if cond='data:blog.enabledCommentProfileImages'>
<data:comment.authorAvatarImage/>
</b:if>
<b:if cond='data:comment.authorUrl'>
<a expr:href='data:comment.authorUrl'><data:comment.author/></a>
<b:else/>
<data:comment.author/>
</b:if>
<span class='says'>said on :</span>
</dt><span style='float: left;'><b:include data='comment' name='commentDeleteIcon'/></span>
<div class='comment-meta commentmetadata'>
<data:comment.timestamp/>
</div>
</div>
<b:if cond='data:comment.isDeleted'>
<span class='deleted-comment'><data:comment.body/></span>
<b:else/>
<p><data:comment.body/></p>
</b:if>
</div>
</b:loop>
</div>
4. Now, its time to add the CSS part for this code. But, you need to remove the already present CSS for your comments section. To remove it, find the word "comments" in the CSS part of your template and remove the related code. The CSS part of your template are the codes which lie between the following two tags.

<b:skin> CSS OF YOUR TEMPLATE </b:skin>
Once, you find the code with name "comments", remove the blocks of code associated with them. Please have a look at the following picture for better understanding.

If you still do not know what code should be removed, then ping me via email and I will solve your problem.
5. Take a break with a cup of coffee:) Now, find the following code in your template.
]]></b:skin>
6. Copy and paste the following piece of code just above/before the line mentioned in step5.

/* Comments Section By www.newbloggingtipz.com */
#comments{
background : #fff url() no-repeat top;
float : left;
width : 590px;
font-size:12px}
#comments h4{ margin:1em 0;   font-weight:bold;   font-size:15px;   text-shadow:1px 1px 1px #ddd;   line-height:1.4em;   text-transform:uppercase;   letter-spacing:.2em;   color:$sidebarcolor}
#comments-outer{ background:#f4f4f4;   border:1px solid #ddd;   margin:1em 0 2.5em;   padding:10px;   line-height:1.6em}
.avatar-image-container{margin-right:20px; padding:0; float:right; width:48px; height:48px; margin-top:-20px}
.avatar-image-container img{background:url(http://3.bp.blogspot.com/_u4gySN2ZgqE/SrSUS1YpxwI/AAAAAAAAAv4/DihiWlWRxQs/s400/grav.png); width:48px; height:48px; border:1px solid #ddd}
.deleted-comment{ font-style:italic;   color:gray}
.comment-body-author{background:#f4f4f4}
7. Huh!!! That's it!!! Save your template and you will find the "Wordpress Style Comments Section" on your blog.

For further customizations like adding a background to the comments section, etc.. you can edit the CSS part  or view "Our Services" page for any type of customization seen on blogger blogs. How ever, I have provided space for various customizations in the code by default. So, if you know little HTML then, the job should be very easy!!!

I hope you enjoyed this hack. If you need any clarifications regarding this hack, then feel free to comment on my blog or ping me via email. I will clarify your doubts as early as possible. Also, we would be happy to receive comments from readers who understood what I blabbered in this post and successfully installed this hack on their blog:)

Remove "Read More" Hack From Static Pages On Blogger

I have just now enabled guest blogging (my next post will be based on guest blogging and its importance, make sure you subscribe to this blog so that, you don't miss any thing that is valuable to your blog) on this blog, which I should have done long before. Better later than never. Anyway, when I recently added a new page to my blogger blog for enabling guest blogging, I encountered a mistake in it. It displayed a "Read More" link at the end of the post on the static page of my blog.

When I clicked on the link, it still showed the same page. So, it is pretty stupid to display "Read More" link for an already expanded post. More over, displaying the same page again and again for the same link appears to be more stupid. If you did not understand what I meant in the lines mentioned above, just have a look at the following two pictures and you will understand what I mean.
BEFORE REMOVING THE "READ MORE" LINK

AFTER REMOVING THE "READ MORE" LINK
So, I thought I should some how overcome this stupidity and to my surprise, I found a piece of code that would do the magic. Just follow the steps mentioned below and you will rectify the bug on your static pages on blogger.
1. As mentioned in many of my previous posts, make sure you create a back up of your template. To do this, navigate to "Design->Edit HTML" and make a backup of your template clicking on the "Download full template" link at the top.
2. Expand your blogger template and search for the following piece of code.
<b:if cond='data:blog.pageType != "item"'>
(or)<b:if cond='data:blog.pageType != "item"'>
(Note: Make sure that the following pieces of code follow above or below the code mentioned in the step2.)
<div expr:id='"summary" + data:post.id'><data:post.body/></div>
<script type='text/javascript'>createSummaryAndThumb("summary<data:post.id/>");
</script>
<span class='rmlink' style='float:right;padding-top:20px;'>
<a expr:href='data:post.url'> read more "<data:post.title/>"</a></span>
3. Copy and paste the following piece of code just before the line mentioned in step2.
<b:if cond='data:blog.pageType == "static_page"'><b:else/>
4. Now, search for the following code near by the above codes.
<div style='clear: both;'/>
5. Copy and paste the following piece of code just before the line mentioned in step4.
</b:if>
6. Save your template and view the static pages of your blog.

This trick might be little confusing because it involves correcting the stupidity on our blogs(quite difficult to accept and digest). If you feel this tutorial is complex, then you can leave your comments below and I will help you solve the problem.

Add Meta Tags To Each Blogger Post

Meta+Tags+For+Each+Blogger+PostIt's pretty obvious that every one who blogs would love to receive more visitors. So, this post basically provides a simple customization by which you can increase your traffic. It improves the SEO of your blog. Although many bloggers would have added the meta tags to their blog, at least one fourth of them would have missed a piece of code which makes a lot of difference when compared to the other blogs. This line is simply a meta tag representing each blogger post rather than the blog as a whole.

I assume that you have already added meta tags for your blogger blog. If that is not the case, then you need to view this post namely, "Add Title Tags To Your Blogger Blog" before you proceed with this post. If you had completed the previous step, then follow the following steps.

1. Navigate to Design->Edit HTML. As usual, create a back up of your template before you make any changes to the template. Once the back up is done, proceed to step 2.
2. Search for the following piece of code in your template.
<title><data:blog.pageName/> | <data:blog.title/></title>
3. Paste the following piece of code just below the line mentioned in step 2.
<meta expr:content='data:blog.pageName' name='description'/>
4. That's all folks!!! Your blog is ready to get a little more hits than before.

So, what does this code do with my blog? To keep it very simple, assume that a person searches your blog on any search engine, say Google, then he/she would see a description written by you beneath the name of your blog as shown in the picture below. When it comes to a post page, that is, if he/she searches for some content, say "Add meta tags to each blogger post", then the post title would be the meta description that appears on the post page.
Meta-Tag-ResultsDo you wonder what benefit your blog would get by making this small customization? The answer is very simple, better search engine ranking which in turn means more traffic. Another advantage would be like this, if your blog and another blog has got the same traffic and if you had installed this tag it means you have a better edge over him and I'm pretty sure you will receive more hits than the other blog.

I hope the above customization will help your blog rank better than before in the search engines. I tried this on my blog and I felt it was pretty effective. So, I hope even you feel the same. Please, feel free to share your views via comments!!!

How To Add A Delicious Button To Blogger Posts?

This post basically features with the addition of a delicious button to every blogger post. It is very similar to addition of digg button(How To Add A Digg Button To Blogger Posts), which you encountered in the last post under the "Design Tips" category. I would stress on adding delicious bookmarks on top of the every blog post apart from the ones installed below the blogger posts because many advertisers favor them. For example, you may check out BuySellAds site and you will find that, they take into account the number of delicious bookmarks for evaluating a site.

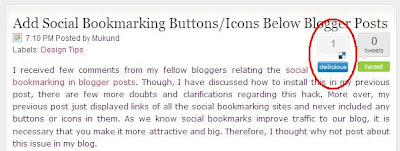
So, what is a Delicious? Delicious, formerly known as del.icio.us, is basically yet another social bookmarking site for storing, sharing, and discovering bookmarks. It was found in the year 2003 and later acquired by Yahoo in the year 2005. It includes more 5.3 million users and 180 million unique bookmarked URLs. So, the stats will tell the complete story about the strength of this site. Have a look at the final output of this post.How do I get my posts/links bookmarked? Just add the button in your blog and wait for your readers to bookmark it. Hope, some one will bookmark this post:) Now, let's straight away move to the steps for installing this button on our blogger posts.
1. Navigate to Design->Edit HTML from your blogger dashboard. Now, click on the Expand Widget Templates, that is ensure that there is a tick mark.
2. Search for the following code.
]]></b:skin>
3. Download this text file: CSS For The Delicious Button.
4. Copy the code in the text file and paste it just above the line mentioned in step 2.
5. Now, expand your template and search for the following piece of code.
<div class='post-header-line-1'>
6. Download this text: Code For The Delicious Button.
7. Copy the code in the text file and paste it just below the line mentioned in step 5.
8. Save your template.
(Note:The button will be visible only on the post pages and not on your home page. So, please check your post page rather than the home page to preview your button.)

If you find the button on the top right corner of your blogger post, it means you have successfully installed the button on your blog. For further customizations like displaying the button to the top left corner or bottom of the posts or if you face any problem in installing the scripts, leave a comment below and I will help you solve the problem!!

How To Add Digg Button To Blogger Posts?

I have recently added a tweet me button(Add Tweet/Retweet Button To Your Blog) with counter on the top right corner of my blog posts. Although, the social bookmarks are already available at the end of each post, I have installed the same on top of each blog post just to increase the visibility of them. The buttons must be readily available for the visitor to bookmark rather than scrolling to the end of post, searching them and then bookmarking it. More feasible the buttons are, more the probability of getting your posts spread over the net. Simply, means more visitors to your blog!!!


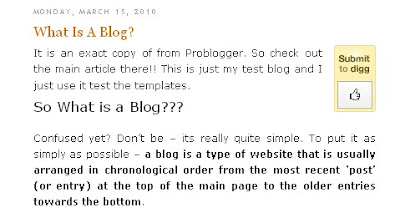
This post deals with adding a digg button to blogger posts. Before we install the digg button on our blogs, we must know, what is digg??? Wiki defines it as, "Digg is social news website". Perfectly right!! But, I would say it is a user driven social news website. So, what does digg do to my blog? Very Simple!! Nothing but, drives more traffic to your blog!! That is what all bloggers want!! So, lets straight away get to our work by adding this button on our blogger/blogspot blogs. Before we start off, just have a look at the screen shot below for a preview of the final output.
Follow the steps carefully!! Before trying this widget, please make sure that you have a back up of your template so that, if anything goes wrong, you can always upload the earlier version of your template!! To make a back up of your template, just navigate to Design->Edit HTML and click on the download full template. Once you make a back up, you can start off with following steps.

1. Navigate to Design->Edit HTML from your blogger dashboard. Now, click on the Expand Widget Templates, that is ensure that there is a tick mark.
2. Search for the following code.
<data:post.body/>
3. Now, copy the following piece of code and paste it just below the line mention in step 2.
<b:if cond='data:blog.pageType == "item"'>
<div style='float:right; margin-left:14px;'>
<script type='text/javascript'>
digg_url="<data:post.url/>";
</script>
<script src='http://digg.com/tools/diggthis.js' type='text/javascript'/>
</div>
</b:if>
4. Once, you paste the above code. Save your template. That is it!! Very Simple!! Isn't' it??

(Note: If you want the digg button to appear at the top left corner, then just interchange the words right and left in the code mentioned in step 3. Moreover, if you have enabled the post pages on your blog, you will not be able to see the buttons on the homepage. So, visit the post pages to have a look at the final output!!!)

You may place the code mentioned in step 3 in different places in your template area. Below the post section, next to the post titles and so on. If you need help regarding the installation at any specific part of your template apart from the usual place explained in this post, then you may contact me via mail or just leave your comments below and I would be happy to help you!!! Always, feel free to share your thoughts via comments:)

Add A Flashing Message To Your Blogger Blog

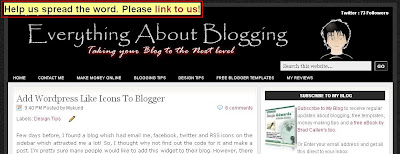
Hi friends!!! I recently found few websites that display a flashing message in their blogs asking for a link to their blog or a subscribe me widget. So, I thought why not help my blog readers do the same. Although the coding was actually done by Dynamic Drive in the name "Always On Top Message", I would like to help the newbies install this simple hack on their blog to display any message of their choice. Take a look at the following picture for better understanding.
flashing-message-on-bloggerFew suggestions for the messages that could be posted in the space are links that will ask the visitors to link to your blog(already installed in the script) or ask the visitors to subscribe for your blog or a simple welcome note. There is no limit. You can post anything below the sky to gain the first and the best impression from the visitors. Now, let us install this script in our blog.

1. Go to "Design->Edit HTML. Make a backup of your template before modifying the HTML by clicking on the "Download full template" link at the top of the page.
2. Download the following javascript - Top Message.
3. Open the file with a simple word pad. Now, edit the various options which are clearly explained in the comments. Any message can be included other than the "Link To Us" which is installed by default on the script.
(Note: Please do change the URL saying "YOURBLOGNAME.blogspot.com" with your blog URL for the default case on the script.)
4. Once you make the changes in the file, save it and upload it to a free hosting site. I use Google Sites. You may try the same or may be Fileave.
5. The last step will be to call this uploaded script to your blog.
Just paste the following piece of code above the </head> in your template.

<script src="http://www.yourdomain.com/topmsg.js">
//Always-on-top message Script- © Dynamic Drive (www.dynamicdrive.com)
//For full source code, and Terms Of use, visit dynamicdrive.com
//This credit MUST stay intact for use
</script>
6. Now, just save your template and view your blog. Still if you face any problems, then you may contact me via email and I will sort out your problems. Or just leave a comment here and I will help you!! Hope you enjoyed this hack. Seen you soon in my next post!!

Add Wordpress Like Icons To Blogger

Few days before, I found a blog which had email me, facebook, twitter and RSS icons on the sidebar which attracted me a lot! So, I thought why not find out the code for it and make a post. I'm pretty sure many people would like to add this widget to their blog. However, there is one small problem with this code, the animation like stuff works only with Mozilla Firefox but, not in IE (especially the older version, that is, 6.0). If you are still wondering how that widget would look, take a look at the following picture.
Wordpress-Icons-For-BloggerI hope you are pretty clear with what I was blabbering for quite sometime. Any way, now let us get to our work by adding this stuff in our blogs. Follow the simple steps given below.
1. Go to "Design->Edit HTML. Make a backup of your template before modifying the HTML by clicking on the "Download full template" link at the top of the page.
2. Now, search for the following line in your template. Use "CTRL+F" to fasten your search.
]]></b:skin>
3. Download the following text file namely, CSS For Icons. Once, the download is complete. Open the text document and paste the code in it just above the line mentioned in step 2.
4. Again, do a search for the following line in your template.
<div id='sidebar-wrapper'>
5. Paste the following piece of code just after the above mentioned line.
<div align='center'>
<div id='subscribe'>
<ul class='subscribe_icons'>
<li class='subscribe_twitter'><a href='http://twitter.com/YOURUSERNAME' rel='nofollow' target='_blank'>Twitter</a></li>
<li class='subscribe_facebook'><a href='http://www.facebook.com/YOURUSERNAME' rel='nofollow' target='_blank'>Facebook</a></li>
<li class='subscribe_rss'><a href='http://feeds2.feedburner.com/YOURFEEDNAME' rel='nofollow' target='_blank'>RSS</a></li>
<li class='subscribe_email'><a href='http://feedburner.google.com/fb/a/mailverify?uri=YOURFEEDNAME&loc=en_US' rel='nofollow' target='_blank'>Email</a></li>
</ul>
<div class='clear'/>
</div>
</div>
6. Please edit the text mentioned in green color namely, "YOURUSERNAME" and "YOURFEEDNAME" with your user names and feed names respectively. Hope, that is self explanatory.
7. Final step. Save your template. That's all folks!!!

If you still need help in adding this widget, feel free to leave a comment and I will help you solve your problem!! See you soon in my next post with some more interesting tips and tricks...

Display Avatars Besides Comments In Blogger

It's been quite long since I made a post in this blog. I had a lot of problems with my net connection(still not fixed) and modem. Still, I found some time today, to post about a new feature introduced by blogger, that is, avatars on blogger comments. Blogger is introducing new features daily on account of its 10th birthday celebration. Every blogger wanted to display avatars like the ones, that showed in word press and this dream has come true now. I have personally tried this feature and you may take a look at the snapshot of the feature installed in my blog below.
avatars-beside-blogger-commentsThis feature displays only users who post comments with Blogger/Google account. But, if you post a comment with "Name /URL" you will not have any image displayed. However, if you post a comment using Wordpress or OpenID or LiveJournal or Typepad or AIM, the favicon of the respective sites will be displayed. I hope the blogger team improves this feature and may be, they can join hands with Gravatar too. Let us get to our work of installing this feature in our blog.

If you are using a default blogger template, then you should navigate to "Settings>>Comments" from the Dashboard and enable the option "Show profile images on comment". It is that simple!! You will find the avatars displayed in your blog. But, what if you have a customized template like mine?? Simply follow the steps below to get the featured installed in your blog.
1. Navigate to "Layout>>Edit HTML" from your dashboard. Make a back up of your template before you do any changes in the template.
2. Expand your template, that is, make sure that you have a tick mark in that "Expand Widget Template". Now, do a search using "CTRL+F" for the following line:
<dl expr:class='data:post.avatarIndentClass' id='comments-block'>
Note: If you could not find the above code, the search for the following line:
<dl id='comments-block'>
3. Now, replace that piece of line with the following code:
<dl expr:class='data:post.avatarIndentClass' id='comments-block'>
4. Next, search for this piece of code:
<a expr:name='data:comment.anchorName'/>
5. Replace all the occurrences of the above code(code in step 4) with the following code:
<b:if cond='data:comment.favicon'>
<img expr:src='data:comment.favicon' height='16px' style='margin-bottom:-2px;' width='16px'/>
</b:if>
<a expr:name='data:comment.anchorName'/>
<b:if cond='data:blog.enabledCommentProfileImages'>
<div expr:class='data:comment.avatarContainerClass'>
<data:comment.authorAvatarImage/>
</div>
</b:if>
You may place a default avatar for those who do not have profile picture. In order to do this, place the following piece of code above the line ]]></b:skin>
.avatar-image-container{background:url(http://alturl.com/xbwk); width:35px;height:35px; }
.avatar-image-container img { border:none;}
Finally, you need to save your template. Now, check out your blog with blogger avatar feature installed in it!! Comments are always welcome!! See you soon in my next post!!

Add Tweet This and Retweet To Blogger Posts

Twitter is one of the fastest growing social networks in the recent days. Many feel it drives a lot of traffic to their blog, especially when they have a large number of followers. We should some how use this twitter to improve traffic to our blog. So, how are we going to do that? Simple, just by adding a "Tweet This" link to our blogger posts. There are certain blogs that include Tweet this in the footer of their posts, that is, at the end of the post as a social bookmarking icon. But I recommend you to place it at the top, next to the title of your post.
retweet-button
This post basically explains, how to add tweet this and also a retweet button to blogger posts. Many blogs have links only for "Tweet this" but not for "ReTweet". This post includes both Tweet and ReTweet option, there by, driving more traffic to your blog and making your posts more effective. This service is provided by Tweetmeme. Check the official page by clicking on the link here: Tweetmeme. The final output after installation will generate a button as shown in the picture. Fine. Enough of bla bla bla.. Let us get in to our work. Follow these steps.

1. Login to your dashboard. Navigate to "Layout>>Edit HTML" from your dashboard. Make a back up of your template before you do any changes in the template.
2. Now, expand your template, that is, make sure that you have a tick mark in that "Expand Widget Template". Now, do a search using "CTRL+F" for the following line, if you want to show the button below the title of your post:
<div class='post-header-line-1'>
Else, search for the following piece of code to add the button at the right end of your blog posts.
<div class='post-body entry-content'>
3. Paste the following piece of code just after the above line(either below the title or embedded with your blog posts).
<div style='float:right; margin-left:14px;'>
<script type="text/javascript">
tweetmeme_url = '<data:post.url/>';
</script>
<script type="text/javascript" src="http://tweetmeme.com/i/scripts/button.js"></script>
</div>
4. Save your template. That is it!! Your done with the installation. Very simple I think!!

Add Social Bookmarking Buttons/Icons Below Blogger Posts

I received few comments from my fellow bloggers relating the social bookmarking in blogger posts. Though, I have discussed how to install this in my previous post, there are few more doubts and clarifications regarding this hack. More over, my previous post just displayed links of all the social bookmarking sites and never included any buttons or icons in them. As we know social bookmarks improve traffic to our blog, it is necessary that you make it more attractive and big. Therefore, I thought why not post about this issue in my blog.

Enough of my story and your stories. Let's get our job done now!!! Follow these simple steps to display beautiful social bookmarking sites below every blogger posts.
1. Login to your dashboard. Navigate to "Layout>>Edit HTML" from your dashboard. Make a back up of your template before you do any changes in the template.
2. Now, expand your template, that is, make sure that you have a tick mark in that "Expand Widget Template". Now, do a search using "CTRL+F" for the following line:
<div class="post-footer-line post-footer-line-1">
3. Download any one of the following text documents, that is, download the first text file for installing large icons below your blog posts. If you want small icons below your blog posts, then download the second file.
4. Open the text document. Paste the code that you see in the text document just below the line in step 2.
5. Preview your template to check for errors in HTML code. Thats all folks!!! If you find any error, let me know via comments. Else, Save your template and enjoy those cool icons below every blog post you do.

Automatic Read More Hack For Blogger With Thumbnails

I recently wanted to change my blog appearance and while working for the same, I could find this hack. This hack is basically an updated version of the previous "READ MORE HACK" provided by sites like eblogtemplates. The disadvantage with the previous hack was that it did not create a summary of the posts that are already existing, that is, posts that are already published. Moreover, you had to include the code every time in your posts to create a summary of the post.

This post will explain you how to add the automatic read more hack for all posts including a thumbnail, if the post has got a picture in it. If the post has not got any picture, it just shows a small summary of the post. Follow these simple to install this hack in your blog.
1. Navigate to "Layout>>Edit HTML" from your dashboard. Make a back up of your template before you do any changes in the template.
2. Now, expand your template, that is, make sure that you have a tick mark in that "Expand Widget Template". Now, do a search using "CTRL+F" for the following line: </head>
3. Paste the following piece of code above </head>.
<script type='text/javascript'>
var thumbnail_mode = "no-float" ;
summary_noimg = 450;
summary_img = 400;
img_thumb_height = 100;
img_thumb_width = 120;
</script>
4. Now, do a search again for the following piece of code: <data:post.body/>
5. Download this Automatic Read More Hack. Replace the following piece of code with that present in the file. Now, save your template and check out the result.

You may customize the number of letters displayed in post by changing the value in the following line, that is, change the ones highlighted in red.
summary_noimg = 450;
summary_img = 400;
In order to change the height and width of the thumbnail that is displayed in every post, you need to modify the following line, that is, change the ones highlighted in red.
img_thumb_height = 100;
img_thumb_width = 120;

How to add HTML codes in Blogger Posts?

Recently, one my blog readers wanted to know how do I add Java scripts and other HTML codes in my blog posts. To be very frank, even I had this question when I started my blog initially. And when I tried to implement such tricks in my blog, I faced a lot of difficulties with the coding. But nowadays, I find many sites have come up with blogging tips and it has become very simple to customize your blog. Let me straight away tell you, how to implement this trick on your blog posts.

If you just want to show up HTML codes in your blogger post, that is without any customization, then use this site : Simple Code. This method will show the HTML as it is and looks very simple. If you want to customize the way it is displayed, like I do in my blog, then you should follow the next method. In this method, you will have to include some codings and then your job will be done.

Follow these simple steps to include the HTML/Java script codes in your blog post:
1. Navigate to "Layout>>Edit HTML" from your dashboard. Make a back up of your template before you do any changes in the template.
2. Now, do a search using "CTRL+F" for the following line: ]]></b:skin>
(Note: I have used the first method here. Just to show you how it looks)
3. Once you find the code, paste the following piece of code above it:
.codeview {
margin : 15px 35px 15px 15px;
padding : 10px;
clear : both;
list-style-type : none;
background : #f9f9f9 url(http://img17.imageshack.us/img17/5162/codeview.gif) no-repeat right bottom;
border-top : 1px solid #eeeeee;
border-right : 2px solid #cccccc;
border-bottom : 2px solid #cccccc;
border-left : 1px solid #eeeeee;
}
.codeview li {
font-size : 13px;
line-height : 24px;
font-family : "Courier New", "MS Sans Serif", sans-serif, serif;
color : #FFFFFF;
font-weight : normal;
margin : 0;
padding : 0;
}
4. Once you do this step, save your template and return to your blog post where you want to insert the HTML code. Place the HTML content in between the following two tags namely, <div class="codeview"> and </div>
5. You can include the code straight away in the "Compose Mode" of your blog post area. After you complete your post, you can simply click the button "PUBLISH POST" and later, view the result.

If you still find problems with the display of HTML codes, then use Simple Code and get the simplified code from that site. Now, place this simplified code in between the two tags as mentioned in step four. That's all folks. Hope I made it simple and clear. Please post your views below through comments.

Jquery Image Maginfier For Blogger Blogs

sm_VistaWallpaperI recently came across a blog that had the effect of image magnification. That is, once you click on the picture in a post, it magnifies. So, I found a hack to implement the same on blogger blogs. The script and the hack original was developed by Dynamic Drive. I modified a little bit of the code and have implemented in my post here.

I feel this trick will be very helpful to those people who post a lot of photos in their blog and for those who post payment proofs in their blog post. Fine, enough of all bla bla's. Let me straight away explain you how to implement this technique in your blog. Follow these simple steps.
1. Navigate to "Layout>>Edit HTML" from your dashboard. Make a back up of your template before you do any changes in the template.
2. Now, expand your template, that is, make sure that you have a tick mark in that "Expand Widget Template". Now, do a search using "CTRL+F" for the following line: </head>
3. Place the following piece of code on top of the above line(</head>).
<script src='http://ajax.googleapis.com/ajax/libs/jquery/1.3.2/jquery.min.js' type='text/javascript'/>
<script src='http://sites.google.com/site/careerfreelife/magnify/Magnifier.js?attredirects=0' type='text/javascript'>
/***********************************************
* jQuery Image Magnify- (c) Dynamic Drive DHTML code library (www.dynamicdrive.com)
* This notice MUST stay intact for legal use
* Visit Dynamic Drive at http://www.dynamicdrive.com/ for this script and 100s more
***********************************************/
</script>
4. Now, when you include any picture in your blog post. Go to the "Edit Html" section and just include class="magnify" and also include this piece of code with the <img src="URL"/>. Just see the syntax of the code here.
<img class="magnify" magnifyby="3" style="width: 200px; height: 150px;" src="YOUR IMAGE URL" alt="YOUR ALTERNATE TEXT" id="BLOGGER_PHOTO_ID_19numbers" border="0" />
5. Also, remove the link pointing to that picture. That is, remove the href code before the image HTML. If it is pretty confusing, just take a look at the following piece of code.
<a onblur="try {parent.deselectBloggerImageGracefully();} catch(e) {}"> <img class="magnify" magnifyby="3" style="width: 200px; height: 150px;" align="left" src="http://alturl.com/53eg" alt="sm_VistaWallpaper" id="BLOGGER_PHOTO_ID_5364892650738529362" border="0"/></a>
This is what, I used for uploading the picture shown above. You can change the width or height of the picture and even change s200 to s400 or s800 in the image URL for bigger images. Note: You cannot find s200 in the above code because I have shorten my URL due to the page width constraints. Any help regarding this trick, you may leave a comment and I will solve your problem.

Increase Traffic To Your Blog With Meta Tag and SEO

The response to my previous posts namely, increasing your Alexa rank, increasing traffic to your blog and so on was very good. So, I felt why not, do some more research on the net and get some information about these stuff and help my fellow bloggers improve their site traffic. Basically, this post tells you, how important it is to optimize your site for SEO (Search Engine Optimization) in order to improve your traffic and explains you one simple method out of that namely, proper placement of Meta Tag in your site.

It is very important that you optimize your site to reach very good heights with respect to your Page Rank, Alexa Rank and so on. Will you spend lots of money in driving traffic to your blog when the same is available for free?? I don't think so.

Now, let me tell you one simple method using Meta Tags to generate more traffic to your blog. So, What is a Meta Tag? It is a piece of HTML, that is usually inserted at the top of the template of every site, to provide information about the contents of the web page to the search engines. Few people say it of no use while few recommend it. How ever, there is no harm in adding them. So, It is better we add them. Let me straight away tell you how to include this.

1. Login to your blogger account and navigate to "Layout>>Edit HTML" from your dashboard. Back up your template before making any changes to it by clicking on "Download Full Template".
2. Find the code below. You may use "CTRL + F" to do so.
<title><data:blog.pageTitle/></title>
3. Add the following Meta Tag below it:
<meta content='Your blog description here' name='description'/>
<meta content='Your keywords here' name='keywords'/>
4. You need to change "Your blog description here" to describe your blog. For example, if your blog is related to money making, then you may write a short description say, "Get all the tips you require to make money online" and replace "Your keywords here" with keywords that you feel will drive traffic to your blog.
5. Click Save Template. Congrats!! You have now optimized your site.

Add Stripe Ad in Blogger

What is Stripe Ad?
Some call it Stripe Ad and some say it Stript Ad. Let the people call what ever they want. Our aim is simply to know, what that is and is it useful to our blog? The answer to this question would be yes!!! You can convey some important messages to your visitors through this Stripe Ad. Stripe ad is a strip of highlighted ad-space that appears below or above the browser’s web page. You can take a look at the Stripe Ad below for better understanding:
This Stripe Ad is mostly used to display the number of FeedBurner subscribers and hence, is useful to increase the number of subscribers. How to add this Stripe Ad to your blog? This post features the answer to that question.

Follow these simple steps to add it to your blog:
1. Login to your blogger account. Navigate to "Layout>>Edit HTML" from your dashboard. As always, make a back up of your template before doing any change. For this, click the "Download template" that appears on the top of the page and save your template.
2. Download this text document: Text Document One. Now, copy the code in "Text Document One" and paste it right above this code:
]]><b:skin>
3. Next, Download this text document: Text Document Two. Now, copy the code in " Text Document Two" and paste it right above this code:
</head>
4. Find for the following piece of code in your template:</body> I
t is found at the end of the template. Now, place the following piece of code above it.
<div id='mta_bar'>
<div id='left_bar'><span class='left'><a href='http://feeds.feedburner.com/yourblogfeed' target='_blank'>More than 300 have subcribed in readers, have you?</a></span></div>
<span class='right' onmouseout='self.status=''' onmouseover='self.status='yourblog.blogspot.com';return true;'> <img align='absmiddle' border='0' onClick='closeTopAds();return false;' src='http://img6.imageshack.us/img6/5207/closethumb1.png?imgmax=800' style='cursor:hand;cursor:pointer;'/></span></div>
5. Change the one's that are highlighted in green with your blog feed and names respectively. That's all. Save your template and check out the result.

Show more than 10 Recent Posts in Blogger

One simple method to keep your visitors stay in your website is to add a recent posts in the sidebar of your blog. The visitor is exposed to more content in your blog. This can easily be done in blogger by adding the "feed widget" with the default post feed as given below: http://yourblog.blogspot.com/feeds/posts/default

Replace "yourblog" with URL of your blog in the above line. Now, with the above described method you can add only 5 recent posts but what if you want to expose more content to your visitor. So, Use Feedburner's BuzzBoost to increase and cuztomize your recent posts. For this, you first need to create a account with FeedBurner and then burn your feeds. It is very simple to do.

After you burn your feeds, follow these simple steps:
1. Navigate to "Publicize" tab from the dashboard for the feed you have burned now.
2. Look in the left sidebar to find a tab namely, BuzzBoost. Click on that.
3. On the BuzzBoost page, you can find many more options to customize the look of your recent posts widget. These options are pretty self-explanatory. Your widget will be some what like this if no options(no tick marks) are selected.
4. Once all this is done, you need to activate this option. You can find a "Activate" button at the bottom of the post. Click that and activate. Now, you can get the HTML for your recent posts widget.
5. Insert this code in your blog. I mean navigate to "Layout>> PageElements" from the dashboard and click on " Add a gadget". Select "HTML/JavaScript" and paste the code. Save it. That is it!! View your blog!!!

How to change your Blogger Logo?

What is blogger logo or favicon? : It is a small icon that gets displayed once you open a webpage. You may find this in every site you visit. I feel you must change this logo to your choice, simply because if someone bookmarks your page, then rather than the default blogger logo, it will be your logo that is saved in their bookmarks. This is the blogger logo or favicon that we are talking about:

Blogger-FaviconThis post features on changing the default blogger to a blogger of your choice. You can create your own logos with Banner Maker Pro software or with Photoshop or even simply with Microsoft Paint. We design professional banners and logos for various websites and blogs, visit "Our Services" page to get one designed by us for your blog/website. After you design your logo, you need to format the size to 16x16. This can easily be done with Adobe Photoshop. Once all this is done, make sure you save your picture in ".ico" format. (For example - "myicon.ico")

After your logo is ready for display, you have to upload it to some site. You may use ImageShack for uploading the picture. After you upload the picture, you will get a link to that picture. Copy that link and save it in a text file.
1. Now, go to your blogger dashboard. Navigate to "Layout>>Edit HTML". Make sure you back up your template before doing any changes.
2. Search for the following code using "CTRL+F"
</head>
3. Now, paste the following code above the line mentioned in step 2.
<link href='http://img502.imageshack.us/img502/3879/micon.gif' rel='shortcut icon'/>
<link href='http://img502.imageshack.us/img502/3879/micon.gif' rel='icon'/>
4. You may replace the above link marked in blue with the link. to your image. Save your template and have a look at your blog (address bar) now. 

UPDATE ON FAVICON INSTALLATION:
adding-favicon-on-blogger
The new blogger dashboard - Blogger In Draft, supports adding the same feature in one click. Just navigate to "Design>>PageElements" page or select the "Layout" tab in the advanced version of the blogger dashboard and select edit link on the tab showing Favicon. A small window will pop up. Just upload the favicon from your comp. That's it!!! Check out the above picture for better understanding!!!

How to add Social Bookmarks in Blogger Posts?

The best way to improve your reader's count is to add a social bookmark at the end of every post. This makes it easy for the readers to bookmark the post page using their favorite social bookmarking service (eg: Del.icio.us, Technorati, etc..) My post features to add some of the best social bookmarks at the end of every post.

Here's how to add social bookmark buttons at the end of each post:
1. Go to "Layout->Edit HTML (check the "expand widget templates" option is ticked). You should make a backup of your template before modifying the HTML by clicking on the "Download full template" link at the top of the page first.
2. You need to search for the following line in your expanded template.
<div class="post-footer-line post-footer-line-1">
3. Paste the following code just after the above line.
<!-- Start of social bookmarks -->
<b><i>Share this:</i>
|<a expr:href='"http://digg.com/submit?phase=2&url=" + data:post.url + "&title=" + data:post.title'
target='_blank'>Digg It</a> |
<a expr:href='"http://technorati.com/faves?add=" + data:post.url' target='_blank'>Add to Technorati</a> |
<a expr:href='"http://del.icio.us/post?url=" + data:post.url + "&title=" + data:post.title'
target='_blank'>Save on Del.icio.us</a> |
<a expr:href='"http://www.stumbleupon.com/submit?url=" + data:post.url + "&title=" + data:post.title'
target='_blank'>Stumble It</a> |
<a expr:href='"http://www.facebook.com/share.php?u=" + data:post.url + "&title=" + data:post.title'
target='_blank'>Share on Facebook</a> |
</b>
<!-- End of social bookmarks -->

4. Preview your blog to make sure the bookmark button appears as you want at the end of the posts. Your final output should be like the one at the end of my post.
[netinsert=0.0.1.11.14.1]